Basic Input and Output in Python
Basic Input and Output in Python 관련


Watch Now
This tutorial has a related video course created by the Real Python team. Watch it together with the written tutorial to deepen your understanding:
For a program to be useful, it often needs to communicate with the outside world. In Python, the input() function allows you to capture user input from the keyboard, while you can use the print() function to display output to the console.
These built-in functions allow for basic user interaction in Python scripts, enabling you to gather data and provide feedback. If you want to go beyond the basics, then you can even use them to develop applications that are not only functional but also user-friendly and responsive.
By the end of this tutorial, you’ll know how to
- Take user input from the keyboard with
input() - Display output to the console with
print() - Use
readlineto improve the user experience when collecting input on UNIX-like systems - Format output using the
sepandendkeyword arguments ofprint()
To get the most out of this tutorial, you should have a basic understanding of Python syntax and familiarity with using the Python interpreter and running Python scripts.
Quiz - Basic Input and Output in Python
In this quiz, you'll test your understanding of Python's built-in functions for user interaction, namely input() and print(). These functions allow you to capture user input from the keyboard and display output to the console, respectively.
Reading Input From the Keyboard
Programs often need to obtain data from users, typically through keyboard input. In Python, one way to collect user input from the keyboard is by calling the input() function:
The input() function pauses program execution to allow you to type in a line of input from the keyboard. Once you press the Enter key, all characters typed are read and returned as a string, excluding the newline character generated by pressing Enter.
If you add text in between the parentheses, effectively passing a value to the optional prompt argument, then input() displays the text you entered as a prompt:
name = input("Please enter your name: ")
#
# Please enter your name: John Doe
name
#
# 'John Doe'
Adding a meaningful prompt will assist your user in understanding what they’re supposed to input, which makes for a better user experience.
The input() function always reads the user’s input as a string. Even if you type characters that resemble numbers, Python will still treat them as a string:
number = input("Enter a number: ")
#
# Enter a number: 50
type(number)
#
# <class 'str'> 6
number + 100
#
# Traceback (most recent call last):
#   File "<python-input-1>", line 1, in <module>
#  number + 100
#  ~~~~~~~^~~~~
# TypeError: can only concatenate str (not "int") to str
In the example above, you wanted to add 100 to the number entered by the user. However, the expression number + 100 on line 7 doesn’t work because number is a string ("50") and 100 is an integer. In Python, you can’t combine a string and an integer using the plus (+) operator.
You wanted to perform a mathematical operation using two integers, but because input() always returns a string, you need a way to read user input as a numeric type. So, you’ll need to convert the string to the appropriate type:
number = int(input("Enter a number: "))
#
# Enter a number: 50
type(number)
#
# <class 'int'>
number + 100
#
# 150
In this updated code snippet, you use int() to convert the user input to an integer right after collecting it. Then, you assign the converted value to the name number. That way, the calculation number + 100 has two integers to add. The calculation succeeds and Python returns the correct sum.
Note
When you convert user input to a numeric type using functions like int() in a real-world scenario, it’s crucial to handle potential exceptions to prevent your program from crashing due to invalid input.
The input() function lets you collect information from your users. But once your program has calculated a result, how do you display it back to them? Up to this point, you’ve seen results displayed automatically as output in the interactive Python interpreter session.
However, if you ran the same code from a file instead, then Python would still calculate the values, but you wouldn’t see the results. To display output in the console, you can use Python’s print() function, which lets you show text and data to your users.
Writing Output to the Console
In addition to obtaining data from the user, a program will often need to present data back to the user. In Python, you can display data to the console with the print() function.
To display objects to the console, you pass them as a comma-separated list of arguments to print(). By default, the output that print() produces separates objects by a single space and appends a newline to the end of the output:
first_name = "John"
last_name = "Doe"

print("Name:", first_name, last_name)
#
# Name: John Doe
You can specify any type of object as an argument to print(). If an object isn’t a string, then print() converts it to an appropriate string representation before displaying it:
numbers = [1, 2, 3]
print(numbers)
#
# [1, 2, 3]

age = 42
print(age)
#
# 42

name = {"first": "John", "last": "Doe"}
print(name)
#
# {'first': 'John', 'last': 'Doe'}

print(len)
#
# <built-in function len>
As you can see, you can display complex types like lists, dictionaries, and even functions to the console with print().
Combining Python Input and Output in a Practical Example
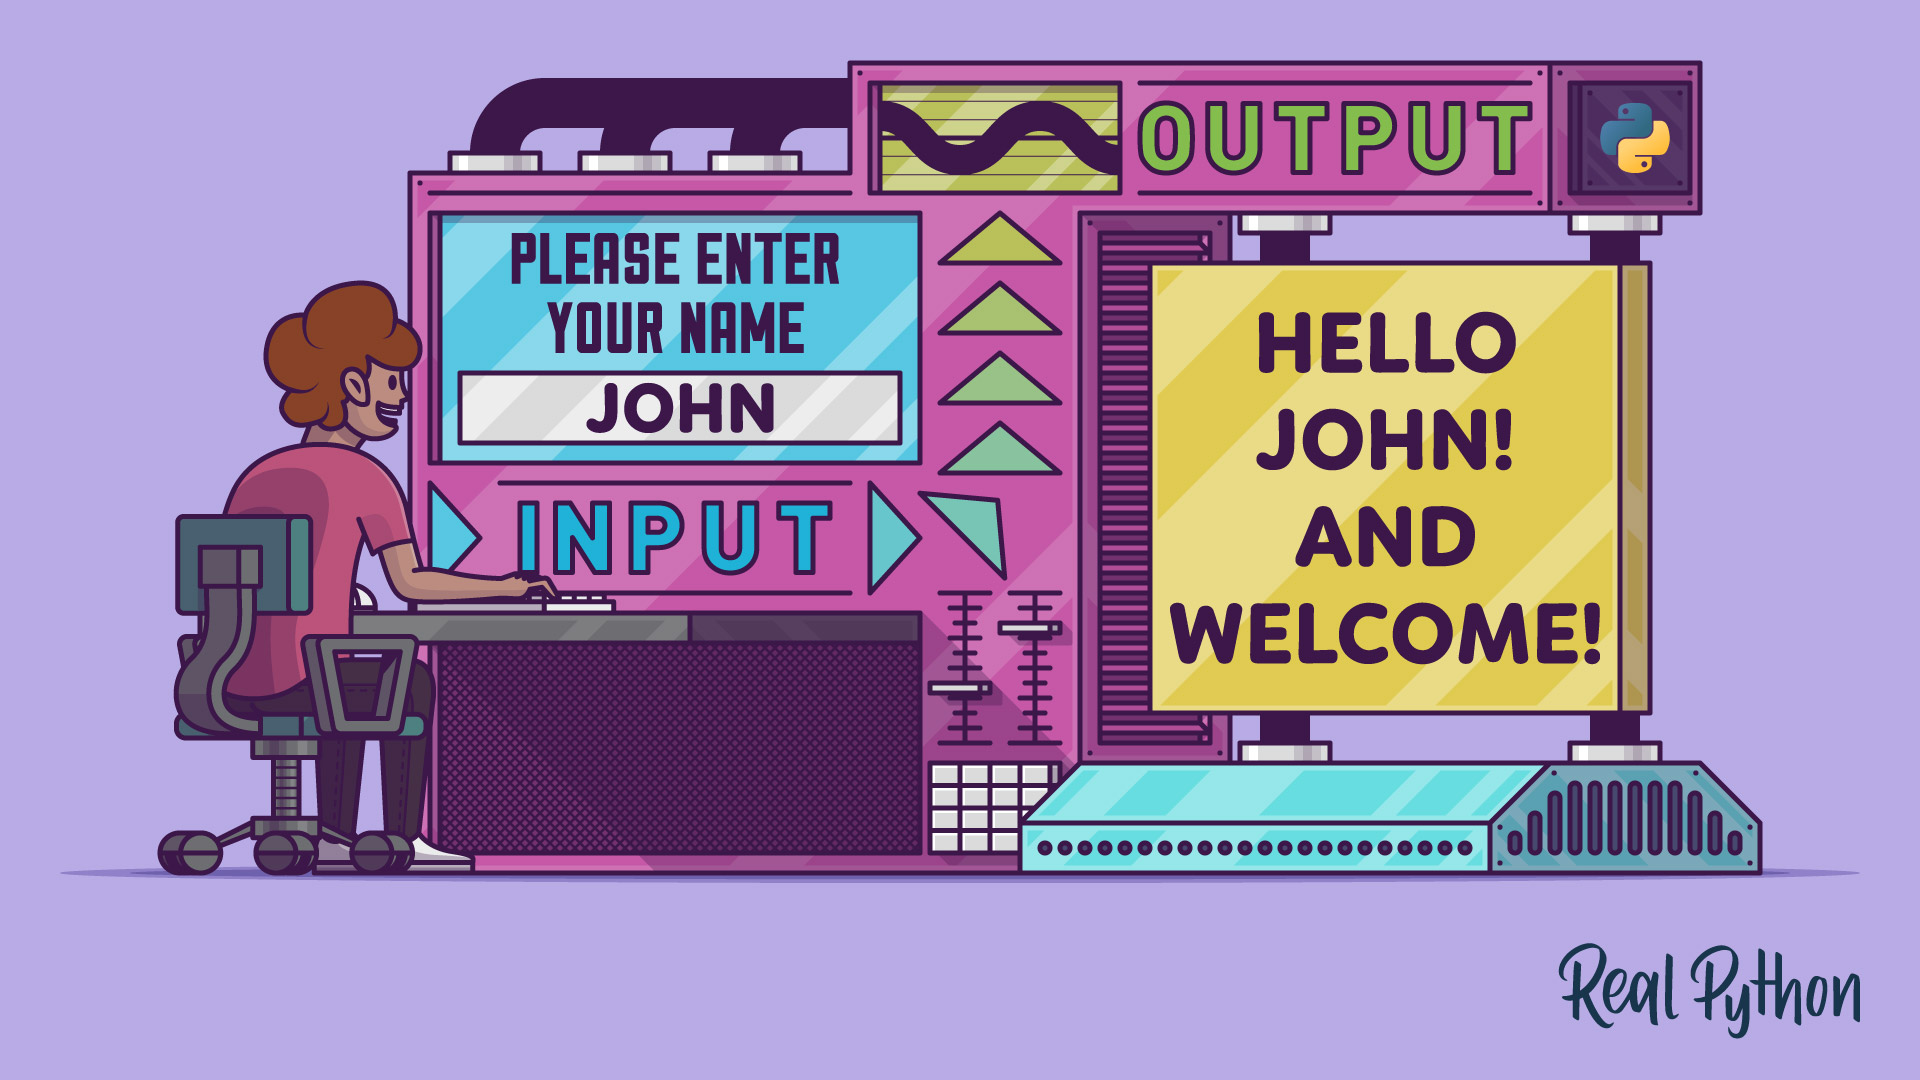
Now that you know how to read input from users with input() and display output with print(), you can combine these tools to create a small two-line program that greets a user by their name.
The program will start by prompting the user to enter their name and capture that input using input(). Then, you can use print() to output a personalized greeting that includes the entered name:
name = input("Please enter your name: ")
print("Hello", name, "and welcome!")
The script introduces a small interaction with your user. When the program runs, it temporarily pauses, awaiting input from the user. Once the user provides their name and presses the Enter key, the program immediately responds with a warm greeting:
Note that print() automatically adds spaces between arguments when concatenating multiple arguments into a single string.
The small program in greeter.py collects user input and responds with console output in only two lines of code:
- Line 1 prompts the user with a helpful message. The
input()function then collects the user’s response as a string, which you assign to thenamevariable. - Line 2 assembles a custom greeting using hardcoded strings and the value stored in
name. Theprint()function combines the greeting with the user’s input and displays it to the console.
This example brings together the input() and print() functions to accomplish a specific purpose, using the strengths of each function:
input()gathers user data, making the program interactive and adaptable to different users.print()displays feedback based on that data, which allows the program to communicate its response to the user in a friendly, personalized way.
In a real-world application, these basic tools can support more complex workflows. For example, after welcoming a user, your program might offer further options or prompt them for more specific input to guide them through a process.
Expand the collapsible section below to continue practicing with a slightly more complex example:
Exercise: Build a Guess-the-Number Game
Create a guess-the-number game where a player only has one shot at getting the right answer. You can use the randint() function from Python’s random module to let your program pick a random number:
import random

number = random.randint(1, 10)
Then, your program should prompt the player to enter a number using input(). You can then use conditional statements to take different actions, depending on whether the user guessed the correct number or not.
Keep in mind that you’ll have to read the user input as an integer in order to successfully compare it to the randomly generated number.
Give it a try and write the code for this small game. Once you have a working solution—or if you get really stuck—you can check the example solution in the collapsible section below.
Solution: Guess-the-Number Game Solution
import random

number = random.randint(1, 10)
guess = int(input("Guess a number between 1 and 10: "))

if guess == number:
    print("You got it!")
else:
    print("Sorry, the number was", number)
If you’ve successfully built the guess-the-number game and you want another challenge, then you can expand the collapsible section below for a second task:
Exercise: Build a Small Text-Based Adventure Game
Write a text-based adventure game where the player can choose whether to attack or run using input(). Try to implement a game loop using indefinite iteration and allow your code to take different actions depending on conditional logic.
Keep it small and don’t go overboard—unless you really want to, of course! You can check out an example solution for a minimal implementation of this game by expanding the collapsible section following this one.
Solution: Text-Based Adventure Game Solution
import random

health = 5
enemy_health = 3

while health > 0 and enemy_health > 0:
    # Normalize input to handle extra spaces and case variations.
    action = input("Attack or Run? ").strip().lower()
    if action not in {"attack", "run"}:
        print("Invalid choice. Please type 'Attack' or 'Run'.")
        continue

    if action == "attack":
        enemy_health -= 1
        print("You hit the enemy!")
        # Implement a 50% chance that the enemy strikes back.
        enemy_attacks = random.choice([True, False])
        if enemy_attacks:
            health -= 2
            print("The enemy strikes back!")
    else:
        print("You ran away!")
        break
    print(f"Your health: {health}, Enemy health: {enemy_health}")

print("Victory!" if enemy_health <= 0 else "Game Over")
Collecting user input and displaying data back to the user comes in handy in many scenarios. Can you think of another practical use case? If you do, share your thoughts in the comments section below.
Reading Input With Advanced Features
In the previous sections, you explored how the input() function allows your program to pause and wait for the user to provide information. However, depending on the operating system and shell that you’re working with, the standard input() may have some limitations that can affect user experience.
Note
If you’re on Windows 10 or newer, then you can skip this section. Windows 10 shipped with console improvements that allow for improved keyboard editing and selection. This works natively on Command Prompt and PowerShell.
In some configurations, specifically on UNIX-like systems and Windows versions before Windows 10, you’ll notice that you can’t use arrow keys for navigating through typed characters or to recall previously entered commands:
This can become cumbersome in interactive programs where users might want to correct mistakes or quickly repeat commands.
There’s a straightforward way to improve input functionality just by importing an additional module. The module that you can use depends on whether you’re on a UNIX-like system or on Windows, so make sure to select your operating system from the options below:
If you’re on a Windows version above Windows 10, then you don’t need to do anything. Advanced input editing capabilities and history recall are natively supported in Command Prompt and PowerShell since Windows 10. You can try running the code that you’ll see further down without importing the readline module, and you should still have access to all of the mentioned features.
However, if you’re working on a Windows version before Windows 10, then you need to install a third-party library to get access to this functionality. One such library is pyreadline3, which you can install with Python’s package manager, pip:
py -m pip install pyreadline3
After the installation is done, the pyreadline3 library will provide similar functionality to the GNU Readline library available on UNIX-like systems. While it mimics the behavior of the readline module from Python’s standard library, pyreadline3 is not a direct substitute as it may have differences due to underlying system variations.
The readline.py file (pyreadline3/pyreadline3) of the third-party project ensures that when you import readline in your Python code, your code will instead use the pyreadline3 implementation.
UNIX-like systems, such as macOS and Linux, usually come with the GNU Readline library preinstalled. Python’s readline module provides an interface to the GNU Readline library, which straightforwardly handles the aforementioned limitations of input().
Because readline is part of Python’s standard-library, you don’t even need to install anything.
To activate the improved input functionality in your input interface, you only need to import readline:
import readline
while (user_input := input("> ")).lower() != "exit":
    print("You entered:", user_input)
Try running the code snippet above, which drops you into an infinite loop that allows you to test input editing and history recall:
- Use the Left and Right arrow keys to navigate within the input line.
- Use Ctrl+A and Ctrl+E to move to the beginning and end of the input line, respectively.
- Recall previous inputs using the Up and Down arrow keys.
You can exit the loop that you set up in improved_input.py and end the example program by typing exit.
How does readline work?
Usually, when you call input(), it calls a lower-level input handling function to wait for user input from the standard input stream. When you import readline, it overrides the standard input processing by registering handlers for keyboard input. These handlers capture each key press, interpreting special keys like arrows differently.
The readline module achieves this seamlessly because instead of changing input(), it intercepts calls to the lower-level read commands that input() relies on. When input() calls these commands, readline steps in and provides its enhanced behavior.
Integrating enhanced input features can significantly improve the user experience, especially in interactive applications like command-line tools or games:
This enhancement is particularly valuable in scenarios where users are expected to input commands frequently or make complex entries with frequent edits.
It’s important to note that the features provided by readline and pyreadline3 are natively supported only in console environments and may not work in all Integrated Development Environments (IDEs). IDEs often handle input differently from standard terminal environments. Additionally, some key bindings and functionalities may vary depending on the system configuration and the specific implementation of the module.
By extending the capabilities of input(), your programs can offer a more robust and user-friendly interface, accommodating smoother data entry and manipulation processes.
In the next section, you’ll continue to explore how you can refine output appearance and formatting using some advanced features of print().
Printing Output With Advanced Features
The print() function takes additional arguments that provide some control over the format of the output. Each of these is a special type of argument called a keyword argument.
Keyword arguments have the form <keyword>=<value>. You need to pass them at the end, after the list of objects that you want to display.
Note
You can only achieve basic formatting of console output with print(). If you need more precise control over the appearance of your data, then you can use Python’s f-strings to format the object before passing it to print().
In this section, you’ll see how the following keyword arguments affect the console output that print() produces:
sepThis argument allows you to specify how to separate multiple objects when they are printed.endUse this argument to set what Python prints at the end of aprint()call.fileThis allows you to redirect the output to any file-like object.flushUse this argument to flush the output stream, effectively bypassing any buffering.
Adding the keyword argument sep=<str> causes Python to separate objects by <str> instead of by the default single space:
print("input", "output")
#
# input output

print("input", "output", sep="/")
#
# input/output

print("input", "output", sep="...")
#
# input...output

person = {"first_name": "John", "last_name": "Doe"}
for key, value in person.items():
    print(key, value, sep=" -> ")
#
# first_name -> John
# last_name -> Doe
In these examples, you’ve used different strings, such as "/", "...", and " -> " to separate the objects that you’re asking print() to display. You can use the sep keyword to specify any arbitrary string as the separator:
print("input", "output", sep="Real Python")
#
# inputReal Pythonoutput
However, passing a string such as "Real Python" as the separator will rarely make a lot of sense. In practice, you’ll probably want to stick with passing a well-readable separator symbol like in the previous examples.
To squish objects together without any space between them, you specify an empty string ("") as the separator:
print("input", "output", sep="")
#
# inputoutput
Finally, you can add a linebreak in between each item by passing the newline character (\n) to sep:
print("input", "output", sep="\n")
#
# input
# output
Separating objects with a newline character displays each of them on an individual line, which can be helpful when you need to inspect more complex objects. Sometimes, you may even want to separate them with two consecutive newline characters (\n\n) to group your output better and make it more readable.
The keyword argument end=<str> causes Python to terminate the output by <str> instead of by the default newline:
first = "John"
last = "Doe"
print(first, last, end="!")
#
# John Doe!
In this example, you’ve replaced the default newline end character with an exclamation mark. Notice how this breaks the usual neat way that calling print() drops you into a new empty line. Now you get to see an exclamation mark followed directly by Python’s input prompt (>>>) because you told print() not to write a newline character.
You can also pass an empty string to this parameter to side-step the default newline functionality. For example, assume that you’re displaying values in a loop:
for number in range(10):
    print(number)
#
# 0
# 1
# 2
# 3
# 4
# 5
# 6
# 7
# 8
# 9
For such small values, you might want to display all values on one line, rather than on individual lines. You can accomplish this with end:
for number in range(10):
    print(number, end=" ")
#
# 0 1 2 3 4 5 6 7 8 9
Note that your prompt slid back up into the output line again because you’re not using a newline as the output terminator. By calling print() without any arguments just after the loop, you can avoid that, too:
for number in range(10):
    print(number, end=" ")
print()
#
# 0 1 2 3 4 5 6 7 8 9
When you don’t provide any values to print(), it outputs a newline character, effectively moving the cursor to the next line. Alternatively, you can achieve the same effect with a bit of logic wrapped in a conditional expression:
for number in range(10):
    print(number, end=(" " if number < 9 else "\n"))
#
# 0 1 2 3 4 5 6 7 8 9
Just like with sep, you can use any string as an argument to the end keyword, but some strings will make more sense than others as output terminators.
The print() function accepts two additional keyword arguments, file and flush, both of which affect how the function handles the output stream. If you want to learn how to work with these two additional keyword arguments, then you can read the in-depth guide about Python’s print() function.
Conclusion
Now you know how to handle basic input and output operations in Python using the input() and print() functions. You’ve explored how to gather user input from the keyboard, process that input, and display it back to the user in a meaningful way. Additionally, you delved into some advanced features of the print() function, such as formatting output with separators and controlling the newline character.
Understanding input and output is crucial for any Python developer, as these operations form the backbone of interacting with users and external systems. Knowing how to work with these tools allows you to create programs that are interactive, user-friendly, and capable of handling real-world data processing tasks.
In this tutorial, you’ve learned how to
- Take user input from the keyboard with
input() - Display output to the console with
print() - Use
readlineto improve the user experience when collecting input on UNIX-like systems - Format output using the
sepandendkeyword arguments ofprint()
With basic input and output handling skills, you can build interactive Python applications that efficiently communicate with users and process input data. This foundational knowledge prepares you for more advanced tasks, such as creating command-line tools or GUI applications.
Quiz - Basic Input and Output in Python
In this quiz, you'll test your understanding of Python's built-in functions for user interaction, namely input() and print(). These functions allow you to capture user input from the keyboard and display output to the console, respectively.
Watch Now
This tutorial has a related video course created by the Real Python team. Watch it together with the written tutorial to deepen your understanding: