Printing With Style
Printing With Style 관련

If you thought that printing was only about lighting pixels up on the screen, then technically you’d be right. However, there are ways to make it look cool. In this section, you’ll find out how to format complex data structures, add colors and other decorations, build interfaces, use animation, and even play sounds with text!
Pretty-Printing Nested Data Structures
Computer languages allow you to represent data as well as executable code in a structured way. Unlike Python, however, most languages give you a lot of freedom in using whitespace and formatting. This can be useful, for example in compression, but it sometimes leads to less readable code.
Pretty-printing is about making a piece of data or code look more appealing to the human eye so that it can be understood more easily. This is done by indenting certain lines, inserting newlines, reordering elements, and so forth.
Python comes with the pprint module in its standard library, which will help you in pretty-printing large data structures that don’t fit on a single line. Because it prints in a more human-friendly way, many popular REPL tools, including JupyterLab and IPython, use it by default in place of the regular print() function.
Note
To toggle pretty printing in IPython, issue the following command:
In [1]: %pprint
#
# Pretty printing has been turned OFF
In [2]: %pprint
#
# Pretty printing has been turned ON
This is an example of Magic in IPython. There are a lot of built-in commands that start with a percent sign (%), but you can find more on PyPI, or even create your own.
If you don’t care about not having access to the original print() function, then you can replace it with pprint() in your code using import renaming:
from pprint import pprint as print
print
#
# <function pprint at 0x7f7a775a3510>
Personally, I like to have both functions at my fingertips, so I’d rather use something like pp as a short alias:
from pprint import pprint as pp
At first glance, there’s hardly any difference between the two functions, and in some cases there’s virtually none:
print(42)
#
# 42
pp(42)
#
# 42
print('hello')
#
# hello
pp('hello')
#
# 'hello'  # Did you spot the difference?
That’s because pprint() calls repr() instead of the usual str() for type casting, so that you may evaluate its output as Python code if you want to. The differences become apparent as you start feeding it more complex data structures:
data = {'powers': [x**10 for x in range(10)]}
pp(data)
#
# {'powers': [0,
#  1,
#  1024,
#  59049,
#  1048576,
#  9765625,
#  60466176,
#  282475249,
#  1073741824,
#  3486784401]}
The function applies reasonable formatting to improve readability, but you can customize it even further with a couple of parameters. For example, you may limit a deeply nested hierarchy by showing an ellipsis below a given level:
cities = {'USA': {'Texas': {'Dallas': ['Irving']}}}
pp(cities, depth=3)
#
# {'USA': {'Texas': {'Dallas': [...]}}}
The ordinary print() also uses ellipses but for displaying recursive data structures, which form a cycle, to avoid stack overflow error:
items = [1, 2, 3]
items.append(items)
print(items)
#
# [1, 2, 3, [...]]
However, pprint() is more explicit about it by including the unique identity of a self-referencing object:
pp(items)
#
# s[1, 2, 3, <Recursion on list with id=140635757287688>]
id(items)
#
# s140635757287688
The last element in the list is the same object as the entire list.
Note
Recursive or very large data sets can be dealt with using the reprlib module as well:
import reprlib
reprlib.repr([x**10 for x in range(10)])
#
# '[0, 1, 1024, 59049, 1048576, 9765625, ...]'
This module supports most of the built-in types and is used by the Python debugger.
pprint() automatically sorts dictionary keys for you before printing, which allows for consistent comparison. When you’re comparing strings, you often don’t care about a particular order of serialized attributes. Anyways, it’s always best to compare actual dictionaries before serialization.
Dictionaries often represent JSON data, which is widely used on the Internet. To correctly serialize a dictionary into a valid JSON-formatted string, you can take advantage of the json module. It too has pretty-printing capabilities:
import json
data = {'username': 'jdoe', 'password': 's3cret'}
ugly = json.dumps(data)
pretty = json.dumps(data, indent=4, sort_keys=True)
print(ugly)
#
# {"username": "jdoe", "password": "s3cret"}
print(pretty)
#
# {
#  "password": "s3cret",
#  "username": "jdoe"
# }
Notice, however, that you need to handle printing yourself, because it’s not something you’d typically want to do. Similarly, the pprint module has an additional pformat() function that returns a string, in case you had to do something other than printing it.
Surprisingly, the signature of pprint() is nothing like the print() function’s one. You can’t even pass more than one positional argument, which shows how much it focuses on printing data structures.
Adding Colors With ANSI Escape Sequences
As personal computers got more sophisticated, they had better graphics and could display more colors. However, different vendors had their own idea about the API design for controlling it. That changed a few decades ago when people at the American National Standards Institute decided to unify it by defining ANSI escape codes.
Most of today’s terminal emulators support this standard to some degree. Until recently, the Windows operating system was a notable exception. Therefore, if you want the best portability, use the colorama library in Python. It translates ANSI codes to their appropriate counterparts in Windows while keeping them intact in other operating systems.
To check if your terminal understands a subset of the ANSI escape sequences, for example, related to colors, you can try using the following command:
tput colors
My default terminal on Linux says it can display 256 distinct colors, while xterm gives me only 8. The command would return a negative number if colors were unsupported.
ANSI escape sequences are like a markup language for the terminal. In HTML you work with tags, such as <b> or <i>, to change how elements look in the document. These tags are mixed with your content, but they’re not visible themselves. Similarly, escape codes won’t show up in the terminal as long as it recognizes them. Otherwise, they’ll appear in the literal form as if you were viewing the source of a website.
As its name implies, a sequence must begin with the non-printable Esc character, whose ASCII value is 27, sometimes denoted as 0x1b in hexadecimal or 033 in octal. You may use Python number literals to quickly verify it’s indeed the same number:
27 == 0x1b == 0o33
#
# True
Additionally, you can obtain it with the \e escape sequence in the shell:
echo -e "\e"
The most common ANSI escape sequences take the following form:
| Element | Description | Example |
|---|---|---|
| Esc | non-printable escape character | \033 |
[ | opening square bracket | [ |
| numeric code | one or more numbers separated with ; | 0 |
| character code | uppercase or lowercase letter | m |
The numeric code can be one or more numbers separated with a semicolon, while the character code is just one letter. Their specific meaning is defined by the ANSI standard. For example, to reset all formatting, you would type one of the following commands, which use the code zero and the letter m:
echo -e "\e[0m"
echo -e "\x1b[0m"
echo -e "\033[0m"
At the other end of the spectrum, you have compound code values. To set foreground and background with RGB channels, given that your terminal supports 24-bit depth, you could provide multiple numbers:
echo -e "\e[38;2;0;0;0m\e[48;2;255;255;255mBlack on white\e[0m"
It’s not just text color that you can set with the ANSI escape codes. You can, for example, clear and scroll the terminal window, change its background, move the cursor around, make the text blink or decorate it with an underline.
In Python, you’d probably write a helper function to allow for wrapping arbitrary codes into a sequence:
def esc(code):
    return f'\033[{code}m'

print(esc('31;1;4') + 'really' + esc(0) + ' important')
This would make the word really appear in red, bold, and underlined font:
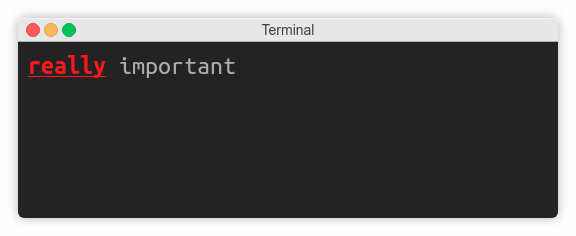
However, there are higher-level abstractions over ANSI escape codes, such as the mentioned colorama library, as well as tools for building user interfaces in the console.
Building Console User Interfaces
While playing with ANSI escape codes is undeniably a ton of fun, in the real world you’d rather have more abstract building blocks to put together a user interface. There are a few libraries that provide such a high level of control over the terminal, but curses seems to be the most popular choice.
Note
To use the curses library in Windows, you need to install a third-party package:
pip install windows-curses
That’s because curses isn’t available in the standard library of the Python distribution for Windows.
Primarily, it allows you to think in terms of independent graphical widgets instead of a blob of text. Besides, you get a lot of freedom in expressing your inner artist, because it’s really like painting a blank canvas. The library hides the complexities of having to deal with different terminals. Other than that, it has great support for keyboard events, which might be useful for writing video games.
How about making a retro snake game? Let’s create a Python snake simulator:
First, you need to import the curses module. Since it modifies the state of a running terminal, it’s important to handle errors and gracefully restore the previous state. You can do this manually, but the library comes with a convenient wrapper for your main function:
import curses

def main(screen):
    pass

if __name__ == '__main__':
    curses.wrapper(main)
Note, the function must accept a reference to the screen object, also known as stdscr, that you’ll use later for additional setup.
If you run this program now, you won’t see any effects, because it terminates immediately. However, you can add a small delay to have a sneak peek:
import time, curses

def main(screen):
    time.sleep(1)

if __name__ == '__main__':
    curses.wrapper(main)
This time the screen went completely blank for a second, but the cursor was still blinking. To hide it, just call one of the configuration functions defined in the module:
import time, curses

def main(screen):
    curses.curs_set(0)  # Hide the cursor
    time.sleep(1)

if __name__ == '__main__':
    curses.wrapper(main)
Let’s define the snake as a list of points in screen coordinates:
snake = [(0, i) for i in reversed(range(20))]
The head of the snake is always the first element in the list, whereas the tail is the last one. The initial shape of the snake is horizontal, starting from the top-left corner of the screen and facing to the right. While its y-coordinate stays at zero, its x-coordinate decreases from head to tail.
To draw the snake, you’ll start with the head and then follow with the remaining segments. Each segment carries (y, x) coordinates, so you can unpack them:
# Draw the snake
screen.addstr(*snake[0], '@')
for segment in snake[1:]:
    screen.addstr(*segment, '*')
Again, if you run this code now, it won’t display anything, because you must explicitly refresh the screen afterward:
import time, curses

def main(screen):
    curses.curs_set(0)  # Hide the cursor

    snake = [(0, i) for i in reversed(range(20))]

    # Draw the snake
    screen.addstr(*snake[0], '@')
    for segment in snake[1:]:
        screen.addstr(*segment, '*')

    screen.refresh()
    time.sleep(1)

if __name__ == '__main__':
    curses.wrapper(main)
You want to move the snake in one of four directions, which can be defined as vectors. Eventually, the direction will change in response to an arrow keystroke, so you may hook it up to the library’s key codes:
directions = {
    curses.KEY_UP: (-1, 0),
    curses.KEY_DOWN: (1, 0),
    curses.KEY_LEFT: (0, -1),
    curses.KEY_RIGHT: (0, 1),
}

direction = directions[curses.KEY_RIGHT]
How does a snake move? It turns out that only its head really moves to a new location, while all other segments shift towards it. In each step, almost all segments remain the same, except for the head and the tail. Assuming the snake isn’t growing, you can remove the tail and insert a new head at the beginning of the list:
# Move the snake
snake.pop()
snake.insert(0, tuple(map(sum, zip(snake[0], direction))))
To get the new coordinates of the head, you need to add the direction vector to it. However, adding tuples in Python results in a bigger tuple instead of the algebraic sum of the corresponding vector components. One way to fix this is by using the built-in zip(), sum(), and map() functions.
The direction will change on a keystroke, so you need to call .getch() to obtain the pressed key code. However, if the pressed key doesn’t correspond to the arrow keys defined earlier as dictionary keys, the direction won’t change:
# Change direction on arrow keystroke
direction = directions.get(screen.getch(), direction)
By default, however, .getch() is a blocking call that would prevent the snake from moving unless there was a keystroke. Therefore, you need to make the call non-blocking by adding yet another configuration:
def main(screen):
    curses.curs_set(0)    # Hide the cursor
    screen.nodelay(True)  # Don't block I/O calls
You’re almost done, but there’s just one last thing left. If you now loop this code, the snake will appear to be growing instead of moving. That’s because you have to erase the screen explicitly before each iteration.
Finally, this is all you need to play the snake game in Python:
import time, curses

def main(screen):
    curses.curs_set(0)    # Hide the cursor
    screen.nodelay(True)  # Don't block I/O calls

    directions = {
        curses.KEY_UP: (-1, 0),
        curses.KEY_DOWN: (1, 0),
        curses.KEY_LEFT: (0, -1),
        curses.KEY_RIGHT: (0, 1),
    }

    direction = directions[curses.KEY_RIGHT]
    snake = [(0, i) for i in reversed(range(20))]

    while True:
 screen.erase()
        # Draw the snake
        screen.addstr(*snake[0], '@')
        for segment in snake[1:]:
            screen.addstr(*segment, '*')

        # Move the snake
        snake.pop()
        snake.insert(0, tuple(map(sum, zip(snake[0], direction))))

        # Change direction on arrow keystroke
        direction = directions.get(screen.getch(), direction)

        screen.refresh()
        time.sleep(0.1)

if __name__ == '__main__':
    curses.wrapper(main)
This is merely scratching the surface of the possibilities that the curses module opens up. You may use it for game development like this or more business-oriented applications.
Living It Up With Cool Animations
Not only can animations make the user interface more appealing to the eye, but they also improve the overall user experience. When you provide early feedback to the user, for example, they’ll know if your program’s still working or if it’s time to kill it.
To animate text in the terminal, you have to be able to freely move the cursor around. You can do this with one of the tools mentioned previously, that is ANSI escape codes or the curses library. However, I’d like to show you an even simpler way.
If the animation can be constrained to a single line of text, then you might be interested in two special escape character sequences:
- Carriage return:
\r - Backspace:
\b
The first one moves the cursor to the beginning of the line, whereas the second one moves it only one character to the left. They both work in a non-destructive way without overwriting text that’s already been written.
Let’s take a look at a few examples.
You’ll often want to display some kind of a spinning wheel to indicate a work in progress without knowing exactly how much time’s left to finish:

Many command line tools use this trick while downloading data over the network. You can make a really simple stop motion animation from a sequence of characters that will cycle in a round-robin fashion:
from itertools import cycle
from time import sleep

for frame in cycle(r'-\|/-\|/'):
    print('\r', frame, sep='', end='', flush=True)
    sleep(0.2)
The loop gets the next character to print, then moves the cursor to the beginning of the line, and overwrites whatever there was before without adding a newline. You don’t want extra space between positional arguments, so separator argument must be blank. Also, notice the use of Python’s raw strings due to backslash characters present in the literal.
When you know the remaining time or task completion percentage, then you’re able to show an animated progress bar:
First, you need to calculate how many hashtags to display and how many blank spaces to insert. Next, you erase the line and build the bar from scratch:
from time import sleep

def progress(percent=0, width=30):
    left = width * percent // 100
    right = width - left
    print('\r[', '#' * left, ' ' * right, ']',
          f' {percent:.0f}%',
          sep='', end='', flush=True)

for i in range(101):
    progress(i)
    sleep(0.1)
As before, each request for update repaints the entire line.
Note
There’s a feature-rich progressbar2 library, along with a few other similar tools, that can show progress in a much more comprehensive way.
Making Sounds With print()
If you’re old enough to remember computers with a PC speaker, then you must also remember their distinctive beep sound, often used to indicate hardware problems. They could barely make any more noises than that, yet video games seemed so much better with it.
Today you can still take advantage of this small loudspeaker, but chances are your laptop didn’t come with one. In such a case, you can enable terminal bell emulation in your shell, so that a system warning sound is played instead.
Go ahead and type this command to see if your terminal can play a sound:
echo -e "\a"
This would normally print text, but the -e flag enables the interpretation of backslash escapes. As you can see, there’s a dedicated escape sequence \a, which stands for “alert”, that outputs a special bell character. Some terminals make a sound whenever they see it.
Similarly, you can print this character in Python. Perhaps in a loop to form some kind of melody. While it’s only a single note, you can still vary the length of pauses between consecutive instances. That seems like a perfect toy for Morse code playback!
The rules are the following:
- Letters are encoded with a sequence of dot (·) and dash (-) symbols.
- A dot is one unit of time.
- A dash is three units of time.
- Individual symbols in a letter are spaced one unit of time apart.
- Symbols of two adjacent letters are spaced three units of time apart.
- Symbols of two adjacent words are spaced seven units of time apart.
According to those rules, you could be “printing” an SOS signal indefinitely in the following way:
while True:
    dot()
    symbol_space()
    dot()
    symbol_space()
    dot()
    letter_space()
    dash()
    symbol_space()
    dash()
    symbol_space()
    dash()
    letter_space()
    dot()
    symbol_space()
    dot()
    symbol_space()
    dot()
    word_space()
In Python, you can implement it in merely ten lines of code:
from time import sleep

speed = 0.1

def signal(duration, symbol):
    sleep(duration)
    print(symbol, end='', flush=True)

dot = lambda: signal(speed, '·\a')
dash = lambda: signal(3*speed, '−\a')
symbol_space = lambda: signal(speed, '')
letter_space = lambda: signal(3*speed, '')
word_space = lambda: signal(7*speed, ' ')
Maybe you could even take it one step further and make a command line tool for translating text into Morse code? Either way, I hope you’re having fun with this!