
05. Others
05. Others 관련
Running the Debugger with Quarkus Dev Mode
Frequently, a test may fail without any apparent cause, leaving us perplexed (or perhaps not so much). Ironically, I sometimes find myself attributing my own simple errors to underlying bugs in external libraries. Thankfully, the debugger comes to our rescue, shedding light on where things took a wrong turn and often humbling me by revealing my own mistakes.
If you wish to use IntelliJ’s debugger in conjunction with the Quarkus dev mode, you need to attach the debugger manually. This process is straightforward but entails creating a personalized run configuration. Head to [Run] > [Edit Configurations] and generate a new [Remote JVM Debug] configuration. Opt for a clear label like "Debug Quarkus" to easily distinguish it from other configurations.
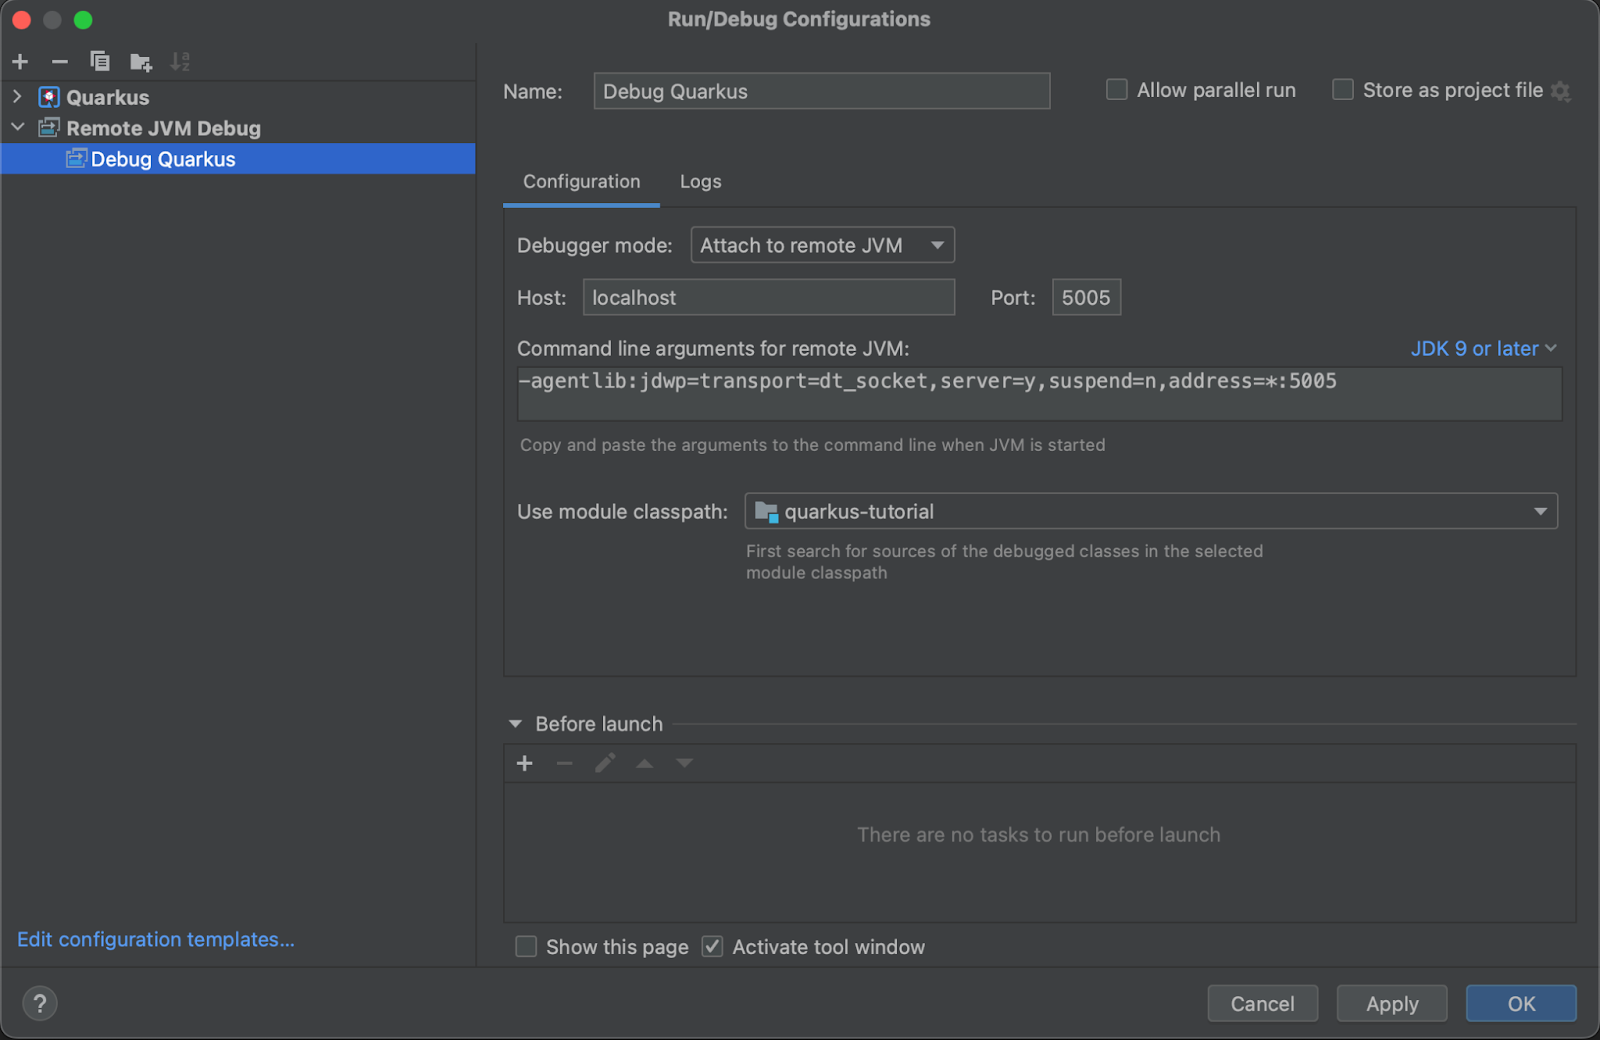
Once this configuration is in place, restart Quarkus in the debug dev mode as follows:
./mvnw compile quarkus:dev -Ddebug
Then run your new Debug Quarkus configuration in IntelliJ to connect to the Quarkus process and proceed to use the debugger as normal.
Building Your Application
Although our application's feature set might be modest at this stage, it's fully functional and primed to potentially offer users access to film-related information. With this in mind, it's a fitting moment to prepare for deployment.
Quarkus provides two distinct build options: the Quarkus JIT HotSpot compiler and the Quarkus native build powered by Graal VM. The former enhances the standard Java JIT compiler for optimal performance, while the latter capitalizes on ahead-of-time compilation (AOT), maximizing build-time efficiency over runtime execution. While the image below is a Quarkus-provided marketing asset, my own experiments affirm the tangible performance gains it highlights.
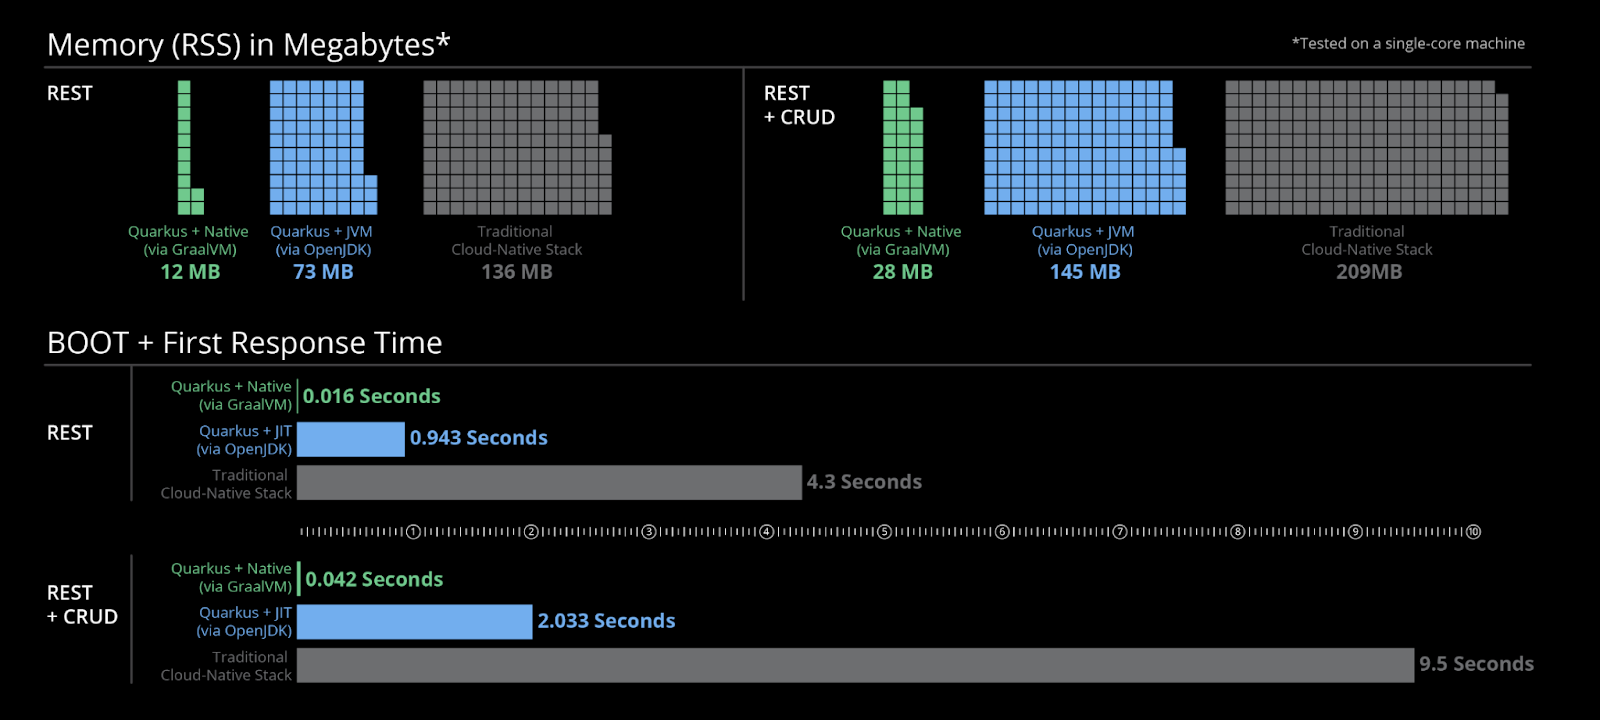
Quarkus JIT Build via OpenJDK
Since you've already developed your project using the Quarkus platform, you have immediate access to the JIT compiler without any additional steps required. The illustration above provides a glimpse into the significant enhancements Quarkus has made to the standard compiler, potentially fulfilling your optimization requirements.
To initiate the standard Quarkus build process, simply execute the command:
quarkus build
./gradlew quarkusBuild
./mvnw quarkus:build
The resulting build is stored in /target/quarkus-app. However, it's important to note that the generated JAR isn't an über-jar and therefore lacks standalone functionality. For successful deployment, ensure that the entire quarkus-app folder is included, to guarantee the availability of all necessary resources.
When you're ready to run your application, employ the following command:
java -jar /target/quarkus-run.jar
Pay attention to the Quarkus prompt indicating how long it took to start your application. For reference, it took me around 1.7s to start the JIT compiled version of this application.
Quarkus Native Build via GraalVM
Now, let's delve into the more interesting aspect of Quarkus—the native build process. Although compiling natively doesn't demand additional effort on your part as a developer, it does require a bit of patience. Performing ahead-of-time compilation (AOT) takes considerably longer than the standard JVM HotSpot build. Native compilation acts as a potent compressor, best reserved for when you're preparing to deploy a fresh iteration of your software.
As Quarkus have introduced the option to build nativelty using a containerized variant of GraalVM, I won't delve into GraalVM installation instructions. To execute a native build using the GraalVM Docker container, issue the following command:
./mvnw package -Pnative -Dquarkus.native.container-build=true
Alternatively, if you possess GraalVM locally, you can proceed with the local version:
./mvnw package -Pnative
The executable file created by the native build operates not as a JVM-based application, but as a platform-specific native application. To run it, simply execute the runner script located in the root of the target folder (The filename corresponds to your application's name):
./target/quarkus-tutorial-1.0.0-SNAPSHOT-runner
Again, observe the Quarkus prompt to observe how long it took to start the native version. In my case I was down to about a tenth of a second!
Resources
- Quarkus Project Configurator
- Quarkus Documentation
- JPAStreamer Documentation
- Complete Project Source Code
