
How to add Metal shaders to SwiftUI views using layer effects
How to add Metal shaders to SwiftUI views using layer effects 관련

Updated for Xcode 15
New in iOS 17
SwiftUI provides extensive integration with Metal shaders, right at the very view level – we can manipulate colors, shapes, and more with remarkable performance.
Trying this out takes three steps:
- Creating a Metal file with your shader. This must have an exact function signature, which varies depending on what kind of effect you’re trying to apply.
- Creating your SwiftUI views, and attaching one or more effect.
- Optionally adding a visual effect to your view, in order to read the view’s size without changing its layout.
I’ve created a selection of Metal shaders for you to try out here: sample SwiftUI Metal shaders. Each one looks a bit like this:
[[ stitchable ]] half4 checkerboard(float2 position, half4 currentColor, float size, half4 newColor) {
    uint2 posInChecks = uint2(position.x / size, position.y / size);
    bool isColor = (posInChecks.x ^ posInChecks.y) & 1;
    return isColor ? newColor * currentColor.a : half4(0.0, 0.0, 0.0, 0.0);
}
In that shader, the first two parameters are required by SwiftUI: it will automatically pass in the position of the view, along with its current color. The second and remaining parameters are all created by us, and need to be sent in manually. In this case, I’m passing in the size I want the checkerboard squares to be.
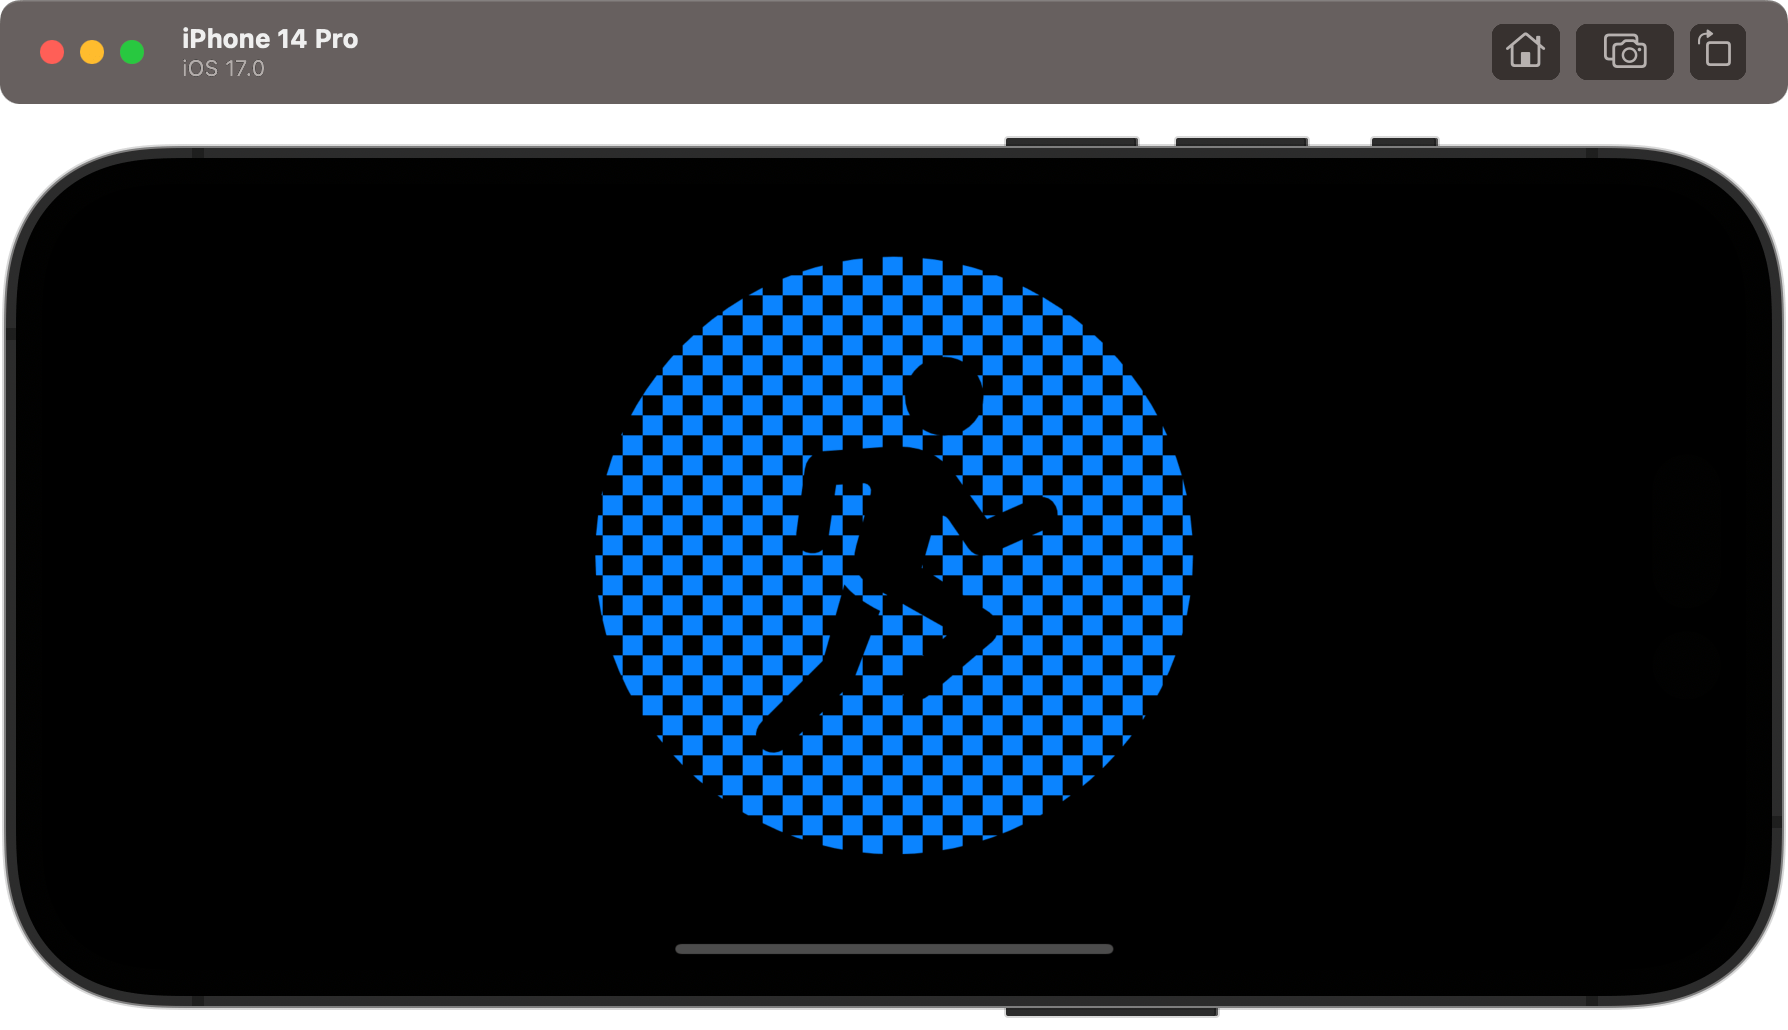
When it comes to using the shader, the syntax is convenient but might be a little surprising at first: SwiftUI uses dynamic member lookup to let us simply call our shader function by name, passing in all the non-fixed parameters we want. In this case that means calling the checkerboard() function, passing a size and color like this:
Image(systemName: "figure.run.circle.fill")
    .font(.system(size: 300))
    .colorEffect(ShaderLibrary.checkerboard(.float(10), .color(.blue)))
Again, we don’t pass in values for position and current color, because SwiftUI takes care of those for us.
That’s the basic concept, but I want to walk through a handful of variations to give you a range of options.
First, you can make shaders that animate by placing them inside a TimelineView and sending in a date value. For example, we could create a start date and send the difference between that start date and the current date to power a noise shader.
Here’s the shader code:
[[ stitchable ]] half4 noise(float2 position, half4 currentColor, float time) {
    float value = fract(sin(dot(position + time, float2(12.9898, 78.233))) * 43758.5453);
    return half4(value, value, value, 1) * currentColor.a;
}
And here’s a SwiftUI view using it with a TimelineView:
struct ContentView: View {
    let startDate = Date()

    var body: some View {
        TimelineView(.animation) { context in
            Image(systemName: "figure.run.circle.fill")
                .font(.system(size: 300))
                .colorEffect(ShaderLibrary.noise(.float(startDate.timeIntervalSinceNow)))
        }
    }
}
To build shaders that need to sample a color from your view, adjust your Metal file to start with #include >SwiftUI/SwiftUI_Metal.h>, then make sure your shader signature accepts both a position and a SwiftUI::Layer instance.
For example, my Metal shader sample file includes this simple pixellation shader:
[[ stitchable ]] half4 pixellate(float2 position, SwiftUI::Layer layer, float strength) {
    float min_strength = max(strength, 0.0001);
    float coord_x = min_strength * round(position.x / min_strength);
    float coord_y = min_strength * round(position.y / min_strength);
    return layer.sample(float2(coord_x, coord_y));
}
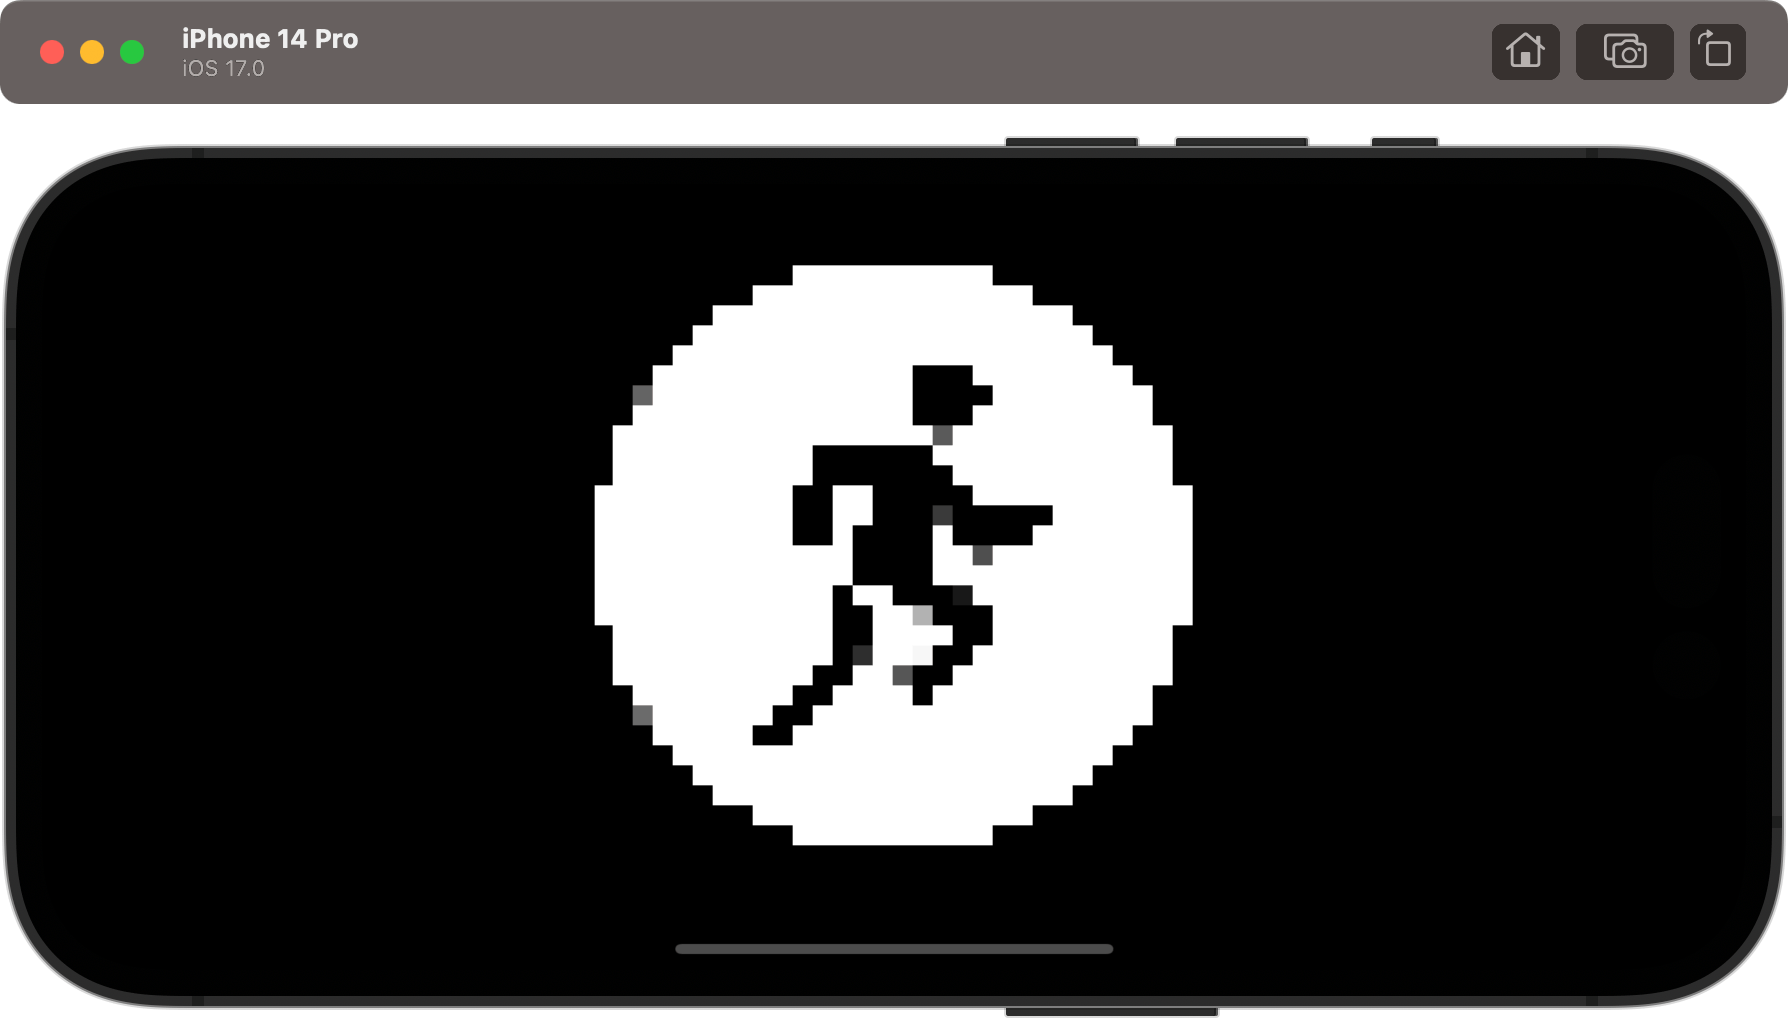
That clamps the function’s strength input to a lower bound of 0.0001 to avoid division by zero, then divides each pixel’s position by the strength, rounds it, then multiplies it back up again, causing pixel data to be thrown away. The real work there is the call to layer.sample(), which reads one color from whichever view has this shader attached.
The shader needs to be called as a layer effect, which tells SwiftUI to pass in the whole layer as well as the position for the current pixel we’re working with:
Image(systemName: "figure.run.circle.fill")
    .font(.system(size: 300))
    .layerEffect(ShaderLibrary.pixellate(.float(10)), maxSampleOffset: .zero)
Another type of effect is activated with the distortionEffect() modifier, which allows you to move one pixel from one location to another, leaving it otherwise unchanged. This means your shader only needs to accept the pixel position at the minimum, so we could a simple wave example like this:
[[ stitchable ]] float2 wave(float2 position, float time) {
    return position + float2 (sin(time + position.y / 20), sin(time + position.x / 20)) * 5;
}
This can be used with the distortionEffect() modifier, like so:
struct ContentView: View {
    let startDate = Date()

    var body: some View {
        TimelineView(.animation) { context in
            Image(systemName: "figure.run.circle.fill")
                .font(.system(size: 300))
                .distortionEffect(ShaderLibrary.simpleWave(.float(startDate.timeIntervalSinceNow)), maxSampleOffset: .zero)
        }
    }
}
If you wanted a complex wave shader that’s more like seeing the view underwater, we need to read the overall size of the image. This takes a little more thinking, because we need to wrap the distortion effect in a visual effect to provide the view’s dimensions.
First, here’s a more complex wave effect that needs the view’s size, but also has options for speed, strength, and wave frequency to make it more customizable:
[[ stitchable ]] float2 complexWave(float2 position, float time, float2 size, float speed, float strength, float frequency) {
    float2 normalizedPosition = position / size;
    float moveAmount = time * speed;

    position.x += sin((normalizedPosition.x + moveAmount) * frequency) * strength;
    position.y += cos((normalizedPosition.y + moveAmount) * frequency) * strength;

    return position;
}
To use this we need to use both visualEffect() and distortionEffect() at the same time, like this:
struct ContentView: View {
    let startDate = Date()

    var body: some View {
        TimelineView(.animation) { context in
            Image(systemName: "figure.run.circle.fill")
                .font(.system(size: 300))
                .visualEffect { content, proxy in
                    content
                        .distortionEffect(ShaderLibrary.complexWave(
                            .float(startDate.timeIntervalSinceNow),
                            .float2(proxy.size),
                            .float(0.5),
                            .float(8),
                            .float(10)
                        ), maxSampleOffset: .zero)
                }
        }
    }
}
Using the two together allows us to read the view’s size, and factor that into our shader calculations.
For our final shader example we’ll create a simple emboss filter, including a SwiftUI Slider to control the emboss strength.
First add the shader to your Metal file:
[[ stitchable ]] half4 emboss(float2 position, SwiftUI::Layer layer, float strength) {
    half4 current_color = layer.sample(position);
    half4 new_color = current_color;

    new_color += layer.sample(position + 1) * strength;
    new_color -= layer.sample(position - 1) * strength;

    return half4(new_color);
}
And now we can put this to use with a layerEffect() modifier like this:
struct ContentView: View {
    @State private var strength = 3.0

    var body: some View {
        VStack {
            Image(systemName: "figure.run.circle.fill")
                .foregroundStyle(.linearGradient(colors: [.orange, .red], startPoint: .top, endPoint: .bottom))
                .font(.system(size: 300))
                .layerEffect(ShaderLibrary.emboss(.float(strength)), maxSampleOffset: .zero)

            Slider(value: $strength, in: 0...20)
        }
        .padding()
    }
}

As you can see, it’s now trivial to add Metal shaders to SwiftUI views, unlocking a wide range of special effects without a great deal of work.
Similar solutions…
