
How to adjust the position of a view using its offset
How to adjust the position of a view using its offset 관련

Updated for Xcode 15
All views have a natural position inside your hierarchy, but the offset() modifier lets you move them relative to that natural position. This is particularly useful inside ZStack, where it lets you control how views should overlap.
Important
Using offset() will cause a view to be moved relative to its natural position, but won’t affect the position of other views or any other modifiers placed after the offset. This means you need to think carefully how you use it, not least to make sure views don’t overlap if that wasn’t your intention.
For example, in this VStack we can use offset() to move the second item down by 15 points so that it begins to overlap the third item:
VStack {
    Text("Home")
    Text("Options")
        .offset(y: 15)
    Text("Help")
}

You will commonly find that using padding() together with offset() gives you the result you’re looking for, as that moves one view around while also adjusting the views next to it to match.
For example, this will move the second item down by 15 points, but add 15 points of padding to its bottom edge so that it doesn’t overlap the text view below:
VStack {
    Text("Home")
    Text("Options")
        .offset(y: 15)
        .padding(.bottom, 15)
    Text("Help")
}

As I said earlier, any modifiers placed after offset() won’t be affected by the change in position, which might cause unexpected results. In this following example, I’ve used background() both before and after the offset, so you can see how they are different:
HStack {
    Text("Before")
        .background(.red)
        .offset(y: 15)

    Text("After")
        .offset(y: 15)
        .background(.red)
}

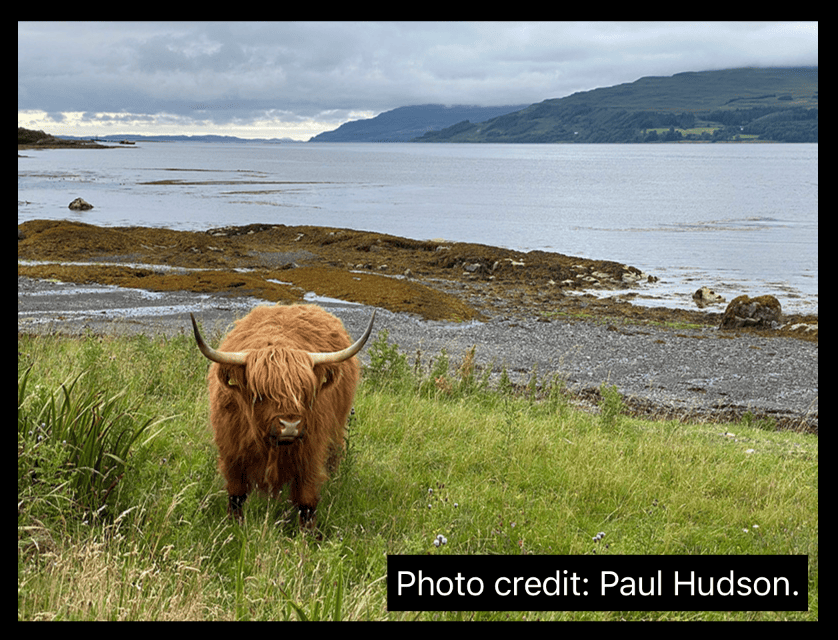
When used in conjunction with a ZStack, offsets let us position one view inside another, which is particularly useful when you control the alignment of the ZStack.
For example, if we have a ZStack showing a photo along with the name of the photographer, we might use .bottomTrailing alignment to make the image take up all the available space while having the credit line sit in the bottom-right corner, then use offset(x: -5, y: -5) to pull the credit line back by five points:
ZStack(alignment: .bottomTrailing) {
    Image("scotland")
    Text("Photo credit: Paul Hudson.")
        .padding(4)
        .background(.black)
        .foregroundStyle(.white)
        .offset(x: -5, y: -5)
}
Placing the offset at the end of the other modifiers ensures they all move together.
Similar solutions…
