Elevating Your Jetpack Compose UI with GraphicsLayer
Elevating Your Jetpack Compose UI with GraphicsLayer 관련


InJetpack Compose, creating stunning and interactive UIs depends on using the right tools effectively. One of these tools is theGraphicsLayer modifier. In this article, we’ll uncover the full potential of GraphicsLayer and demonstrate how it can be used to craft unique, dynamic user experiences.
Imagine a transparent sheet placed on top of your composable. That’s essentially whatGraphicsLayeris. It isolates the rendering instructions of its content, allowing you to apply transformations, effects, and optimizations independently.
To showcase the versatility ofGraphicsLayer, we’ll create a UI that enables real-time transformations such as scaling, rotating, and translating images. Additionally, we’ll explore how to apply color filters and blending modes to achieve striking visual effects. Finally, we’ll demonstrate how easy it is to leverage the power of this modifier to generate a bitmap that can be exported or shared effortlessly.
All the code used in this article is available on GitHub in my newPlayground project (stefanoq21/ComposePlayground).

Transformations with GraphicsLayer
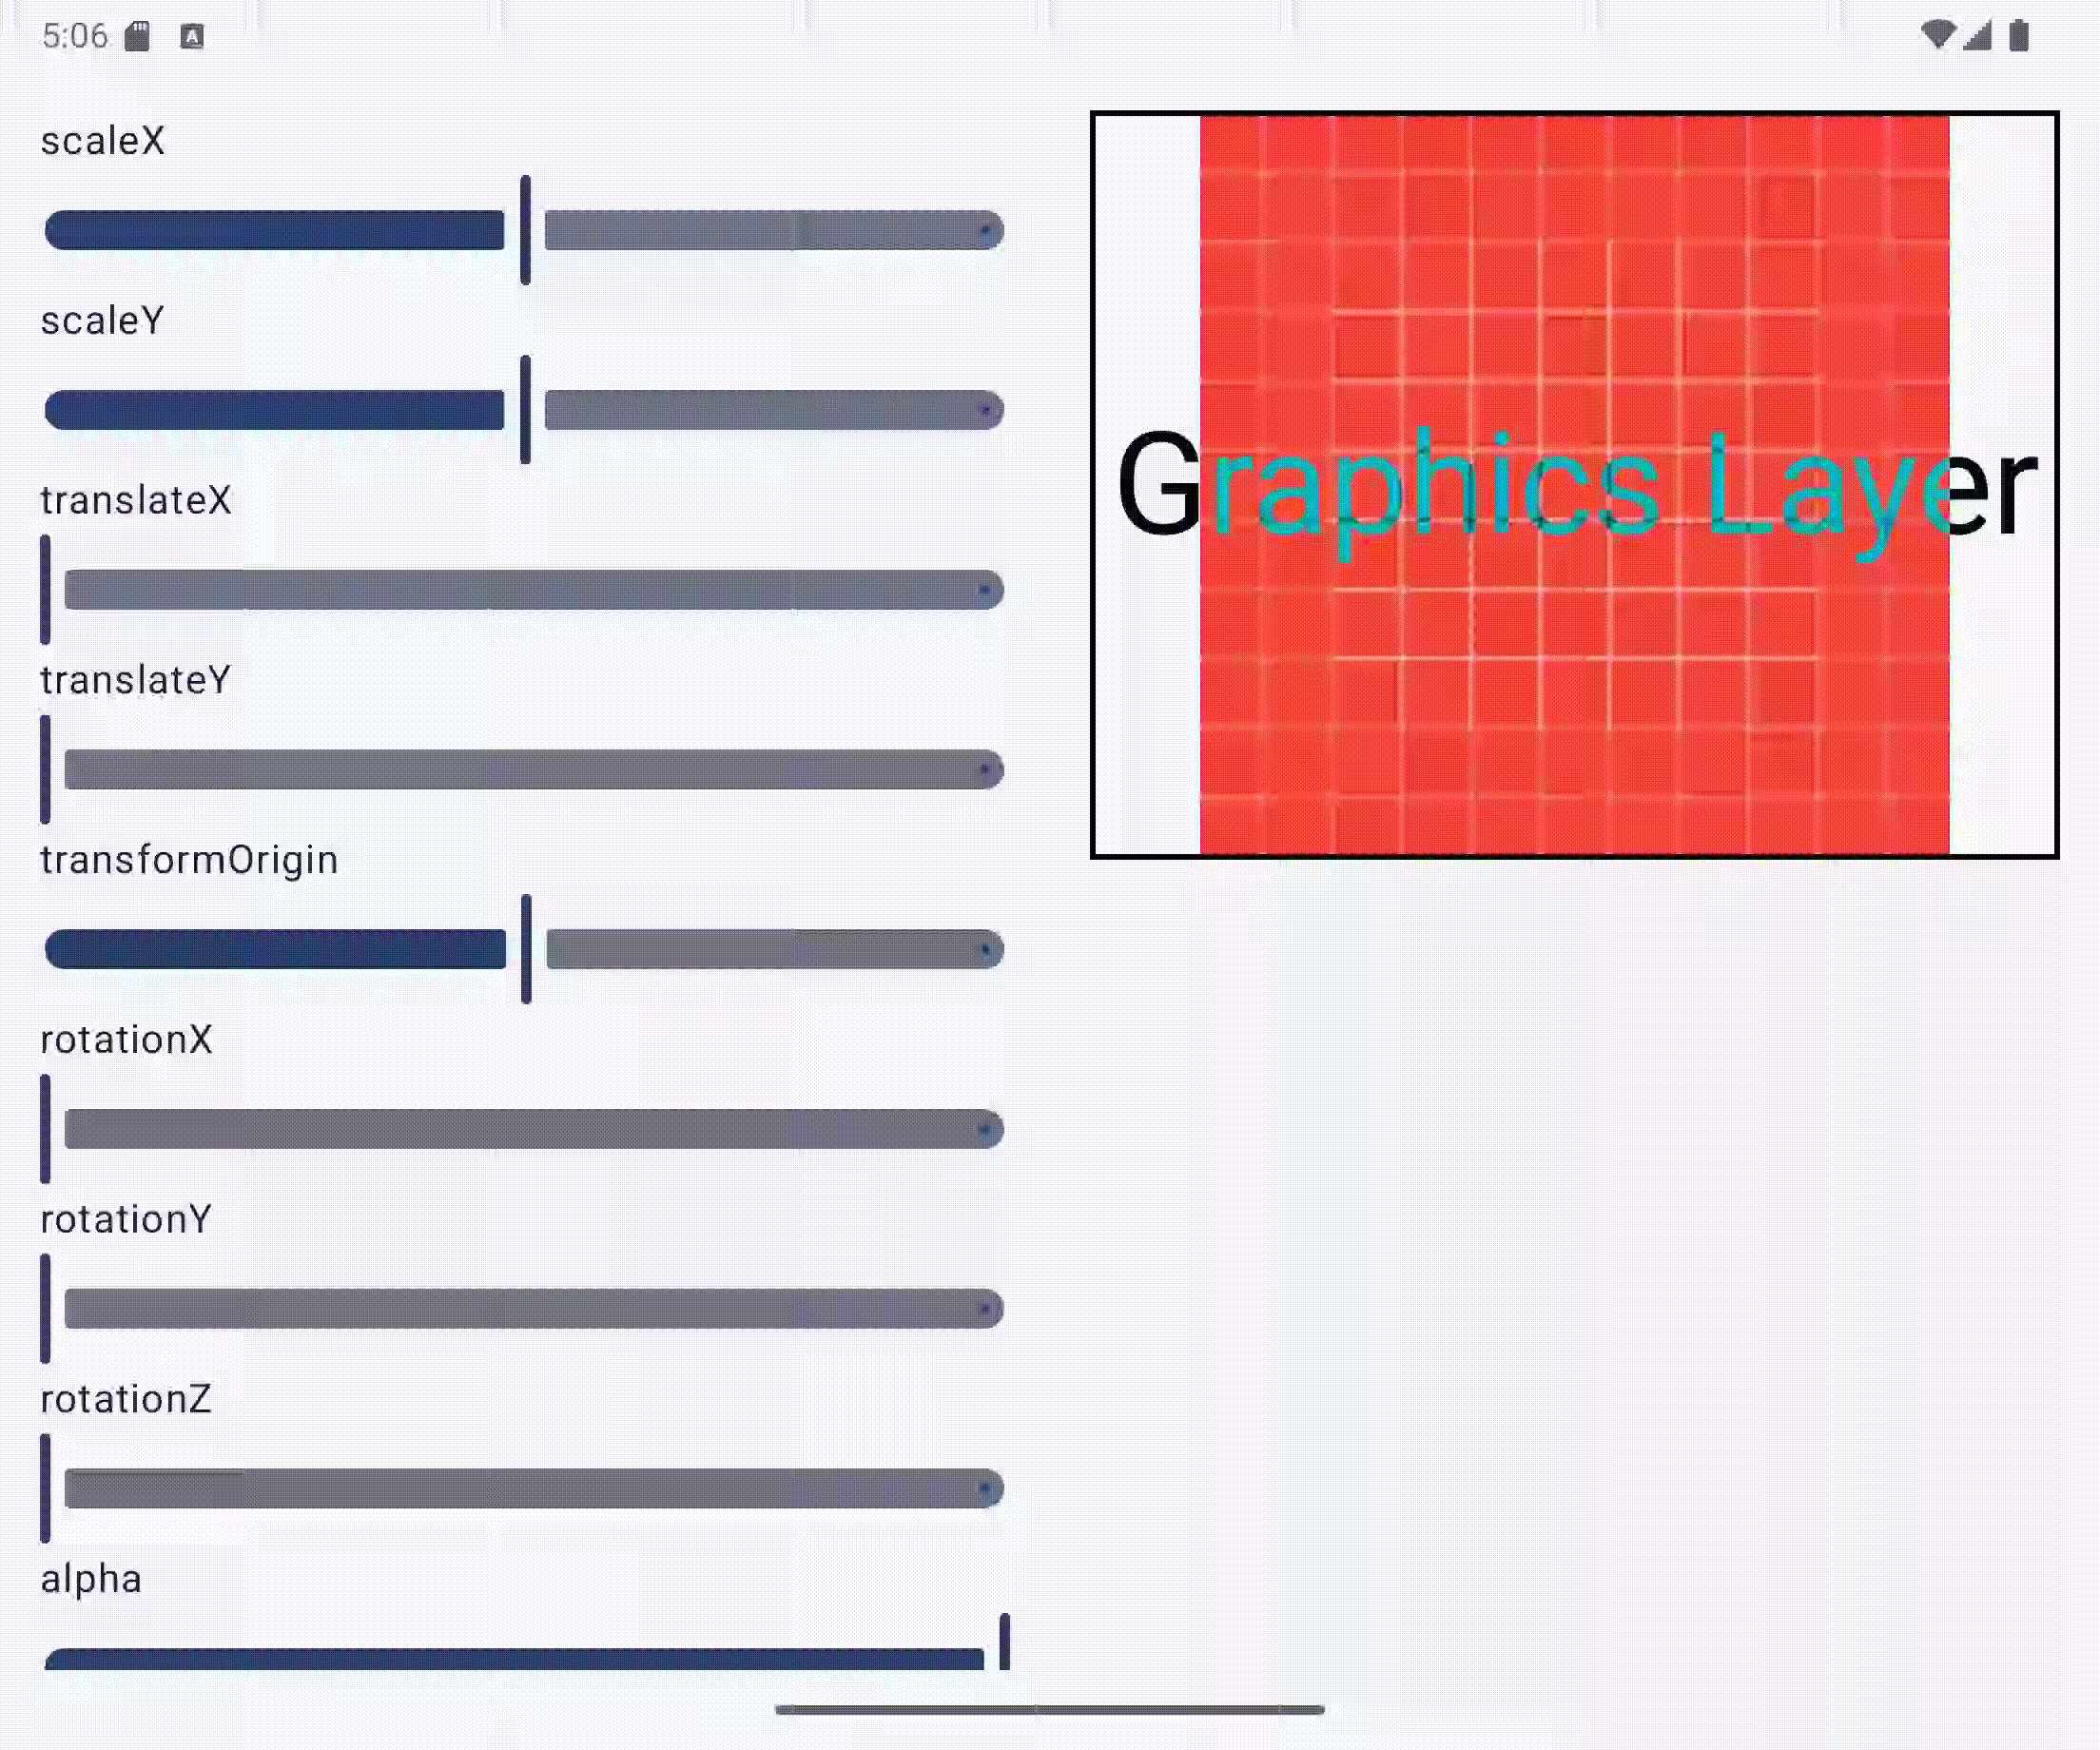
Let’s dive straight into the action! In myCompose Playground project, I’ve created a dedicated screen calledGraphicsLayerScreen to showcase the incredible potential of GraphicsLayer for visual transformations.
The screen utilizes sliders to dynamically control properties such as scaling, rotation, translation, and alpha. These sliders allow us to modify the appearance of the content within the GraphicsLayer in real time by assigning their values to corresponding properties of the GraphicsLayer instance.

Here’s a snippet to give you an idea of how the code works:
Image(
    painter = painterResource(id = R.drawable.test_background_1),
    contentDescription = "",
    modifier = Modifier
        .fillMaxWidth()
        .height(300.dp)
        .graphicsLayer {
            this.scaleX = scaleX
            this.scaleY = scaleY
            this.translationX = (100 * translateX).dp.toPx()
            this.translationY = (100 * translateY).dp.toPx()
            this.transformOrigin = TransformOrigin(transformOrigin, transformOrigin)
            this.rotationX = rotationX
            this.rotationY = rotationY
            this.rotationZ = rotationZ
            this.alpha = alpha
            this.clip = clip
            this.shape = CircleShape
        },
    contentScale = ContentScale.Fit
)
This setup demonstrates how you can leverageGraphicsLayer to manipulate your UI components in a highly customizable and interactive way.
Rendering Effects with GraphicsLayer
As mentioned in the introduction, another powerful capability of GraphicsLayer is its support for color filters and blend modes, allowing for highly customized and visually striking views. These features enable developers to create unique effects that elevate their UI designs.
Recently, theAndroid Developers YouTube channelreleased avideowhere Rebecca Franks introduced two incredibly useful modifiers that make it easier to apply these effects directly to views. Here’s how you can create these custom modifiers to leverage the power of GraphicsLayer:
Blend Mode Modifier
The**blendMode modifier**lets you define how overlapping content blends visually.
private fun Modifier.blendMode(blendMode: BlendMode): Modifier {
    return this.drawWithCache {
        val graphicsLayer = obtainGraphicsLayer()
        graphicsLayer.apply {
            record {
                drawContent()
            }
            this.blendMode = blendMode
        }
        onDrawWithContent {
            drawLayer(graphicsLayer)
        }
    }
}
Color Filter Modifier
The**colorFilter modifier**applies color transformations to the content, enabling effects like grayscale, sepia, or custom tints.
private fun Modifier.colorFilter(colorFilter: ColorFilter): Modifier {
    return this.drawWithCache {
        val graphicsLayer = obtainGraphicsLayer()
        graphicsLayer.apply {
            record {
                drawContent()
            }
            this.colorFilter = colorFilter
        }
        onDrawWithContent {
            drawLayer(graphicsLayer)
        }
    }
}
These modifiers integrate seamlessly withGraphicsLayer to provide advanced rendering effects, giving developers greater flexibility and control over their designs. Whether you want to experiment with blending modes or apply complex color transformations, these tools open up a world of creative possibilities.
If you want to dive deeper into how this code can be integrated and used in your project, you canexplore the examples (stefanoq21/ComposePlayground)I’ve added in myCompose Playground.
Exporting Views as Bitmaps with GraphicsLayer
Last but not least important feature ofGraphicsLayer is its ability to effortlesslyexport a view as a bitmap. Imagine providing your users with the ability to design stunning banners or customized visuals in your app and then share them seamlessly. With GraphicsLayer, this becomes not only possible but also straightforward. Here’s an example of how you can achieve it:
val graphicsLayer = rememberGraphicsLayer()
val coroutineScope = rememberCoroutineScope()

Box(
    modifier = Modifier
        .fillMaxWidth()
        .border(2.dp, Color.Black)
        .drawWithContent {
            graphicsLayer.record {
                this@drawWithContent.drawContent()
            }
            drawLayer(graphicsLayer)
        }
        .clickable {
            coroutineScope.launch {
                val bitmap = graphicsLayer
                    .toImageBitmap()
                    .asAndroidBitmap()
                shareBitmap(bitmap, context)
            }
        }
) {
    // Content here
}
In this snippet, I created aGraphicsLayer object to capture the content as a bitmap using thetoImageBitmap()method. This bitmap can then be processed further, such as being converted into a sharable file. The integration is simple and highlights the versatility ofGraphicsLayer.
It’s impressive how easy it is to enable functionality like this inJetpack Compose!
If you want to explore the complete implementation, including how the bitmap is shared and the additional integrations, you can check out the full code in myGitHub repository (stefanoq21/ComposePlayground).
Conclusion
TheGraphicsLayer ability to transform, animate, and render effects allows developers to push the boundaries of UI design, creating unique and dynamic experiences. Fromscalingandrotatingviews to applyingblend****modes,color filters, and evenexporting content as bitmaps, GraphicsLayer opens up a world of creative possibilities with minimal effort.
In this article, we’ve explored how GraphicsLayer enables real-time transformations, customizable effects, and seamless content sharing. Whether you’re designing visually rich interfaces, adding thin effects, or building entirely new features, this modifier proves invaluable.
Jetpack Composecontinues to empower developers with tools likeGraphicsLayer to create polished and immersive user experiences. I hope this article inspires you to experiment with it in your projects and unlock its full potential.
To dive deeper into the code examples and try them out yourself, check out the full implementation in myGitHub Compose Playground (stefanoq21/ComposePlayground).
If you found this article interesting, feel free to follow me for more insightful content on Android development and Jetpack Compose. I regularly publish new articles on these topics. Don’t hesitate to share your comments or reach out to me onBlueskyorLinkedIn (stefano-natali-q21) for further discussions.
Have a great day, and happy coding!
Info
This article is previously published on proandroiddev