How to render a gradient
How to render a gradient 관련

Updated for Xcode 15
Updated in iOS 16
SwiftUI gives us a variety of gradient options, all of which can be used in a variety of ways.
If you're targeting iOS 16 or later, you can get a beautifully simple linear gradient by appending .gradient to whatever color you're using:
Rectangle().fill(.blue.gradient)
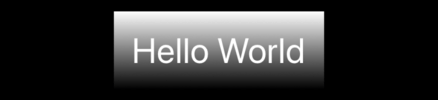
For more advanced gradients, or to support iOS versions prior to 16, you can use one of SwiftUI's built in gradient types to get exact control. For example, you could render a text view using a white to black linear gradient like this:
Text("Hello World")
    .padding()
    .foregroundStyle(.white)
    .font(.largeTitle)
    .background(
        LinearGradient(gradient: Gradient(colors: [.white, .black]), startPoint: .top, endPoint: .bottom)
    )
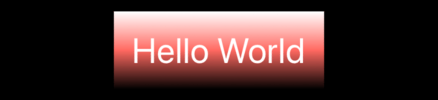
The colors are specified as an array and you can have as many as you want - by default SwiftUI will space them equally. So, we could go from white to red to black like this:
Text("Hello World")
    .padding()
    .foregroundStyle(.white)
    .font(.largeTitle)
    .background(
        LinearGradient(gradient: Gradient(colors: [.white, .red, .black]), startPoint: .top, endPoint: .bottom)
    )
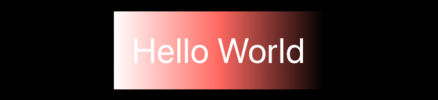
To make a horizontal gradient rather than a vertical one, use .leading and .trailing for your start and end points:
Text("Hello World")
    .padding()
    .foregroundStyle(.white)
    .font(.largeTitle)
    .background(
        LinearGradient(gradient: Gradient(colors: [.white, .red, .black]), startPoint: .leading, endPoint: .trailing)
    )
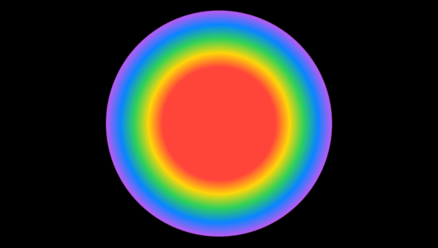
For alternative gradient styles, try RadialGradient or AngularGradient. As an example, this creates a radial gradient through a variety of colors, starting from the center of the circle and going out to the edges:
Circle()
    .fill(
        RadialGradient(gradient: Gradient(colors: [.red, .yellow, .green, .blue, .purple]), center: .center, startRadius: 50, endRadius: 100)
    )
    .frame(width: 200, height: 200)
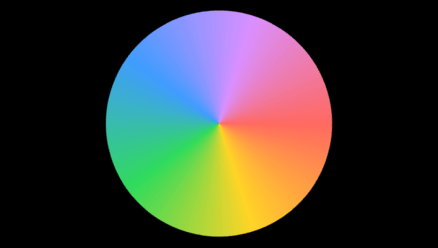
And this creates an angular gradient (often called a conic gradient), cycling through various colors then returning to the beginning:
Circle()
    .fill(
        AngularGradient(gradient: Gradient(colors: [.red, .yellow, .green, .blue, .purple, .red]), center: .center)
    )
    .frame(width: 200, height: 200)
Because all three gradient types conform to the ShapeStyle protocol, you can use them for backgrounds, fills, and strokes. For example, this uses our rainbow conical gradient as a thick inner stroke for a circle:
Circle()
    .strokeBorder(
        AngularGradient(gradient: Gradient(colors: [.red, .yellow, .green, .blue, .purple, .red]), center: .center, startAngle: .zero, endAngle: .degrees(360)),
        lineWidth: 50
    )
    .frame(width: 200, height: 200)
Similar solutions…