Using the Markdown Editor
Using the Markdown Editor 관련

When you write a program that’s intended for others to use, it’s important that you document it so that your users understand it and other developers can maintain it. Documentation also serves as a future reference to allow you to remember how the program works.
Although you can write documentation using a variety of tools, a common one is the Markdown language. Markdown is a user-friendly markup language that allows you to create editable formatted documents. JupyterLab provides a Markdown editor and viewer for you. However, unlike most others, JupyterLab’s version also allows you to run any code snippets that you place within your Markdown files.
It’s time for you to get the heads-up on Markdown.
Creating and Previewing a Markdown Document
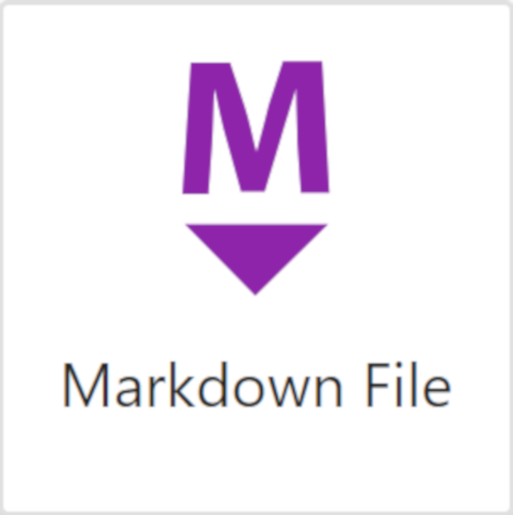
To create a new Markdown file, make sure the Launcher page is displayed. If it’s not, then click any of the + symbols next to the tabs of any existing open content, and a new Launcher will appear. Then click the purple Markdown File icon:
You’ll now be looking at a blank Markdown file. Right-click its tab and rename it Handling Exceptions.md. Now it’s time to add content.
In this example, you’ll provide a short note that explains how Python can handle exceptions. This will allow you to practice some basic formatting. In addition, you’ll add some code and run it from within the Markdown file.
While Markdown isn’t terribly complicated, it’s still helpful to see what the formatted output will look like. Jupyter allows you to do this as you type the Markdown by displaying the Markdown preview. The preview automatically synchronizes with your Markdown file and lets you see what the final product will look like as you write it.
To open a Markdown preview, right-click on the blank Markdown file and choose Show Markdown Preview:
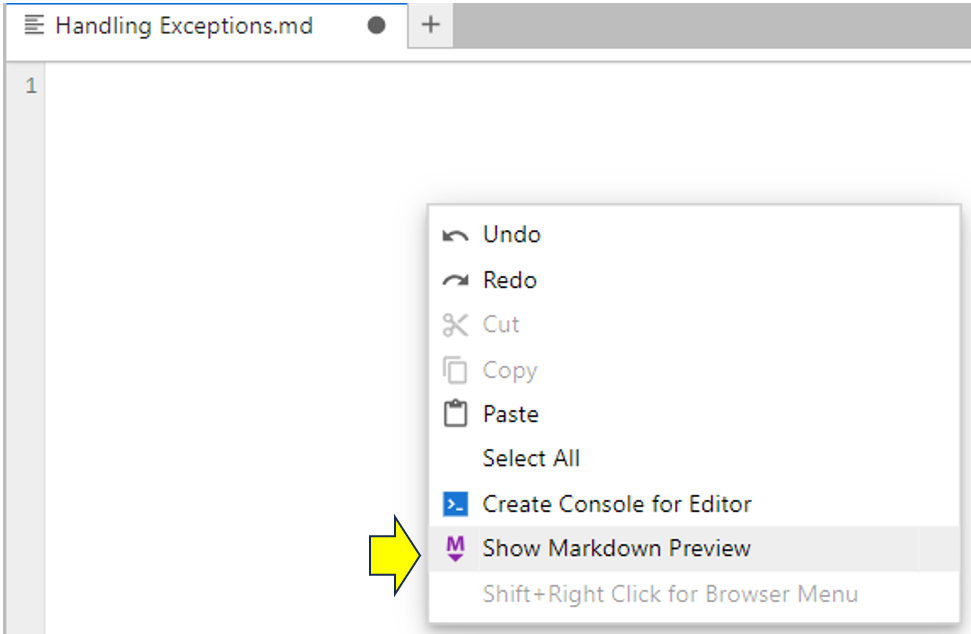
As you can see, a second preview window appears to the right of the Markdown file. It’ll be blank because you haven’t added any content to the Markdown file. You’ll fix this now and see another example of JupyterLab’s synchronization abilities. You decide to add the following to your Markdown file:
# Dealing With Exceptions

---

## What is an Exception?

An **Exception** gets **raised** when code encounters an occasional,
but not unexpected, error. Although exceptions are an unavoidable
part of software, because you are aware that exceptions may occur,
you should write code to deal with or **handle** them.
Unhandled exceptions will cause a program to crash.

---

## How Do You Handle Them?

You implement [*exception handling*](https://realpython.com/python-exceptions/)
to handle exceptions. In its most basic form, this provides both a *try*
and one or more *except* blocks:

* The *try* block contains the code you wish to monitor for exceptions.
Any exceptions raised within *try* will be eligible for handling.

* One or more *except* blocks are where you define code that will run
when exceptions occur and handle them. This is how you stop the exception
from crashing the code.

---

## What Are Some Common Exceptions

The Python language supports more than sixty common exceptions.
Two of the more common are:

| Exception             | Cause                                       |
|:----------------------|:--------------------------------------------|
| **ZeroDivisionError** | Raised when you attempt to divide by zero   |
| **ValueError**        | Raised when you pass an inappropriate value |

---

## Example

```python
try:
    first_number = float(input("Enter your first number"))
    second_number = float(input("Enter your second number"))
    print(f"{first_number} / {second_number} = {first_number / second_number}")
except ZeroDivisionError:
    print("You can't divide by zero")
except ValueError:
    print("You must supply a number")
```
Don’t worry if some of these characters look odd to you. You’ll learn what they mean below. In the meantime, if you’ve typed everything in correctly, then your Markdown and preview will look like this:
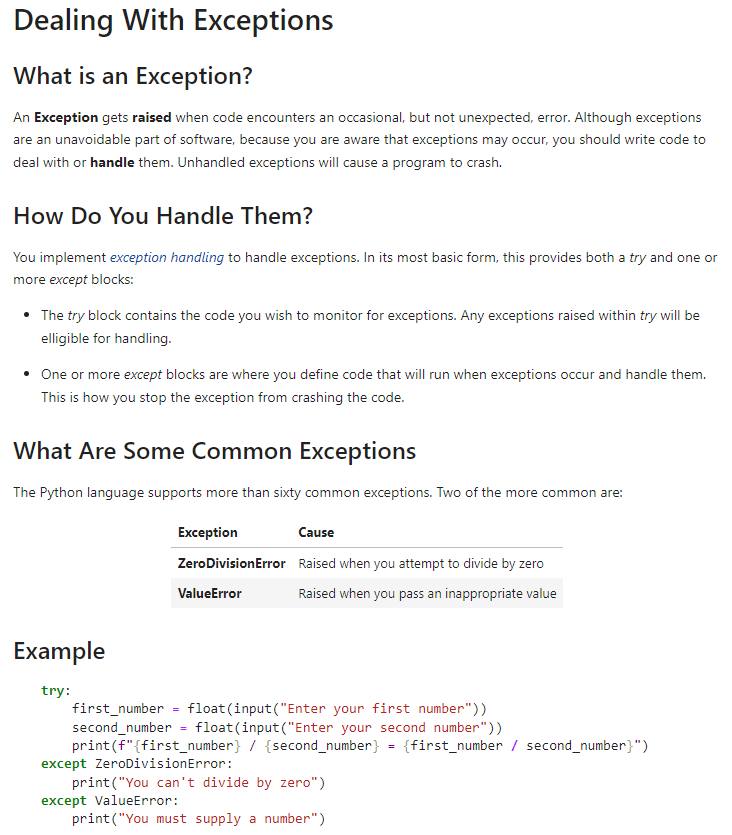
If you notice any differences between your output and what’s shown above, then go back and check your Markdown source carefully.
Note
The Markdown preview that you generated above is actually a view of the original Markdown file. If you change your Markdown file, then the Markdown preview will also change.
Here’s how you used Markdown symbols:
- To create headings, you used one or more
#characters. A single#produces a heading, while##produces a subheading. - To make your text bold, you surrounded it with
**. To italicize your text, you surrounded it with*. - To create hyperlinks, you enclosed the link text in
[]and the URL in(). In your Markdown, clicking the exception handling link text will take your readers to a tutorial on the subject. - To create the table, you separated its data with
|and used:-to specify left alignment. - To define a code block, you wrote its code between triple backticks (```) followed by the word
python, and you put another set of triple backticks at the end of the code block. This not only formats it neatly but also allows you to run the code by clicking inside the box.
As you can see, you can quickly create a neatly formatted document using a few common pieces of Markdown syntax. These will most likely meet most of your needs, but more involved formatting options are available if you need them. However, writing Markdown isn’t the only thing you can do with your Markdown files in JupyterLab.
Running Code Embedded Within a Markdown File
Although basic Markdown is good for providing information about program code, JupyterLab goes a step further and allows you to run the code embedded within it. This is a great way of ensuring that your code does what you expect it to.
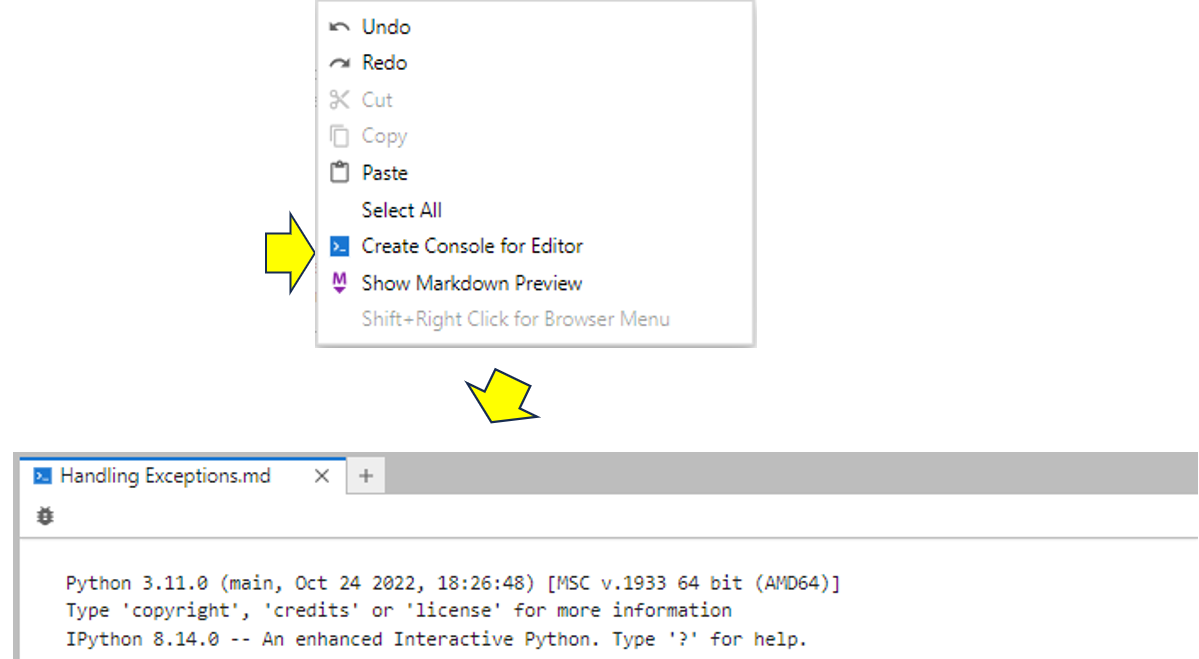
If you want to run your code from a code block, then you need to create a console for it to run in. To do this, right-click anywhere in your Markdown file and choose Create Console for Editor from the menu. You must then choose a kernel. Unless you need to access data stored in an existing kernel, selecting Python3 (ipykernel) will link in the new kernel to manage the running of the code in the new console window that has appeared:
Now that you’ve created a console and linked a kernel to your Markdown file, you can run the code. To actually run the code, you put your cursor anywhere inside the Python block—for example, to the left of the first except keyword—and then tap Shift+Enter to run it:
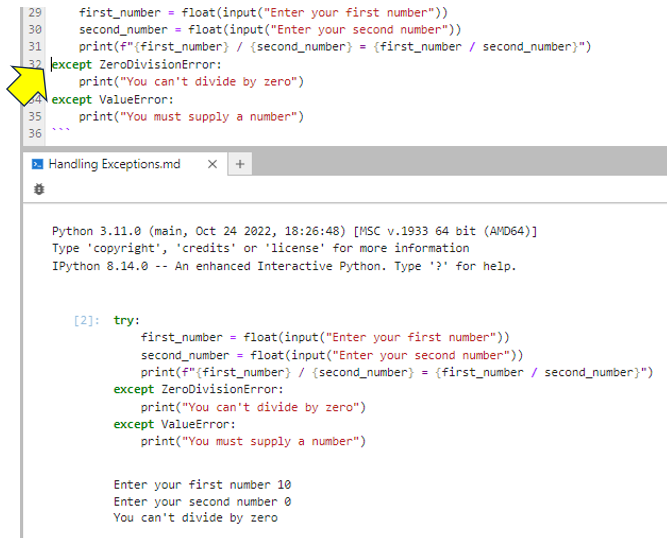
As you can see, the code gets passed to the console and runs. In this test case, the zero that you entered as the second input caused your code to raise and handle a ZeroDivisionError. Feel free to run the cell once more, but this time, enter "ten" as the first input and see how your code reacts.
One of the other cool things that JupyterLab allows you to do is to run small snippets of your code. This can be useful if you’re analyzing a specific part of it. To do this, select the lines of code that you want to run and tap Shift+Enter to run that portion:
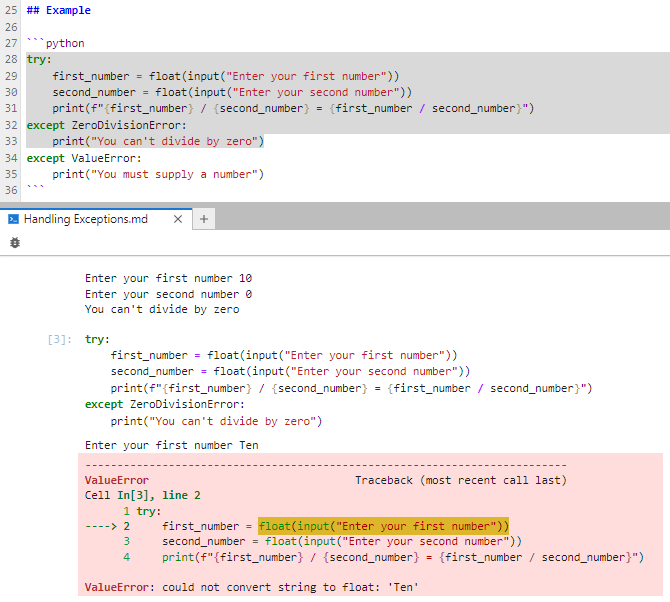
This time, you only selected lines 28 through 33. When you tapped Shift+Enter, only those lines ran. When you entered an invalid value for one of the numbers, a ValueError got raised but remained unhandled because you didn’t select the handler for it in lines 34 and 35. Although this is a useful feature, be careful when selecting small parts of your code. You need to make sure that you select enough to form a complete program. For example, selecting lines 32 and 33 alone will cause a crash because the selected code is a syntax error by itself.
Note
You can also run embedded code from within plain text files and .py files by linking a console to them. Isn’t that a great time-saver?
As you can see, JupyterLab allows you to write Markdown files that contain code that you can document and run. So not only can you view your Markdown the way you want your readers to see it, but by attaching a console to your Markdown file, you can test your code as well. That means you can avoid creating Markdown documents with incorrect code.
Using a Table of Contents With a Markdown File
As a convenience, if you have a long Markdown file, you can jump to specific sections within it by generating a table of contents. To do this, click the Table of Contents icon as shown:
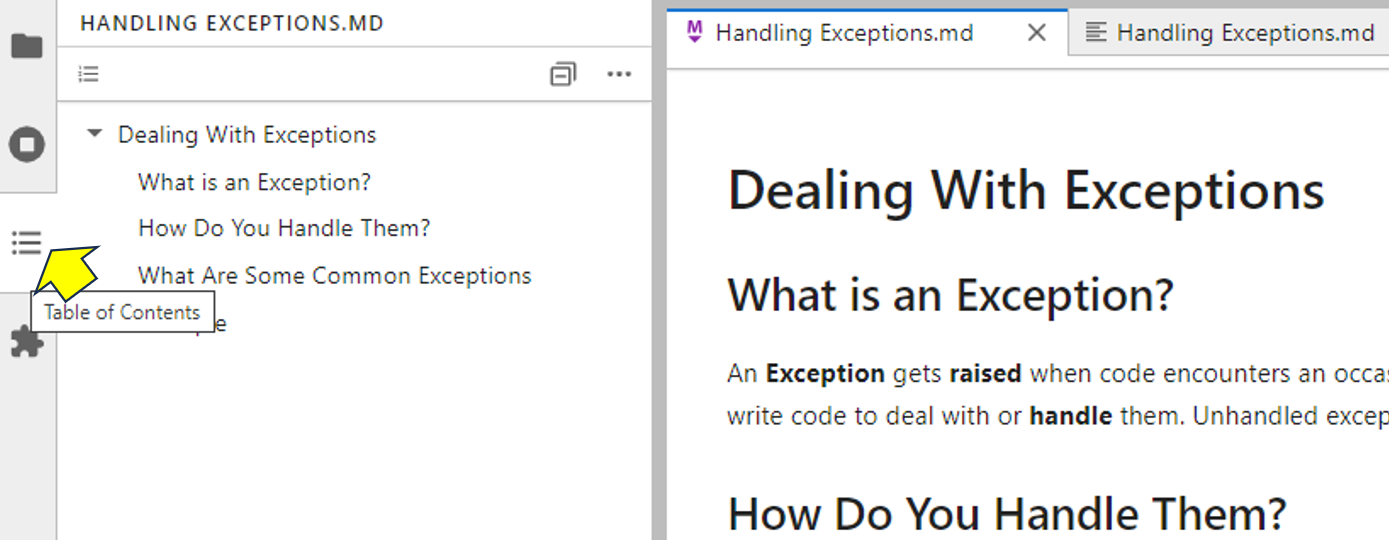
If you select the Markdown file preview then click any of the table of contents entries, then your Markdown preview file will jump to that heading. Similarly, if you select the Markdown file first, then it’ll jump to the position that you select from the table of contents.