
How to create a date picker and read values from it
How to create a date picker and read values from it 관련

Updated for Xcode 15
Updated in iOS 15
SwiftUI's DatePicker view is analogous to UIDatePicker, and comes with a variety options for controlling how it looks and works. Like all controls that store values, it does need to be bound to some sort of state in your app.
For example, this creates a date picker bound to a birthDate property, allowing users to choose any date up before now, then displays the value of the date picker as it's set:
struct ContentView: View {
    @State private var birthDate = Date.now

    var body: some View {
        VStack {
            DatePicker(selection: $birthDate, in: ...Date.now, displayedComponents: .date) {
                Text("Select a date")
            }

            Text("Date is \(birthDate.formatted(date: .long, time: .omitted))")
        }
    }
}

Important
If you're using Xcode 12 you should create and use your own local date formatter, like this:
struct ContentView: View {
    let dateFormatter: DateFormatter = {
        let formatter = DateFormatter()
        formatter.dateStyle = .long
        return formatter
    }()

    @State private var birthDate = Date.now

    var body: some View {
        VStack {
            DatePicker(selection: $birthDate, in: ...Date.now, displayedComponents: .date) {
                Text("Select a date")
            }

            Text("Date is \(birthDate, formatter: dateFormatter)")
        }
    }
}
You can see I've set displayedComponents to .date, but you could also use .hourAndMinute to get time data instead.
Using in: ...Date.now specifies the date range as being anything up to and including the current date, but nothing after. You could do the opposite – i.e., allow dates starting from now onwards – by using in: Date.now..., but you can also use precise ranges if that's what you want.
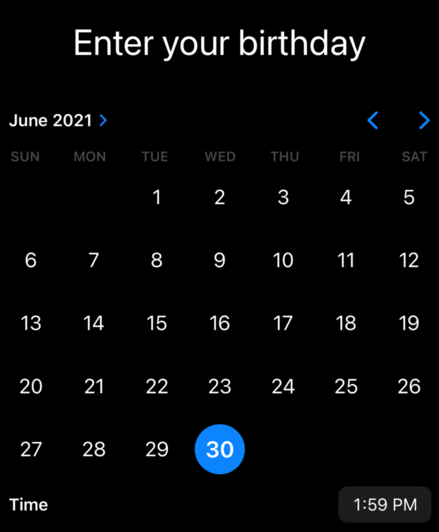
From iOS 14 onwards, you can use the new GraphicalDatePickerStyle() to get a more advanced date picker, that shows a calendar plus space to enter a precise time:
struct ContentView: View {
    @State private var date = Date.now

    var body: some View {
        VStack {
            Text("Enter your birthday")
                .font(.largeTitle)
            DatePicker("Enter your birthday", selection: $date)
                .datePickerStyle(GraphicalDatePickerStyle())
                .frame(maxHeight: 400)
        }
    }
}
Similar solutions…
