
Automated Tools for Maintaining Clean Code ⚓
Automated Tools for Maintaining Clean Code ⚓ 관련

Tools and automation techniques can be really helpful in writing clean code. If you’re not using the right tools and automating things to save yourself time, you’re missing out.
You think you can "eyeball" your way through code quality? Guess again. Without automation, this is what happens:
- 👎 You miss obvious mistakes because you're "too busy."
- 🤕 Your code looks different in every file, making collaboration a headache.
- 🪦 Deployment breaks because you skipped a critical test.
Successful developers use the right tools to automate code and get things done. Here are four strategies for maintaining clean code using modern tools.
1️⃣ Static Analysis
Static analysis is actually a code inspector that reads through your code and points out potential issues early on. The best part? It works before runtime, catching errors that could otherwise lead to crashes, downtime, or embarrassing bugs.
How does it work?
- Syntax checking: It looks at your code to analyze everything written in the correct syntax. If you misspell a variable or forget a closing bracket, it’ll call you out instantly.
- Code quality rules: Tools like ESLint enforce rules like consistent indentation, avoiding unused variables, and sticking to best practices.
- Error prevention: It identifies logic errors, such as using variables that haven’t been defined, or making comparisons that don’t make sense.
Here’s how static analysis works in action:
🚨 Before static analysis:
let sum = (a, b) => { return a + b; }
console.log(sume(2, 3)); // Typo, unnoticed until runtime
Problem: The typo in
sumewill only cause an error when the code runs, and that could lead to frustrating debugging sessions or worse — breaking the app in production.
🚑 After static analysis (using ESLint):
codeError: 'sume' is not defined.
Solution: ESLint immediately flags the typo before you even run the code. The error is caught early, saving you time and headaches.
2️⃣ Automated Code Formatting
Before Formatting:
function calculate ( x , y ){ return x+ y;}
console.log( calculate (2,3 ) )
Problem: Inconsistent spacing and formatting make the code harder to read.
After using Prettier:
function calculate(x, y) {
  return x + y;
}
console.log(calculate(2, 3));
Solution: Clean, consistent, and professional formatting is applied automatically. No more nitpicking over spaces or alignment.
Pretty basic stuff though. I covered this in case you write code in notepad or something where IDE is not provided (for example, a job interview).
3️⃣ Continuous Integration (CI) Testing
CI testing make sure every new change to your code is verified automatically. It’s like a safety net that catches bugs introduced during development. CI tools run your tests every time you push code, so nothing breaks after deployment.
How Does CI Testing Work?
- Triggers on change: Each time code is committed, the CI tool (like GitHub Actions, Jenkins) runs automated tests.
- Feedback: It gives you instant feedback if something fails.
- Prevents broken code: Commits only clean, and the working code gets merged into the main branch.
4️⃣ CI/CD pipelines
We also use CI/CD pipelines as a continuous process that includes code building, testing, and deployment, while CI testing is a part of that process that focuses on automating the testing of code changes.
Differece between CI/CD pipelines vs CI testing:
- CI/CD pipelines: A CI/CD pipeline combines code building, testing, and deployment into a single process. This process make sure that all changes to the main branch code are releasable to production. CI/CD pipelines can reduce deployment time, decrease costs, and improve team collaboration.
- CI testing: CI testing is the process of automatically testing code changes that are integrated into a central repository. CI testing focuses on making sure the codebase is stable and that integration issues are resolved. CI testing help developer build software that is stable, bug-free, and meets functional requirements
Note
This is what CI testing CI/CD pipelines concepts are really about. Not as complex as it seems. So let me elaborate more on CI testing with GitHub Actions, as we usually run tests through automated tools nowadays.
⚡ Continuous Integration (CI) Testing with GitHub Actions
As I said earlier, CI tools run automated tests every time you push code or open a pull request. This guarantees that only working, bug-free code gets merged into the main branch.
How to Set Up CI Testing with GitHub Actions
Step 1: Create Your Repository
Set up a GitHub repository for your project. Then, push your code to GitHub using the following commands:
git init
git add .
git commit -m "Initial commit for CI Testing"
git branch -M main
git remote add origin https://github.com/codewithshahan/codewithshahan.git
git push -u origin main
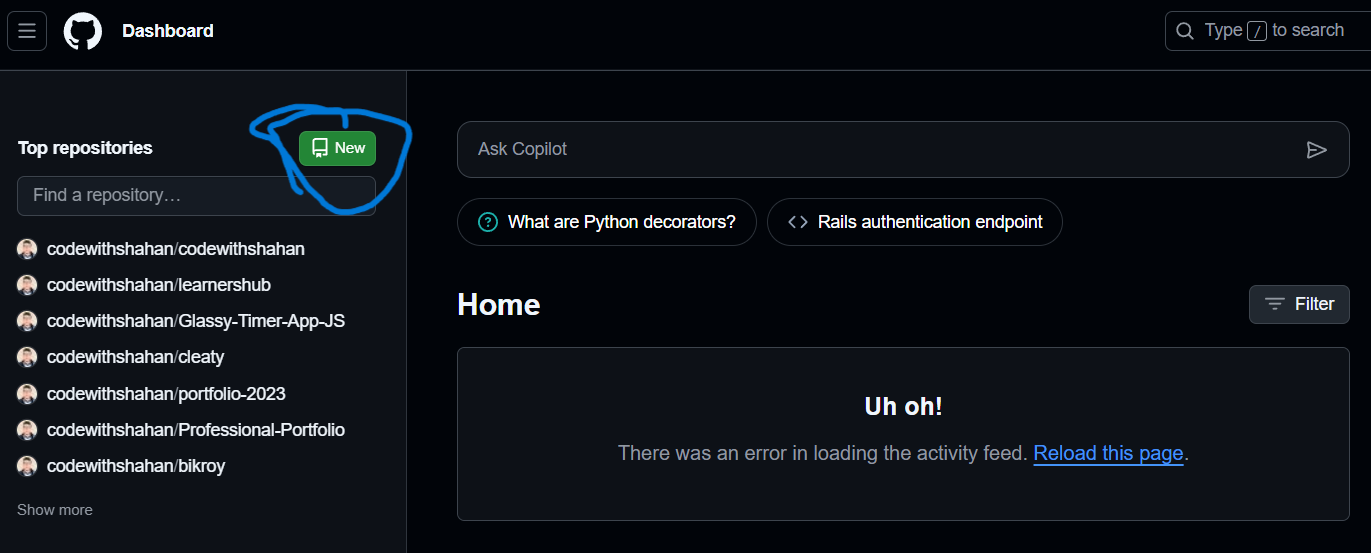
Or you can create a new repo from your GitHub account without using the command. Just login to your GItHub account and visit dashboard. Here you will find a “New” button to create a brand new repo:
Step 2: Add a GitHub Actions Workflow
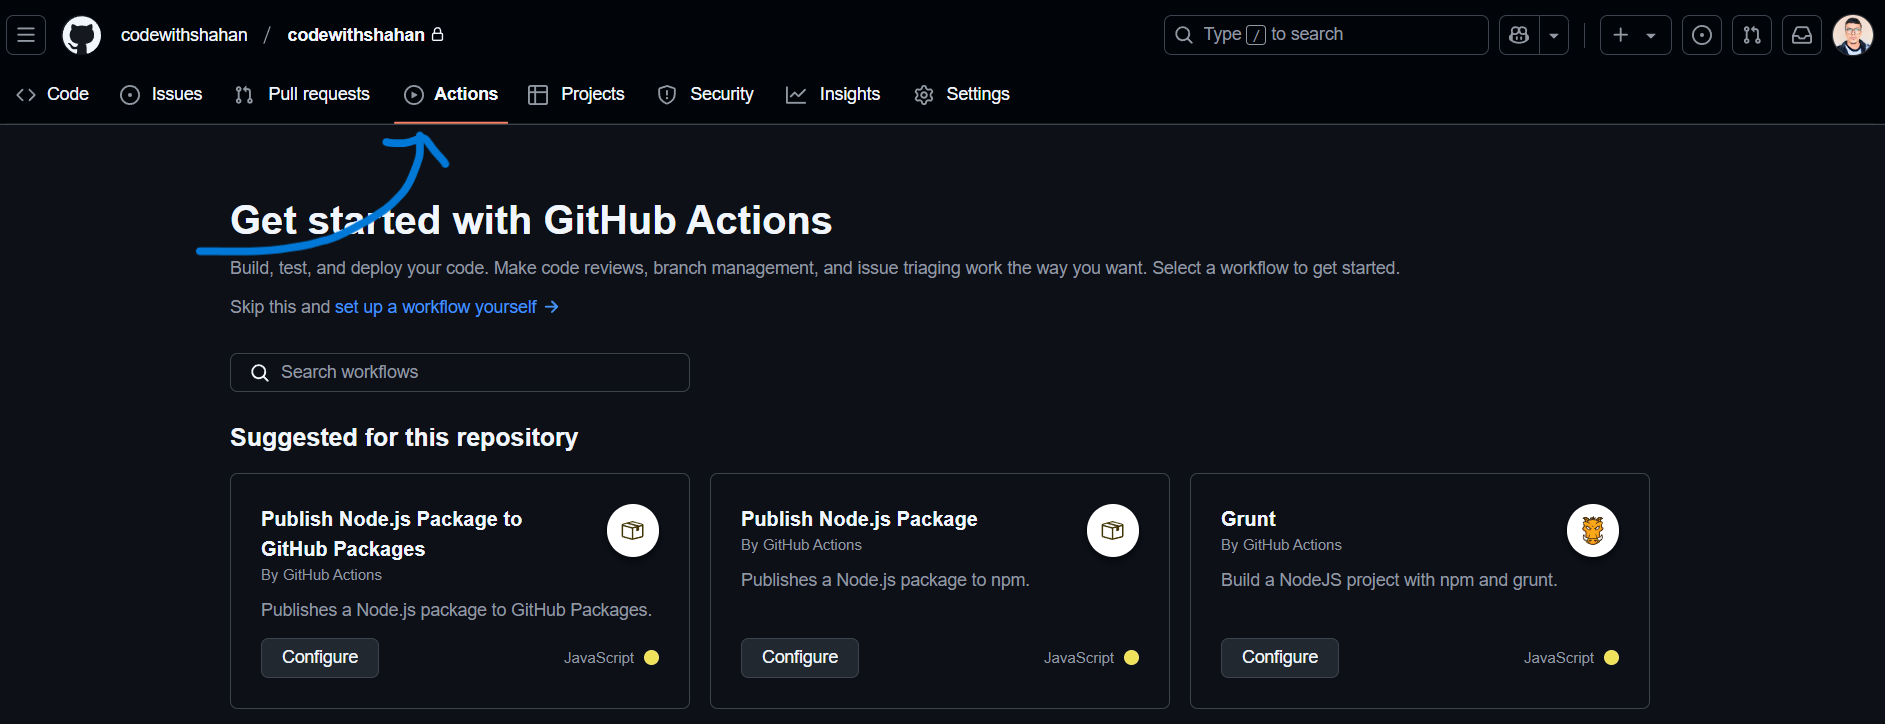
Navigate to your repository’s Actions tab. To do this, first, you have to visit your repo on Github (you will find the link after creating your repo). In this case, I created a new repo called “codewithshahan”. Here, look for the Actions tab on the right side of the navigation bar.
After navigating the Actions tab, scroll down a little and you will find the continuous integration section:
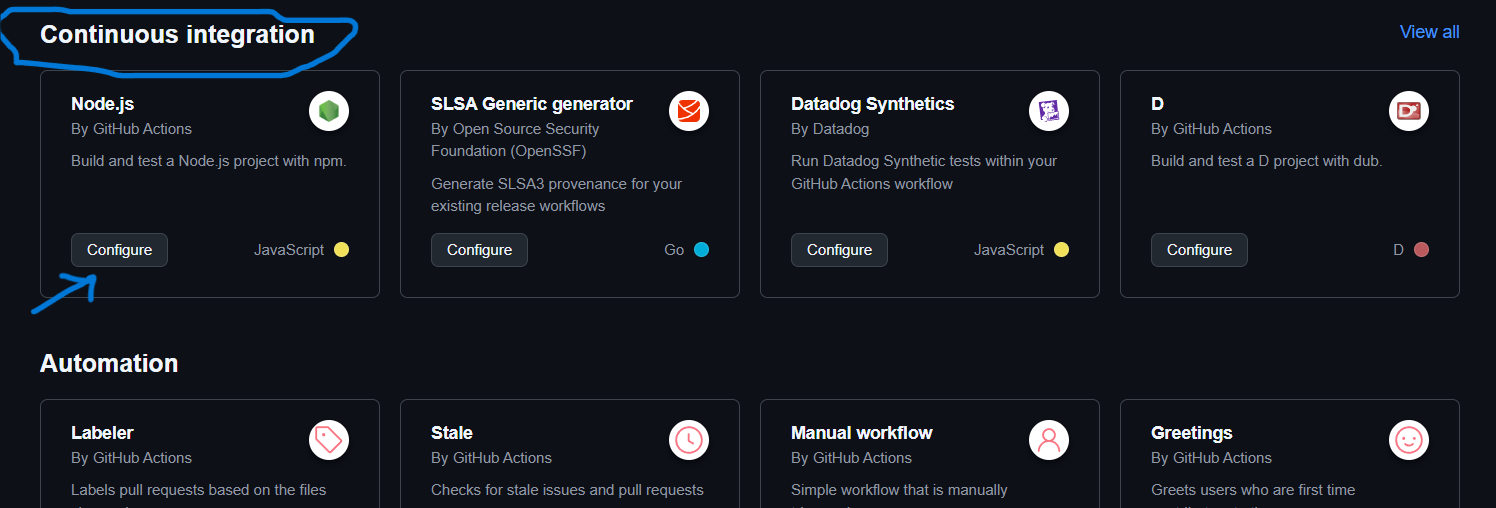
Choose a setup workflow yourself. I will use Node.js for this project.
After clicking the configure button, a node.js.yml file will be created automatically, and you can adjust the code depending on your goals.
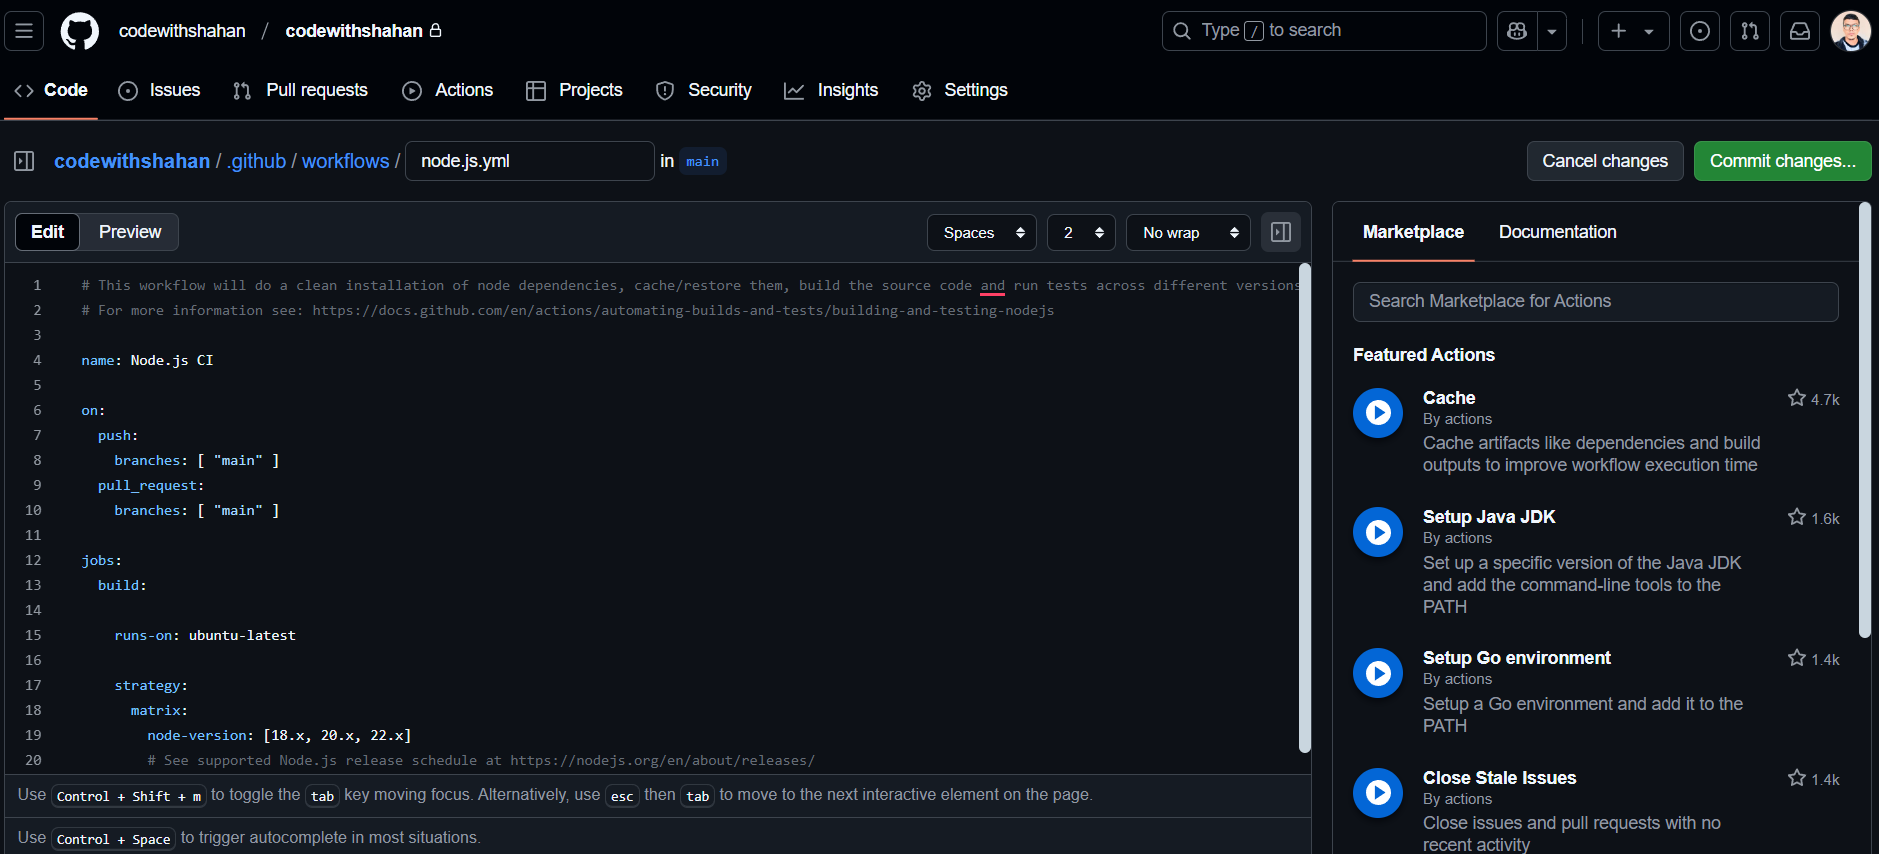
I won’t go into detail about how should modify your .yml file. It depends on your project goals and personal preference. Also, it is a whole different broader topic and as this article has already become quite long, so I’ll explain it in a future article. For now, just stick with this foundational knowledge.
This CI Testing workflow is best for modern application development. Your app remains stable while incorporating key features including testing (e,g. Dark Mode), Building and deploying applications directly within your GitHub repository. This way, you can push your code confidently, knowing your code is always clean and ready for production.