How to create a picker and read values from it
About 2 min
How to create a picker and read values from it 관련
SwiftUI by Example
Back to Home
How to create a picker and read values from it | SwiftUI by Example
How to create a picker and read values from it
Updated for Xcode 15
SwiftUI's Picker view manages to combine UIPickerView, UISegmentedControl, and UITableView in one, while also adapting to other styles on other operating systems. The great thing is that we really don't have to care how it works - SwiftUI does a good job of adapting itself automatically to its environment.
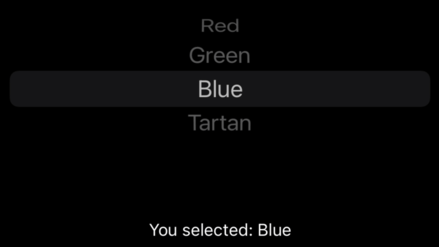
As with most other controls, you must attach your picker to some sort of state that will track the picker's selection. For example, this creates a colors array and an integer that stores which color was selected, then uses that with a picker and a text view so you can see values being read back:
struct ContentView: View {
    var colors = ["Red", "Green", "Blue", "Tartan"]
    @State private var selectedColor = "Red"

    var body: some View {
        VStack {
            Picker("Please choose a color", selection: $selectedColor) {
                ForEach(colors, id: \.self) {
                    Text($0)
                }
            }
            Text("You selected: \(selectedColor)")
        }
    }
}

Tips
Even though the label text isn't visible, it's still useful because VoiceOver will use it when reading the screen.
Similar solutions…
How to create a date picker and read values from it | SwiftUI by Example
How to create a date picker and read values from it
How to hide the label of a Picker, Stepper, Toggle, and more using labelsHidden() | SwiftUI by Example
How to hide the label of a Picker, Stepper, Toggle, and more using labelsHidden()
How to fix a Form Picker or a NavigationLink that isn't tappable | SwiftUI by Example
How to fix a Form Picker or a NavigationLink that isn't tappable
How to create a segmented control and read values from it | SwiftUI by Example
How to create a segmented control and read values from it
How to create a slider and read values from it | SwiftUI by Example
How to create a slider and read values from it