
How to add in-app purchases in SwiftUI
How to add in-app purchases in SwiftUI 관련

Updated for Xcode 15
New in iOS 17
If you import StoreKit, you can use StoreView, SubscriptionStoreView, and ProductView to present in-app purchases to your users, including handling the process of starting the purchase. This still leaves a fair amount of StoreKit work for you to do, including processing the actual purchase transactions and so on, but I wouldn’t rule out Apple requiring apps to use this standardized interface in future releases.
Important
You must add import StoreKit to your Swift file in order for any of this code to work.
At its simplest, just add a ProductView with a single product identifier, like this:
// just show a single product
ProductView(id: "com.hackingwithswift.plus.subscription")

However, in practice you’re likely to want to configure how the product looks, such as adjusting the layout or adding other styling:
VStack {
    Text("Welcome to my store")
        .font(.title)

    ProductView(id: "com.hackingwithswift.plus.subscription") {
        Image(systemName: "crown")
    }
    .productViewStyle(.compact)
    .padding()
}

If you want to display multiple products at the same time, you can either arrange groups of ProductView instances however you want in a custom UI, or switch over to a StoreView with the list of product IDs you want to display, like this:
VStack {
    Text("Hacking with Swift+")
        .font(.title)

    StoreView(ids: ["com.hackingwithswift.plus.subscription", "com.hackingwithswift.plus.lifetime"])
}
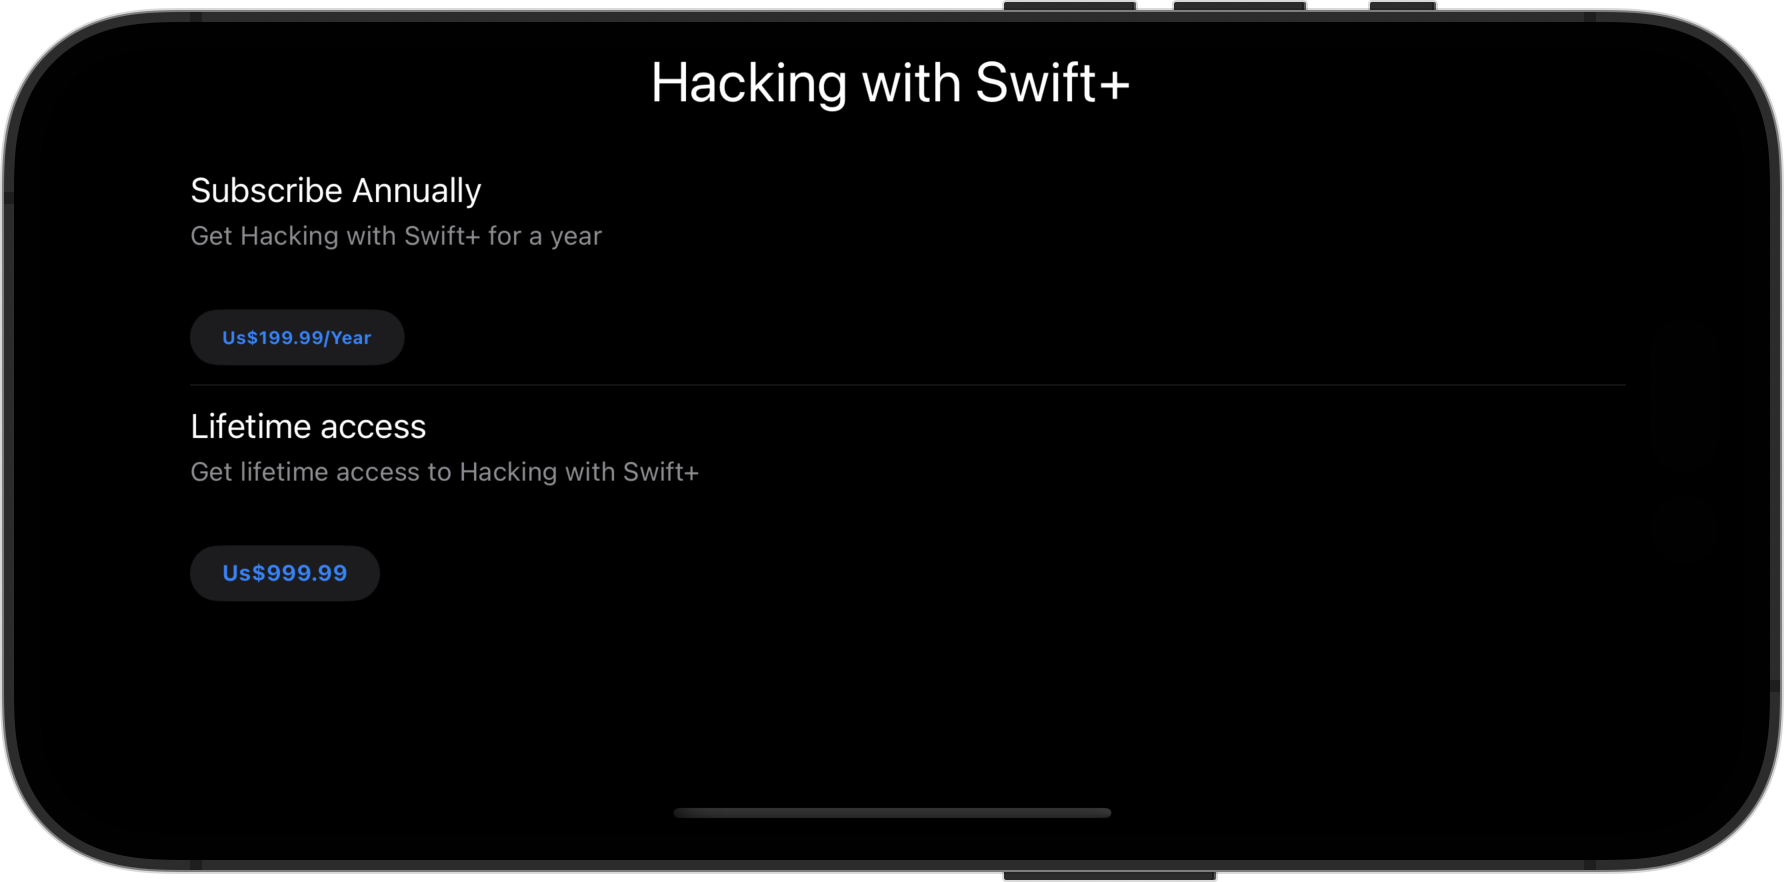
Again, that looks pretty vanilla by default, but it’s configurable with a range of modifiers. For example, you can configure the system to show a “Restore Missing Purchases” button like this:
VStack {
    Text("Hacking with Swift+")
        .font(.title)

    StoreView(ids: ["com.hackingwithswift.plus.subscription", "com.hackingwithswift.plus.lifetime"])
        .storeButton(.visible, for: .restorePurchases)
}
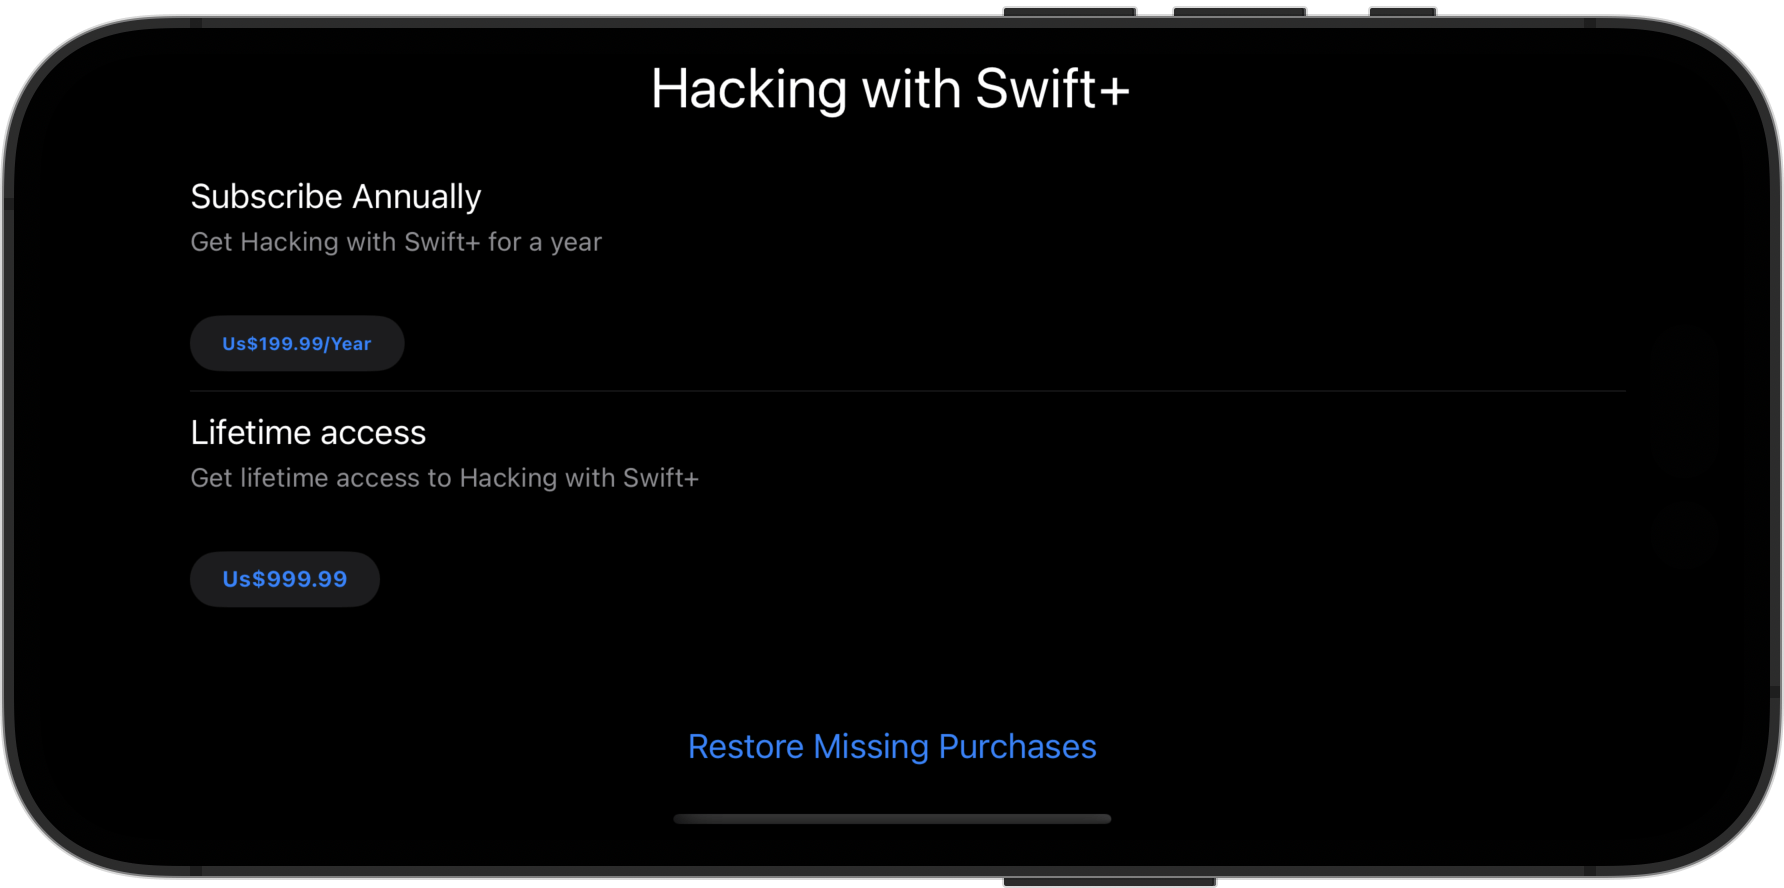
Remember, this shows the UI but doesn’t automatically unlock any content when purchases are made or restored – it’s important you also listen for transaction updates.
Tips
ProductView, StoreView, and SubscriptionStoreView automatically check Screen Time to make sure your user has in-app purchases enabled.
The default StoreView works great for in-app purchases, but I think the real power here is SubscriptionStoreView, which does the same thing for in-app subscriptions. This is where most developers trip up in trying to get an experience that App Review is happy with, making sure to include clear terms and conditions.
Again, at its simplest it can just be a matter of getting it some product IDs to show, but this too lets you customize which buttons are shown. For example, we could add buttons to restore purchases or redeem a promo code:
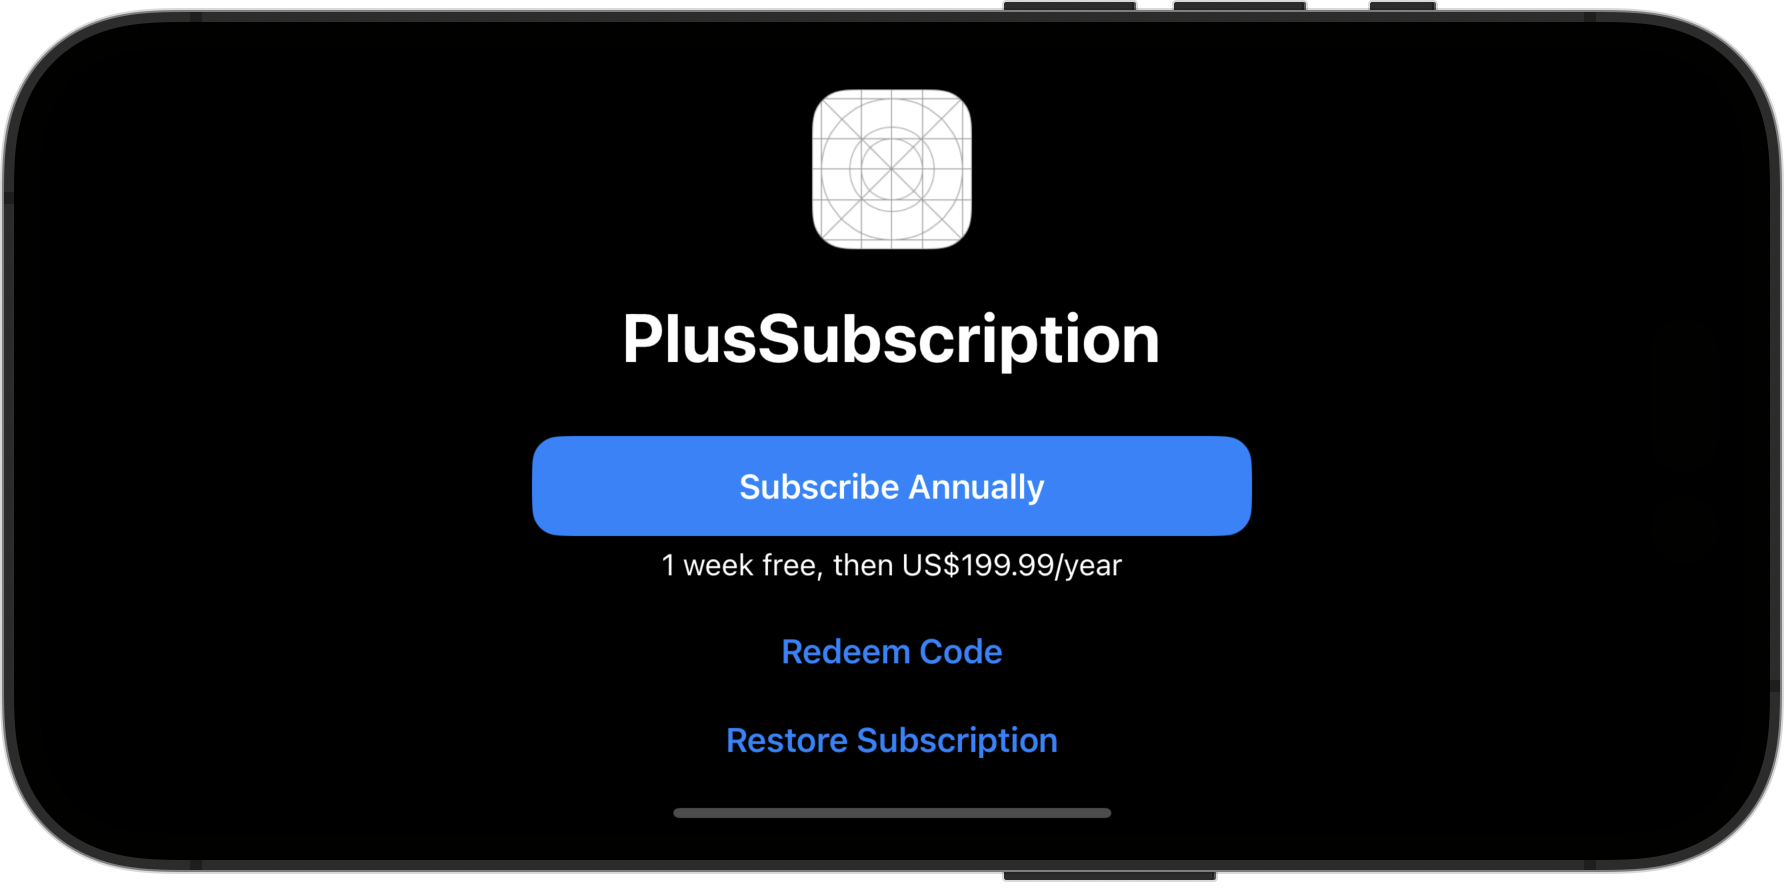
SubscriptionStoreView(productIDs:  ["com.hackingwithswift.plus.subscription"])
    .storeButton(.visible, for: .restorePurchases, .redeemCode)
Where things get really interesting is how we can customize this screen further. For example, we could add buttons for custom sign in, terms of service, and privacy policy, attach screens to display both those things, add a sheet to show when the sign in button is pressed, and adopt a more prominent subscription selection design:
struct ContentView: View {
    @State private var showingSignIn = false

    var body: some View {
        SubscriptionStoreView(productIDs:  ["com.hackingwithswift.plus.subscription"])
            .storeButton(.visible, for: .restorePurchases, .redeemCode, .policies, .signIn)
            .subscriptionStorePolicyDestination(for: .privacyPolicy) {
                Text("Privacy policy here")
            }
            .subscriptionStorePolicyDestination(for: .termsOfService) {
                Text("Terms of service here")
            }
            .subscriptionStoreSignInAction {
                showingSignIn = true
            }
            .sheet(isPresented: $showingSignIn) {
                Text("Sign in here")
            }
            .subscriptionStoreControlStyle(.prominentPicker)
    }
}
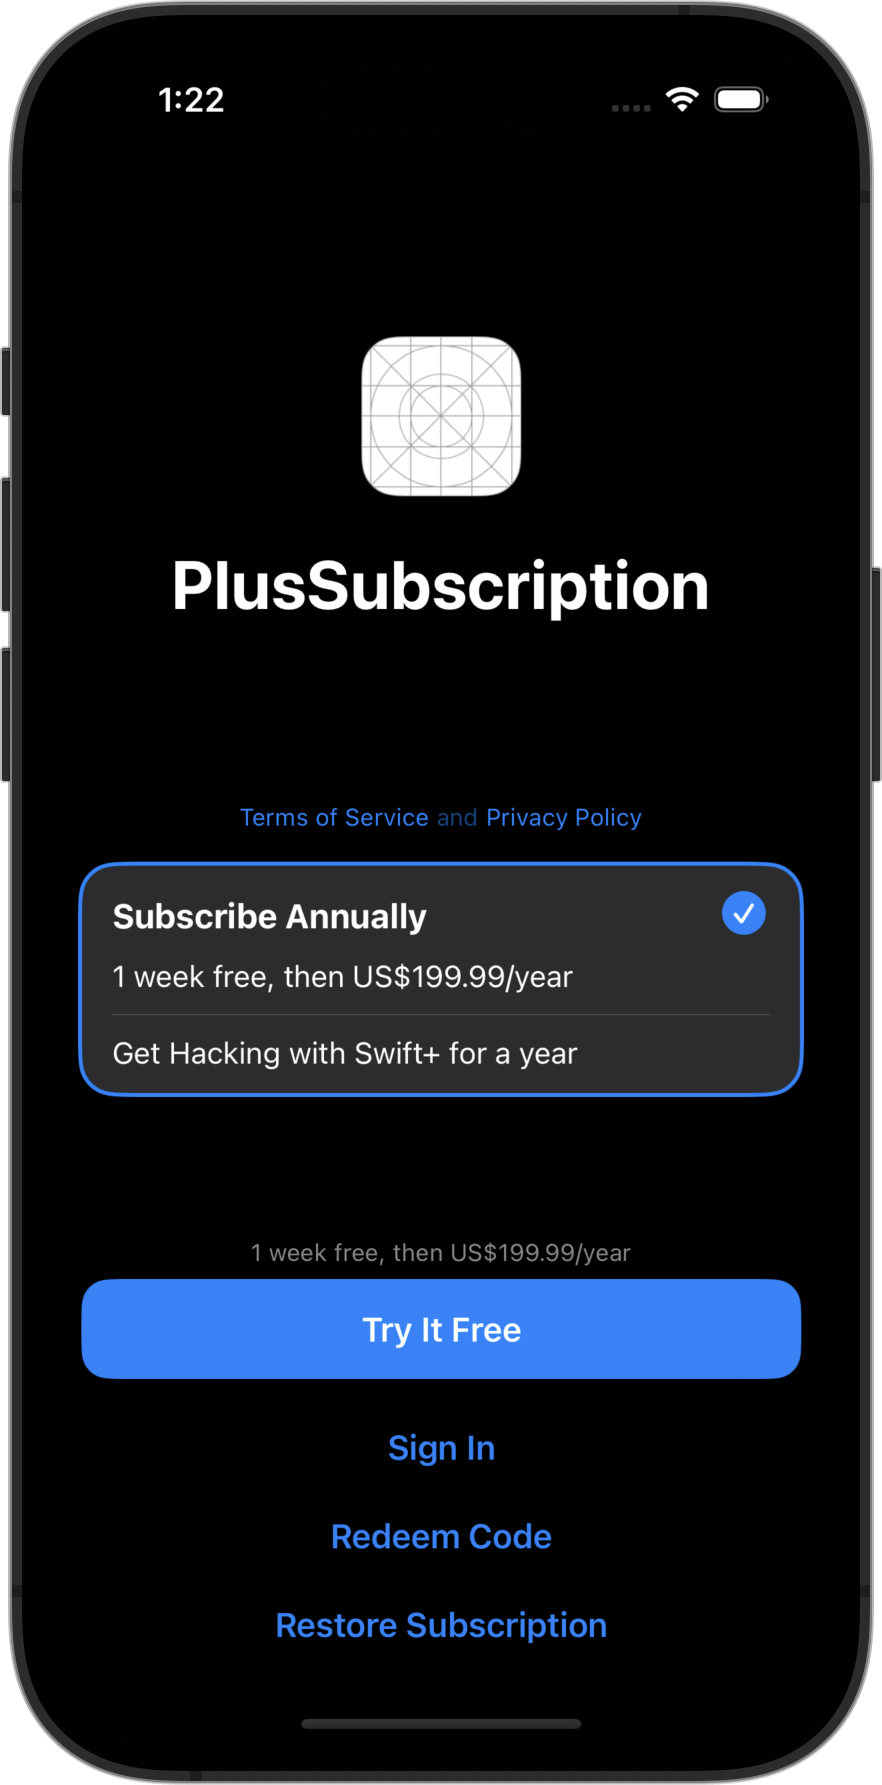
Tips
Both privacy and terms of service can be provided as URLs rather than custom SwiftUI views.
There are also various options for controlling how the screen looks, all carefully picked out by Apple to ensure all the core functionality remains – that your screen ultimately shows all the purchase information in a way that Apple will approve.
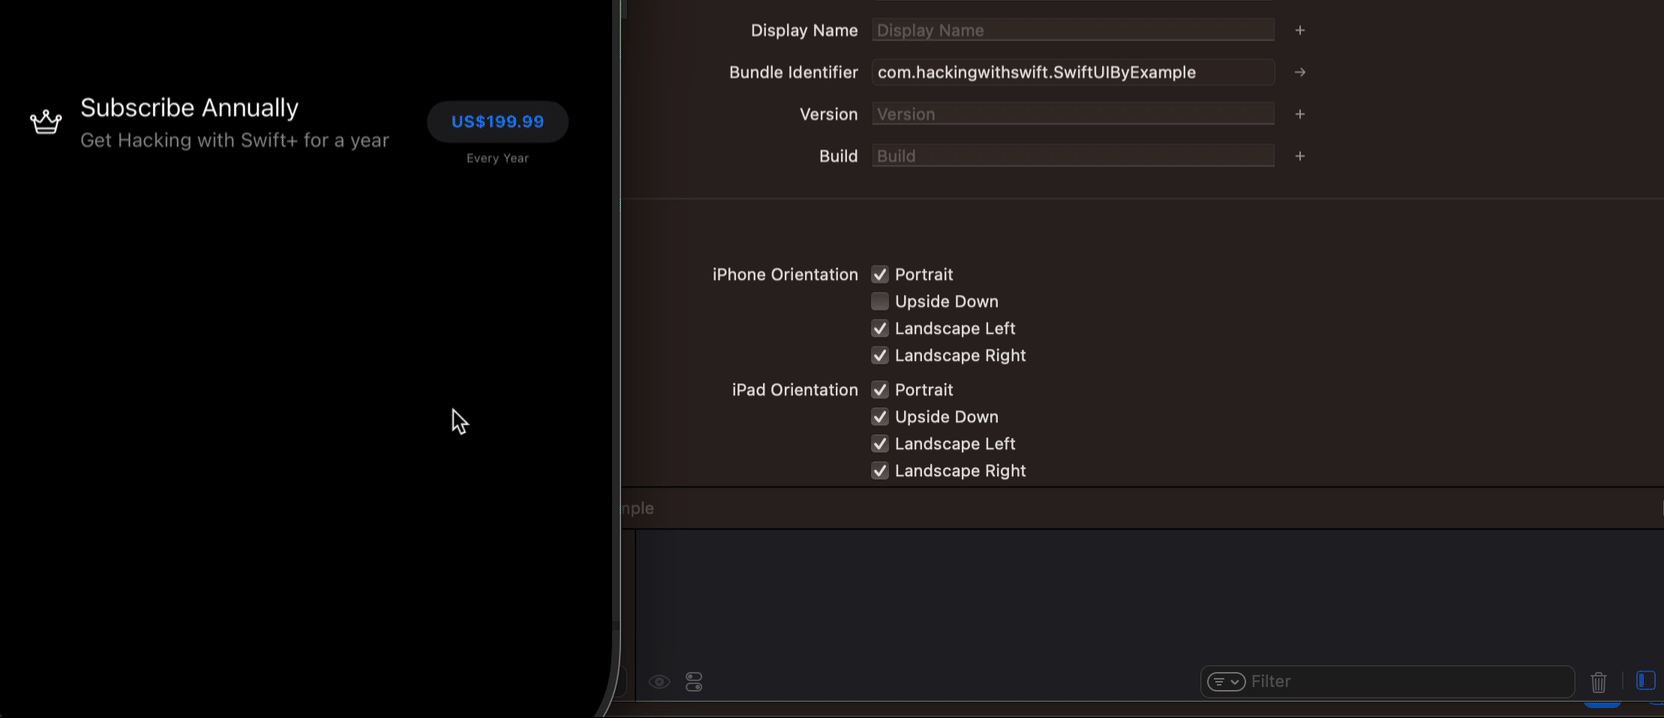
For example, this shows a custom marketing header for my subscriptions, placing a blue gradient behind it:
SubscriptionStoreView(productIDs:  ["com.hackingwithswift.plus.subscription"]) {
    VStack {
        Text("HWS+")
            .font(.largeTitle)
            .fontWeight(.black)

        Text("Take your Swift learning to the next level by subscribing to Hacking with Swift+!")
            .multilineTextAlignment(.center)
    }
    .foregroundStyle(.white)
    .containerBackground(.blue.gradient, for: .subscriptionStore)
}
.storeButton(.visible, for: .restorePurchases, .redeemCode)
.subscriptionStoreControlStyle(.prominentPicker)

Note
You can add code to monitor for in-app purchase transactions, but this does not replace a full StoreKit implementation where you monitor them correctly.
In the code below, we print a message when a product starts, then print one of two other messages depending on how the transaction goes:
ProductView(id: "com.hackingwithswift.plus.subscription") {
    Image(systemName: "crown")
}
.productViewStyle(.compact)
.padding()
.onInAppPurchaseStart { product in
    print("User has started buying \(product.id)")
}
.onInAppPurchaseCompletion { product, result in
    if case .success(.success(let transaction)) = result {
        print("Purchased successfully: \(transaction.signedDate)")
    } else {
        print("Something else happened")
    }
}
Yes, the API is a little clunky here – the double .success is needed because we’re given two nested enums, with the inner one containing the transaction details you can use to verify the purchase externally if needed.
Be careful: that code alone isn’t enough, because one of the possible completion status is pending: the purchase is in the process of happening but hasn’t completed yet, so you still need to watch the transaction queue manually to be absolutely sure of handling the process completely.
Similar solutions…
