Two Circles, One Arrow, and Anchor Positioning
Two Circles, One Arrow, and Anchor Positioning 관련

In a previous series of articles, we studied a classic use case of anchor positioning: Tooltips. In this article, we will explore a less common use case that is a great example of the power of this new feature and modern CSS in general.
Note
At the time of writing, only Chrome and Edge fully support the features we will be using.
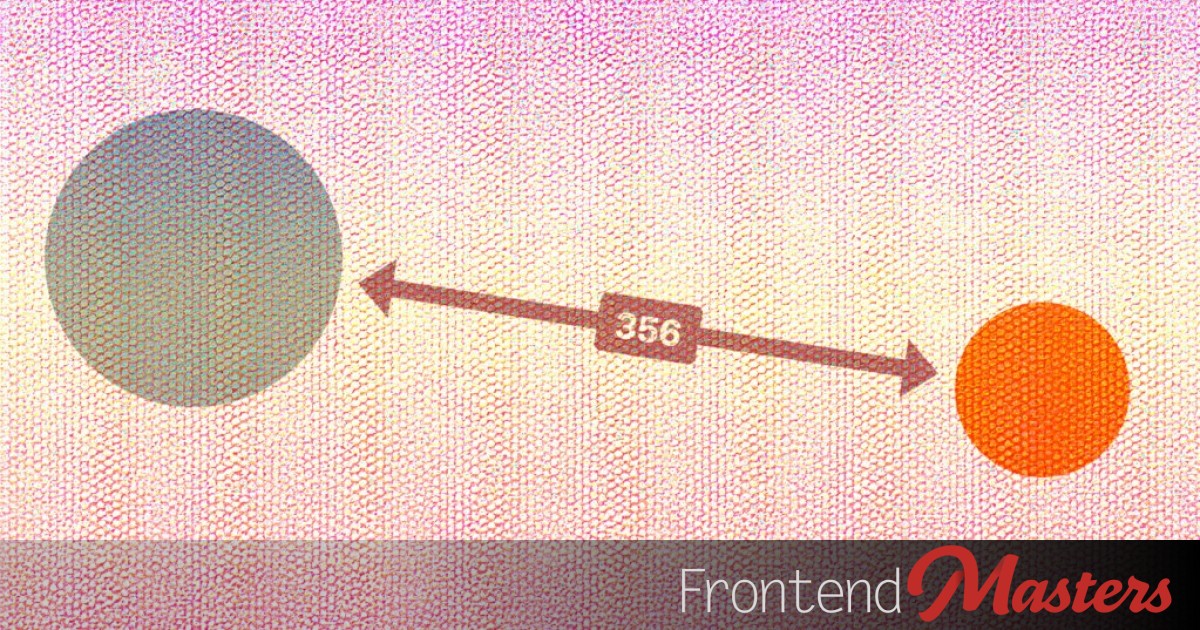
Let’s start with a demo. Drag both circles and see how the arrow follows the movement. You will also get the distance between the two circles inside the arrow shape. And if the circles are too close, the arrow shape changes!
Except for the drag feature, everything else is controlled using CSS. The position and shape of the arrow, the distance calculation, collision/proximity detection, etc. I know it’s hard to believe, but CSS has evolved a lot to make this possible!
“Why CSS?!”
The classic question that always emerges in such situations. You might think this use case is not suitable for a CSS-only approach, and I agree. There are plenty of tools/libraries that rely on JavaScript and/or SVG, which do the job perfectly. So use those if you need this kind of feature.
My CSS-only demo can be seen as an experiment or an exploration of new CSS features. The goal is not to build that demo, but the steps I followed and the tricks I used to build it. Pushing the limit of CSS and creating things that sound “impossible” is the best way to learn CSS. I say “impossible” because there is plenty of stuff that I was not able to build, but when I succeed, I am here to write an article about it.
If you are eager to learn cool CSS tricks and discover some modern features, you are in the right place!
The Initial Configuration
The main idea is that one element can be anchored to multiple elements (two in our case).
:nth-child(1 of .circle) {
  anchor-name: --c1;
}
:nth-child(2 of .circle) {
  anchor-name: --c2;
}
.arrow {
  position: absolute;
  top:    min(anchor(--c1 top),   anchor(--c2 top));
  left:   min(anchor(--c1 left),  anchor(--c2 left));
  bottom: min(anchor(--c1 bottom),anchor(--c2 bottom));
  right:  min(anchor(--c1 right), anchor(--c2 right));
  outline: 5px solid #000;
}
The above code creates a rectangle around both circles. It’s actually the smallest rectangle that can hold both circles. Drag the circles in the demo below and see how it works.
Each side of the rectangle will consider the minimum value from both circles. To better understand the trick, reason through each side individually. For example, the top value needs to match the highest circle’s top value, and that circle will logically have the smallest top value.
We can still optimize the code a little and use the following:
.arrow {
  position: absolute;
  top:    min(anchor(--c1 inside), anchor(--c2 inside));
  left:   min(anchor(--c1 inside), anchor(--c2 inside));
  bottom: min(anchor(--c1 inside), anchor(--c2 inside));
  right:  min(anchor(--c1 inside), anchor(--c2 inside));
}
The value inside is a special value that refers to the same side as the one where it’s used. With top, it’s equal to top; with left, it’s equal to left, and so on.
This gives us the same value for all the properties that we can turn into a variable:
.arrow {
  position: absolute;
  --p: min(anchor(--c1 inside), anchor(--c2 inside));
  top: var(--p);
  left: var(--p);
  bottom: var(--p);
  right: var(--p);
}
Or simply use the inset property:
.arrow {
  position: absolute;
  inset: min(anchor(--c1 inside), anchor(--c2 inside));
}
Let’s update the inset property and make the rectangle start at the center of the circles:
.arrow {
  position: absolute;
  inset: min(anchor(--c1 inside) + anchor-size(--c1)/2,
             anchor(--c1 inside) + anchor-size(--c2)/2);
}
By adding half the distance to each side, we are decreasing the size of the rectangle, and we get the following:
Do you start to see where we are going? With barely two or three CSS properties, we can already see a link between the two circles.
Linking the Circles
Now that I have a rectangle that follows the position of both circles, the first idea that came to my mind was to “shape” that rectangle to make it look like an arrow.
We have clip-path so let’s start with a simple shape:
.arrow {
  clip-path: polygon(0 0, 15px 0,100% calc(100% - 15px), 100% 100%, calc(100% - 15px) 100%,0 15px);
}
Not bad at first glance, but once you start dragging the circles around, it looks messy.

The shape I created will link to the top-left corner of the rectangle with the bottom-right corner, but this is not ideal, as we can have four different positions (as illustrated below) and this is only good for two of them (A and D).

We need to adjust the shape when we get into the B and C positions. The question is: How do we know in which position we are?
In theory, we can do the following:
--x: sign(anchor(--c1 left) - anchor(--c2 left));
--y: sign(anchor(--c1 top) - anchor(--c2 top));
When we are at position A, the first circle will have a smaller left value and a smaller top value, hence --x will be equal to -1 and --y equal to -1. For position B, we get 1 and -1, and so on.
Based on the values of --x and --y, we can conditionally have a different shape per position, but unfortunately, it is not possible because the anchor() function can only be used with the inset properties. This will probably change in a future (I hope so), but until then we need another solution.
The only solution I have found is to have an element per position, hence the HTML code of the arrow will look like below:
<div class="arrow">
  <a></a>
  <b></b>
  <c></c>
  <d></d>
</div>
Then, we define each position as follows:
.arrow > * {
  position: absolute;
  --_x: calc(anchor(--c1 inside) + anchor-size(--c1)/2);
  --_y: calc(anchor(--c2 inside) + anchor-size(--c2)/2);
}
.arrow :is(a,b) {top:  var(--_x); bottom: var(--_y)}
.arrow :is(a,c) {left: var(--_x); right:  var(--_y)}
.arrow :is(c,d) {top:  var(--_y); bottom: var(--_x)}
.arrow :is(b,d) {left: var(--_y); right:  var(--_x)}
We no longer need to use min() but instead, we use both values that I am defining as --_x and --_y. The code may look complex at first glance, but if you refer to the previous figure, you will understand its logic.
Positions A and B share the same vertical position for both circles, so they have the same top and bottom value. A and C share the same horizontal position, hence the same left and right value, etc.
Note
But, will we have four elements visible at the same time?
Not really. For example, the <a> element has the following inset values:
/* pseudo-code */
a {
  top: top_of_c1;
  bottom: bottom_of_c2;
  left: left_of_c1;
  right: right_of_c2;
}
If we are at position A, it will be visible, but if we are at position B, you won’t see it because left_of_c1 will be bigger than the right_of_c2. When the right value is bigger than the left value the browser makes them equal, which means the element has a width equal to 0 hence invisible.
I think a demo is worth a thousand words. If you drag the circles, you can see four different colors for each element, and only one color is visible at a time.
Another observation we can make is that each position can be defined as a flip of another one. If we flip A vertically, we get B. If we flip it vertically, we get C, and if we flip it both horizontally and vertically, we get D. This means we are not going to write too much code. We do the job once, and then we flip!
.arrow > * { /* the same code for all */ }

/* We flip the other positions */
.arrow b {scale: -1  1} /* horizontally */
.arrow c {scale:  1 -1} /* vertically */
.arrow d {scale: -1 -1} /* horizontally & vertically */
Let’s try again with the previous clip-path:
Much better: the shape links the two circles, regardless of their positions. Now let’s work on improving that shape and creating a perfect arrow.
Creating the Arrow
Using clip-path to create the arrow is the route to follow, but it won’t be enough alone. I made a first attempt with only clip-path, and it worked, but it was spaghetti code with a lot of math functions. I tried to optimize and came up with better ideas.
Starting here, I will focus only on position A. We can ignore the others, since they are a flipped version of position A, as I explained previously.

Now, instead of trying to shape the <a> element (as well as <b>, <c>, and <d>), I will consider its pseudo-element. The element is a rectangle sized with anchor positioning, so I can make it a container and work “inside” it by using its width/height, thanks to container query units.
Knowing the dimensions of the rectangle will make it a lot easier to create and position the arrow. We cannot rely on anchor() and anchor-size() to get them, so we will use container queries! That’s why I’m using the pseudo-element, as I cannot retrieve the values from the container itself.
First, we start by creating an arrow, and we position it at the bottom of the rectangle:
I will skip the creation of the shape, as it’s a basic usage of clip-path with a few variables to control the shape.

The next step is to rotate the arrow so that it points to the first circle:

The angle of rotation is equal to the inverse tangent of the height divided by the width, which translates into the following CSS code:
rotate: atan(100cqh/100cqw);
Then we adjust the arrow’s width. We need to make it taller so that it reaches the center of the first circle.

The value we are looking for is simply the diagonal we can find using the CSS hypotenuse function.
width: hypot(100cqh, 100cqw)
Our arrow is now perfect!
Oops, it’s not really perfect.
If you drag the circles, you will see a good arrow pointing between both circles, but two others are also visible. Don’t forget that we have four elements for each position and are using four pseudo-elements. The elements can have their size equal to 0, but since we are defining the size of the pseudo-elements, they will remain visible.
To fix this, I will play with their opacity using the following code:
opacity: calc(sign(1cqh)*sign(1cqw))
If either the width or the height of the element is 0, it means that either 1cqh or 1cqw will be 0. sign() of 0 is also 0 hence we get opacity: 0 (invisible).
Now we are good. Only one arrow is visible at a time and is perfectly sized and placed!
If we want the arrow to be at the edge of the circles instead of the centers, we can adjust the padding and change the reference of clip-path to be content-box
padding-inline: 85px 50px;
clip-path: polygon() content-box;
If you inspect the pseudo-element, you will notice that the padding is nothing but half the size of the circles. By changing the reference of the clip-path to content-box I am excluding that area from the shape.

The only drawback here is that I am hardcoding the padding, as I don’t have another alternative to get the circle sizes. For this reason, in the original demo, I am adding the sizes as attributes so I can easily control everything from the HTML code. I am doing the same with the anchor names, by the way.
<div class="circle" name="--c1" size="170px"></div>
<div class="circle" name="--c2" size="100px"></div>

<div class="arrow" x="--c1" y="--c2" size_x="170px" size_y="100px">
 ...
</div>
Transforming the Arrow
If you get back to the initial demo, you will notice that the arrow changes to something else when both circles get closer, and the shape disappears completely when both circles touch each other.

To achieve this, we need to apply conditions based on the distance between the circles, which also determines the arrow’s width.
hypot(100cqh, 100cqw)
We create a variable like the following:
--_m0: sign(hypot(100cqh,100cqw) - value);
The variable will be equal to either 1 if the distance is greater than the value, -1 if the distance is smaller, and 0 if they are equal. Then we can use if() to define two different shapes based on that variable.
clip-path: if(style(--_m0 = 1):
    /* we draw the arrow */
 else:
    /* we draw another shape */
  );
I won’t get into the details of the “value” or the code of the shapes because it doesn’t really matter. You can view it as a media query with a specific width at which your layout will switch. You create two shapes and decide the distance at which we switch between them.
As for the collision detection, we need a precise value, which is half the sum of the circle sizes. So we define another variable:
--_m1: sign(hypot(100cqh,100cqw) - (Size_c1 + Size_c2)/2);
--_m1 is either 0 or -1 when both circles are touching each other, and when it’s the case, we hide the arrow completely. We are already using opacity for a similar thing so we can update it like below:
opacity: calc(sign(1cqw)*sign(1cqh)*var(--_m1))
If the element’s width or height is 0, or the circles overlap, we hide the pseudo-element.
You have probably noticed that I am using = inside if() and not :. If you are wondering why, read the following post: The Hidden Trick of Style Queries and if(). It’s one of those little tricks that you’d better learn early before getting headaches trying to figure out why your code isn’t working.
Showing the Distance
I am sure you are thinking this part is going to be tricky, but it’s actually the easiest part. We have used one pseudo-element to create the arrow, and we will use the second one to show the distance.
The relevant code is the following:
.arrow :is(a,b,c,d)::after {
  content: counter(d);
  counter-reset: d calc((hypot(100cqh,100cqw) - value)/1px);
}
I am again using the hypotenuse to calculate the diagonal, then I subtract a specific value from it. The result will be a length that we divide by 1px to get an integer. That integer will serve as a reset value for a counter we display within the content.
That’s all. Now the pseudo-element contains the distance value, and we add some styling to position it above the arrow. I will reuse many of the CSS properties I used for the arrow, like opacity to show/hide it when needed, and rotation so it follows the arrow’s orientation.
As for the “value”, it depends on what you want to show. You may decide to show the distance between the center of the circles or the distance between their edge. It doesn’t change the main logic.
Here is again the full demo with all the stuff together:
The final demo includes a few things I didn’t mention, but you should be able to understand them easily. I focused on the main tricks, and everything else is a matter of preference and visual styling.
Graph Theory
Linking two circles together is good, but can we do more? Of course, we can! It’s pretty straightforward because all you have to do is add as many circles/arrows you want in the HTML code.
Thanks to the use of attributes combined with attr(), I don’t need to touch the CSS, regardless of the number of elements we want to have. I can specify everything on the HTML side:
<!-- we give each circle a name and a size  -->
<div class="circle" name="--a" size="150px"></div>
<div class="circle" name="--b" size="100px"></div>
<div class="circle" name="--c" size="80px"></div>

<!--  each arrow will receive two names and two sizes -->
<div class="arrow" x="--a" y="--b" size_x="150px" size_y="100px">...</div>
<div class="arrow" x="--a" y="--c" size_x="150px" size_y="80px">...</div>
<div class="arrow" x="--b" y="--c" size_x="100px" size_y="80px">...</div>
We go fancier and study graph theory by implementing a shortest path algorithm!
In this demo, I am relying on a trick I am detailing in a previous article that I highly recommend you read: How to Get the Width/Height of Any Element in Only CSS.
I am using scroll-driven animation to retrieve all the distances between the nodes and make them available at root level. Inside the <arrow> element, you will find a new element <e> that will serve as my size calculator for each link.
For each link, I will define two variables that contain the width and height (e.g., --sax and --say). Then, I calculate the diagonal, which is the distance I need (e.g., –sa). Having all the distances at hand, I calculate the different paths (in our case, four are considered), and we identify the minimum among them. Finally, we conditionally do stuff based on that.
Here is part of the code to see the logic:
:root {
   /* all the distances */
  --sa: hypot(1/var(--sax),1/var(--say));
  --sb: hypot(1/var(--sbx),1/var(--sby));
  --ac: hypot(1/var(--acx),1/var(--acy));
  --ad: hypot(1/var(--adx),1/var(--ady));
  --bc: hypot(1/var(--bcx),1/var(--bcy));
  --bd: hypot(1/var(--bdx),1/var(--bdy));
  --ce: hypot(1/var(--cex),1/var(--cey));
  --de: hypot(1/var(--dex),1/var(--dey));

   /* the different paths */
  --sace: calc(var(--sa) + var(--ac) + var(--ce));
  --sade: calc(var(--sa) + var(--ad) + var(--de));
  --sbce: calc(var(--sb) + var(--bc) + var(--ce));
  --sbde: calc(var(--sb) + var(--bd) + var(--de));
  /* we get the min value */
  --min: min(var(--sace),var(--sade),var(--sbce),var(--sbde));
}
@container style(--sace = var(--min)) {
  /* if S-A-C-E is the shortest path we style the relevant links */
}
@container style(--sade = var(--min)) {
  /* if S-A-D-E is the shortest path we style the relevant links */
}
@container style(--sbce = var(--min)) {
  /* if S-B-C-E is the shortest path we style the relevant links */
}
@container style(--sbde = var(--min)) {
  /* if S-B-D-E is the shortest path we style the relevant links */
}
/* the pseudo element of the header will show the shortest path and the distance */
h3::after {
  content: if(
    style(--sace = var(--min)):"S-A-C-E";
    style(--sade = var(--min)):"S-A-D-E";
    style(--sbce = var(--min)):"S-B-C-E";
    style(--sbde = var(--min)):"S-B-D-E";
  )  " (" counter(d)  ")";
  counter-reset: d round(var(--min));
}
The implementation is, of course, tailored to a particular HTML structure, and we have to adjust the CSS if we want another graph, but it’s more of a proof of concept and a demo to illustrate that it’s indeed possible. In the future, we may have more features that allow us to have a more dynamic implementation that works with any HTML code (loops in CSS, maybe?)
Conclusion
It was too much for CSS, right? I agree, and again, the main goal was not to create those demos and use them everywhere. It was more about the features and tricks we have learned that will be useful in other situations. We covered a lot of anchor positioning stuff, container queries, if() conditions, various calculations, attr(), etc.