
How to fill and stroke shapes at the same time
How to fill and stroke shapes at the same time 관련

Updated for Xcode 15
Improved in iOS 17
In iOS 17 and later, you can fill and stroke shapes at the same time just by stacking the modifiers, like this:
Circle()
    .stroke(.red, lineWidth: 20)
    .fill(.orange)
    .frame(width: 150, height: 150)

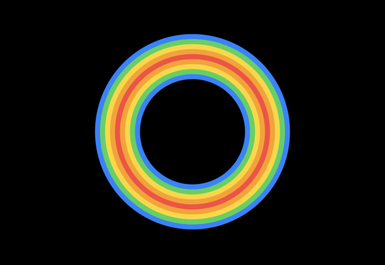
This even works with multiple strokes of various sizes:
Circle()
    .stroke(.blue, lineWidth: 45)
    .stroke(.green, lineWidth: 35)
    .stroke(.yellow, lineWidth: 25)
    .stroke(.orange, lineWidth: 15)
    .stroke(.red, lineWidth: 5)
    .frame(width: 150, height: 150)
In iOS 16 and below, SwiftUI provides the fill(), stroke(), and strokeBorder() modifiers for adjusting the way we draw shapes, but it does not provide a built-in way to fill and stroke at the same time. However, we can get the same effect in two different ways, and I'm going to show you both here.
The first option is to use strokeBorder() to add a border around your shape, then place a filled shape in the background using background(). For example, this creates a circle with a black stroke and blue fill:
Circle()
    .strokeBorder(.red, lineWidth: 20)
    .background(Circle().fill(.orange))
    .frame(width: 150, height: 150)

Using background() ensures the blue circle always matches the size of the red circle.
The second option is to layer the two circles manually using ZStack:
ZStack {
    Circle()
        .fill(.orange)

    Circle()
        .strokeBorder(.red, lineWidth: 20)
}
.frame(width: 150, height: 150)
If you want to fill and stroke lots of shapes, you should consider wrapping up this functionality in an extension. Only InsettableShapes get the strokeBorder() method, so you should probably write two extension methods – one to handle regular shapes using stroke(), and one to handle insettable shapes using strokeBorder().
Here's how that looks in code:
extension Shape {
    func fill<Fill: ShapeStyle, Stroke: ShapeStyle>(_ fillStyle: Fill, strokeBorder strokeStyle: Stroke, lineWidth: Double = 1) -> some View {
        self
            .stroke(strokeStyle, lineWidth: lineWidth)
            .background(self.fill(fillStyle))
    }
}

extension InsettableShape {
    func fill<Fill: ShapeStyle, Stroke: ShapeStyle>(_ fillStyle: Fill, strokeBorder strokeStyle: Stroke, lineWidth: Double = 1) -> some View {
        self
            .strokeBorder(strokeStyle, lineWidth: lineWidth)
            .background(self.fill(fillStyle))
    }
}
Similar solutions…
