How to disable ScrollView clipping so contents overflow
How to disable ScrollView clipping so contents overflow 관련
Updated for Xcode 15
New in iOS 17
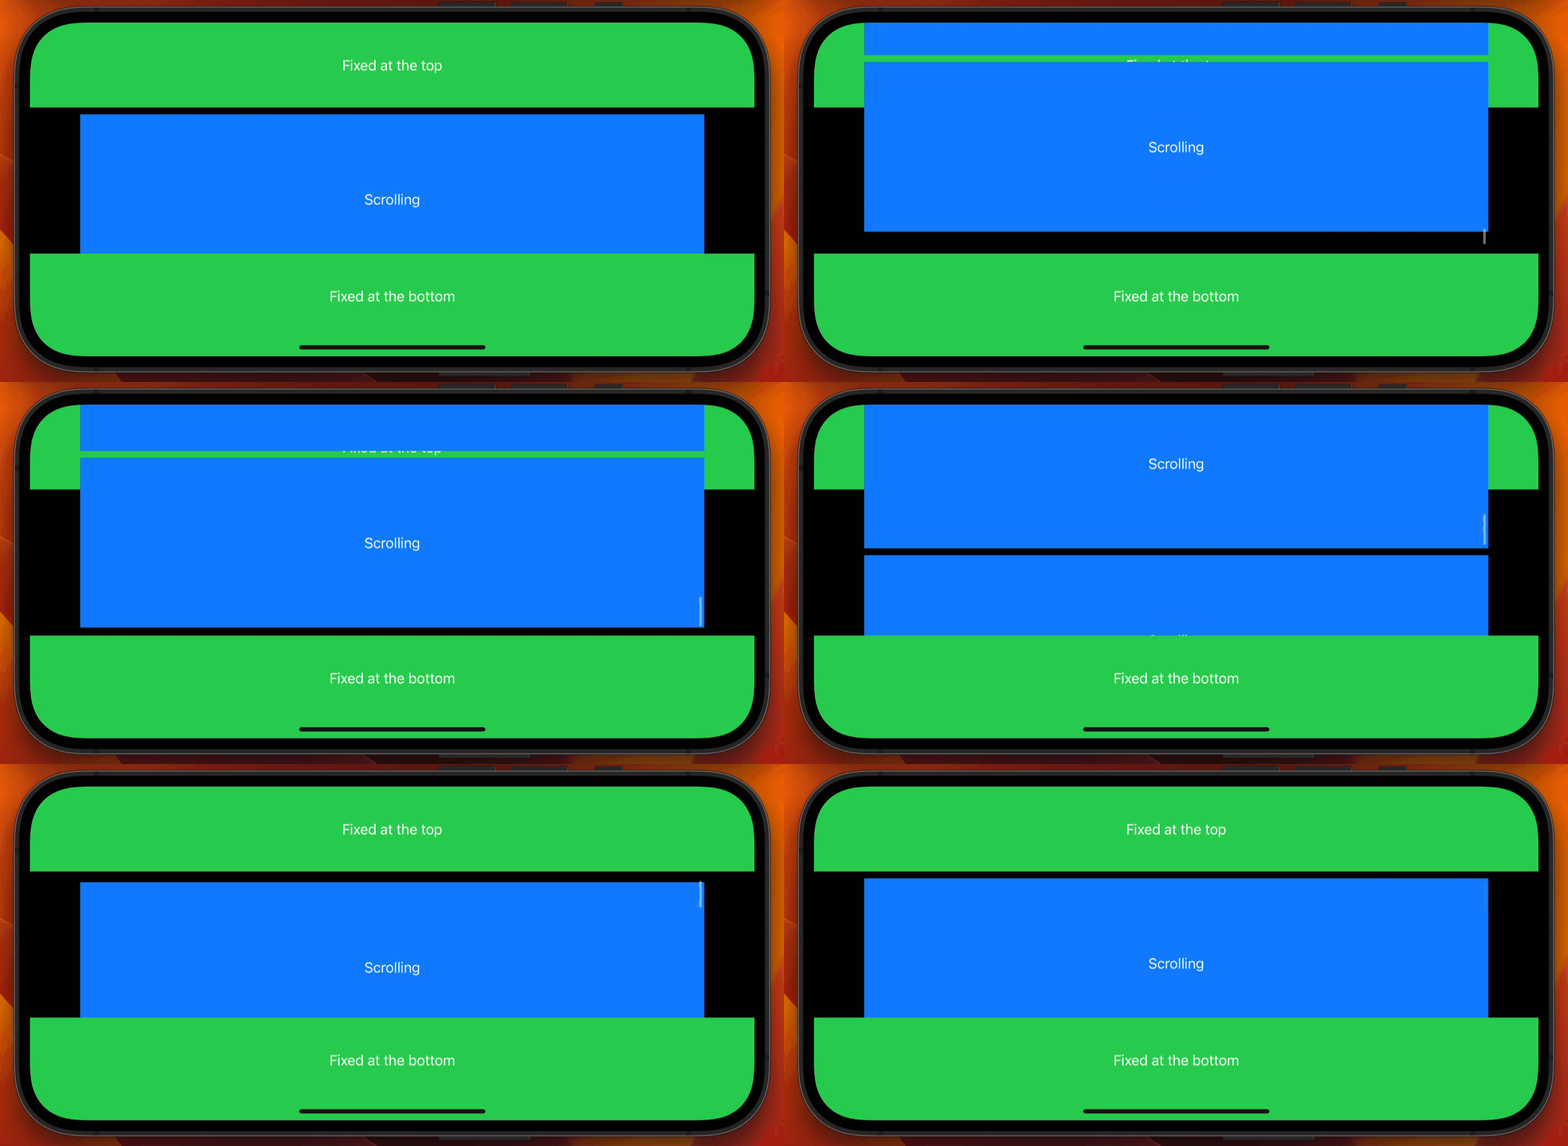
SwiftUI's ScrollView automatically clips its contents, so that scrolling views always stay fully inside the scroll view area. However, if you use the scrollClipDisabled() modifier you can override this default behavior, allowing scrolling views to overflow.
Important
This does not affect the touch area of the scroll view, so if users tap on views that have overflowed your ScrollView that tap will actually be received by whatever is below. So, it's probably best to restrict this a little, for example to allow shadows to flow outside the scrolling area without affecting other views too much.
As an example, this next example shows a VStack with fixed text at the top and bottom, with a scrolling area in the middle. The scrolling views will start neatly aligned below the top text, but as you scroll will overflow:
VStack {
    Text("Fixed at the top")
        .frame(maxWidth: .infinity)
        .frame(height: 100)
        .background(.green)
        .foregroundStyle(.white)

    ScrollView {
        ForEach(0..<5) { i in
            Text("Scrolling")
                .frame(maxWidth: .infinity)
                .frame(height: 200)
                .background(.blue)
                .foregroundStyle(.white)
        }
    }
    .scrollClipDisabled()

    Text("Fixed at the bottom")
        .frame(maxWidth: .infinity)
        .frame(height: 100)
        .background(.green)
        .foregroundStyle(.white)
}

There are two extra things it's helpful to know when working with scrollClipDisabled():
- You can add a custom clip shape to limit how far things overflow. For example, adding
padding()thenclipShape(.rect)means you get a little overflow, but not infinite. - Because scrolling views now overlap their surroundings, you may need to use
zIndex()to adjust their vertical positioning. For example, if other views have the default Z index, then usingzIndex(1)on your scroll view will make its children render over other views.
