
React Native Tutorial - Building Android Apps with JavaScript
React Native Tutorial - Building Android Apps with JavaScript 관련

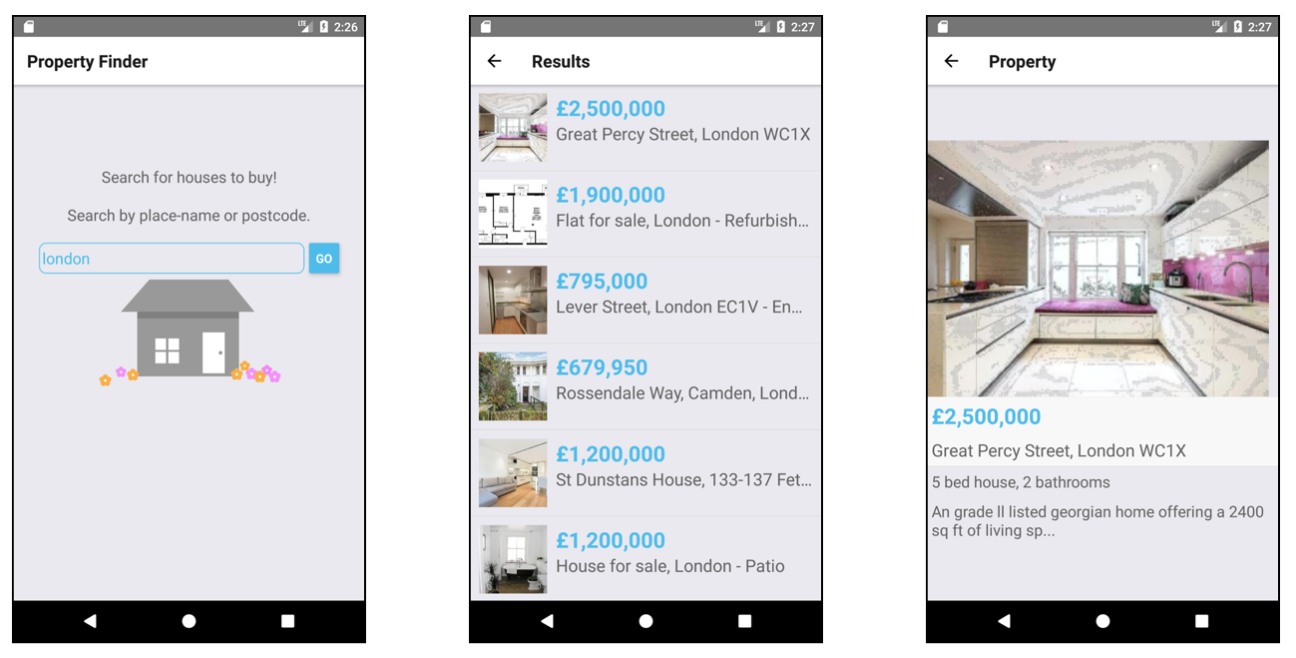
In this React Native tutorial you’ll learn how to build native apps based on the hugely popular React JavaScript library.
What makes React Native different from other frameworks such as PhoneGap (Apache Cordova) or Appcelerator Titanium, that use JavaScript to create iOS apps?
- (Unlike PhoneGap) with React Native your code may be written in JavaScript but the app’s UI is fully native. It doesn’t have the drawbacks typically associated with a hybrid HTML5 app.
- Additionally (unlike Titanium), React introduces a novel, radical and highly functional approach to constructing user interfaces. Your UI is simply a function of the current app state.
React Native brings the React paradigm to mobile app development. It’s goal isn’t to write the code once and run it on any platform. The goal is to learn-once (the React way) and write-anywhere. An important distinction to make.
The community has even added tools such as Expo and Create React Native App to help you quickly build React Native apps without having to touch Xcode or Android Studio!
While you can write React Native apps for iOS and Android, this tutorial only covers Android. You can also check out our tutorial focused on React Native for iOS.
Don’t worry if you’ve never written any JavaScript or used the CSS-like properties you’ll see. This tutorial will guide you through every step and provide resources where you can learn more.
Ready to get going? Read on!
Note
We also have an iOS version of this tutorial that you may be interested in.
Getting Started
Node and Java Development Kit
React Native uses Node.js, a JavaScript runtime, to build your JavaScript code. React Native also requires a recent version of the Java SE Development Kit (JDK) to run on Android. Follow the instructions for your system to make sure you install the required versions.
First install Homebrew using the instructions on the Homebrew website. Then install Node.js by executing the following in Terminal:
brew install node
Next, use homebrew to install watchman, a file watcher from Facebook:
brew install watchman
This is used by React Native to figure out when your code changes and rebuild accordingly. It’s like having Android Studio do a build each time you save your file.
Finally, download and install JDK 8 or newer if needed.
First install Chocolatey using the instructions on the Chocolatey website.
Install Node.js if you don’t have it or have a version older than 4. Run the following command as Administrator (Right-click on Command Prompt and select [“Run as Administrator”]):
choco install -y nodejs.install
Python is needed to run the React Native build scripts. Run the following command as Administrator if you don’t have Python 2:
choco install -y python2
Run the following command as Administrator if you don’t have a JDK or have a version older than 8:
choco install -y jdk8
Install Node.js by following the installation instructions for your Linux distribution. You will want to install Node.js version 6 or newer.
Finally, download and install JDK 8 or newer if needed.
React Native CLI
Use Node Package Manager (or npm) to install the React Native Command Line Interface (CLI) tool. In your terminal (Terminal or Command Prompt or shell) type:
npm install -g react-native-cli
npm fetches the CLI tool and installs it globally; npm is similar in function to JCenter and is packaged with Node.js.
Next, install Yarn using the instructions on the Yarn website. Yarn is a fast npm client.
Android Development Environment
Set up your Android development environment, if haven’t done so. Make sure you can successfully run an Android app on an emulator.
React Native requires Android 6.0 (Marshmallow). In Android Studio, go to Tools\Android\SDK Manager. Select SDK Platforms and check Show Package Details. Make sure that the following items are checked.
- Google APIs, Android 23
- Android SDK Platform 23
- Intel x86 Atom_64 System Image
- Google APIs Intel x86 Atom_64 System Image

Next, select SDK Tools and check Show Package Details. Expand Android SDK Build-Tools and make sure 23.0.1 is selected.
Finally, tap Apply to install your selections.
When the Android components are finished installing, create a new emulator running SDK Platform 23.
Create the Starter App
Navigate to the folder where you would like to develop your app and run the following in your terminal:
react-native init PropertyFinder
This uses the CLI tool to create a starter project containing everything you need to build and run a React Native app.
In a terminal, run:
cd PropertyFinder
In the created folders and files you will find a few items of note:
- node_modules is a folder which contains the React Native framework
- index.js is the entry point created by the CLI tool
- App.js is the skeletal app created by the CLI tool
- android is a folder containing an Android project and the code required to bootstrap your application
- ios is a folder containing iOS-related code, which you won’t be touching in this tutorial.
Start your Android emulator running SDK 23 if it isn’t running.
Run the following command in a terminal:
react-native run-android
If you receive an error related to “SDK location not found”, then perform the following steps:
- Go to the
android/directory of your react-native project - Create a file called
local.propertieswith this line:
sdk.dir = {PATH TO ANDROID SDK}
For example, on macOS, the SDK path will look something like /Users/USERNAME/Library/Android/sdk.
You might also have noticed that a terminal window has popped up, displaying something like this:
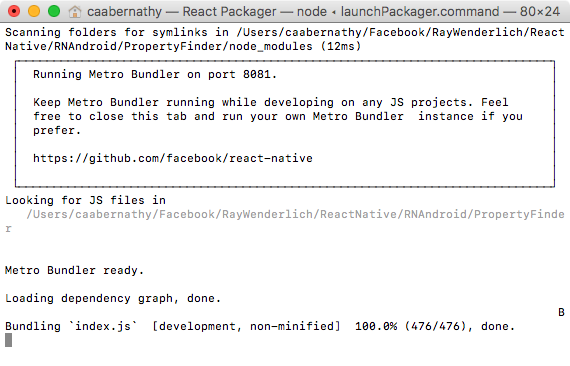
This is Metro Bundler (facebook/metro-bundler), the React Native JavaScript bundler running under Node.js. You’ll find out what it does shortly.
Don’t close the terminal window; just keep it running in the background. If you do close it by mistake, simply run the following in terminal:
react-native start
Note
You’ll be mostly writing JavaScript code for this React Native tutorial so no need to use Android Studio as your editor. I use Sublime Text, which is a cheap and versatile editor, but Atom, Brackets or any other lightweight editor will do the job.
React Native Basics
In this section, you’ll learn React Native basics as you begin working on PropertyFinder.
Open App.js in your text editor of choice and take a look at the structure of the code in the file:
import React, { Component } from 'react'; // 1
import {Platform, StyleSheet, Text, View} from 'react-native';

const instructions = Platform.select({ ... }); // 2

type Props = {};
export default class App extends Component<Props> { ... } // 3

const styles = StyleSheet.create({ ... }); // 4
Let’s go through the code step-by-step:
- Imports the required modules.
- Sets up a platform-specific display message.
- Defines the component that represents the UI.
- Creates a style object that controls the component’s layout and appearance.
Take a closer look at this import statement:
import React, { Component } from 'react';
This uses the ECMAScript 6 (ES6) import syntax to load the react module and assign it to a variable called React. This is roughly equivalent to importing libraries in Android. It also uses what’s called a destructuring assignment to bring in the Component object. Destructuring lets you extract multiple object properties and assign them to variables using a single statement.
Note
For more information about ES6 modules I’d recommend reading this blog post by Dr. Axel Rauschmayer.
ES6 is a much nicer way to write JavaScript, supporting features like default parameters, classes, arrow functions, and destructuring assignments. Not all browsers support ES6. React Native uses a tool called Babel to automatically translate modern JavaScript into compatible legacy JavaScript where necessary.
Back to App.js, check out the class definition:
export default class App extends Component<Props>
This defines a class which extends a React Component. The export default class modifier makes the class “public”, allowing it to be used in other files.
Open index.js and take a look at the entry point file:
import {AppRegistry} from 'react-native';
import App from './App';
import {name as appName} from './app.json';

AppRegistry.registerComponent(appName, () => App);
This registers the imported component that serves as the app’s entry point.
It’s time to start building your app.
In App.js, add the following at the top of the file, just before the import statements:
'use strict';
This enables Strict Mode, which adds improved error handling and disables some less-than-ideal JavaScript language features. In simple terms, it makes JavaScript better!
Inside the App class replace render() with the following:
render() {
  return React.createElement(Text, {style: styles.description}, "Search for houses to buy!");
}
App extends React.Component, the basic building block of the React UI. Components contain immutable properties, mutable state variables and expose a method for rendering. Your current application is quite simple and only requires a render method.
React Native components are not Android view classes; instead they are a lightweight equivalent. The framework takes care of transforming the tree of React components into the required native UI.
Next, replace the const styles statement with the following:
const styles = StyleSheet.create({
  description: {
    fontSize: 18,
    textAlign: 'center',
    color: '#656565',
    marginTop: 65,
  },
});
This defines a single style that you’ve applied to the description text. If you’ve done any web development before, you’ll probably recognize those property names. The React Native StyleSheet class used to style the application UI is similar to the Cascading Style Sheets (CSS) used on the Web.
Then, get rid of the instructions assignment code block as you no longer need it.
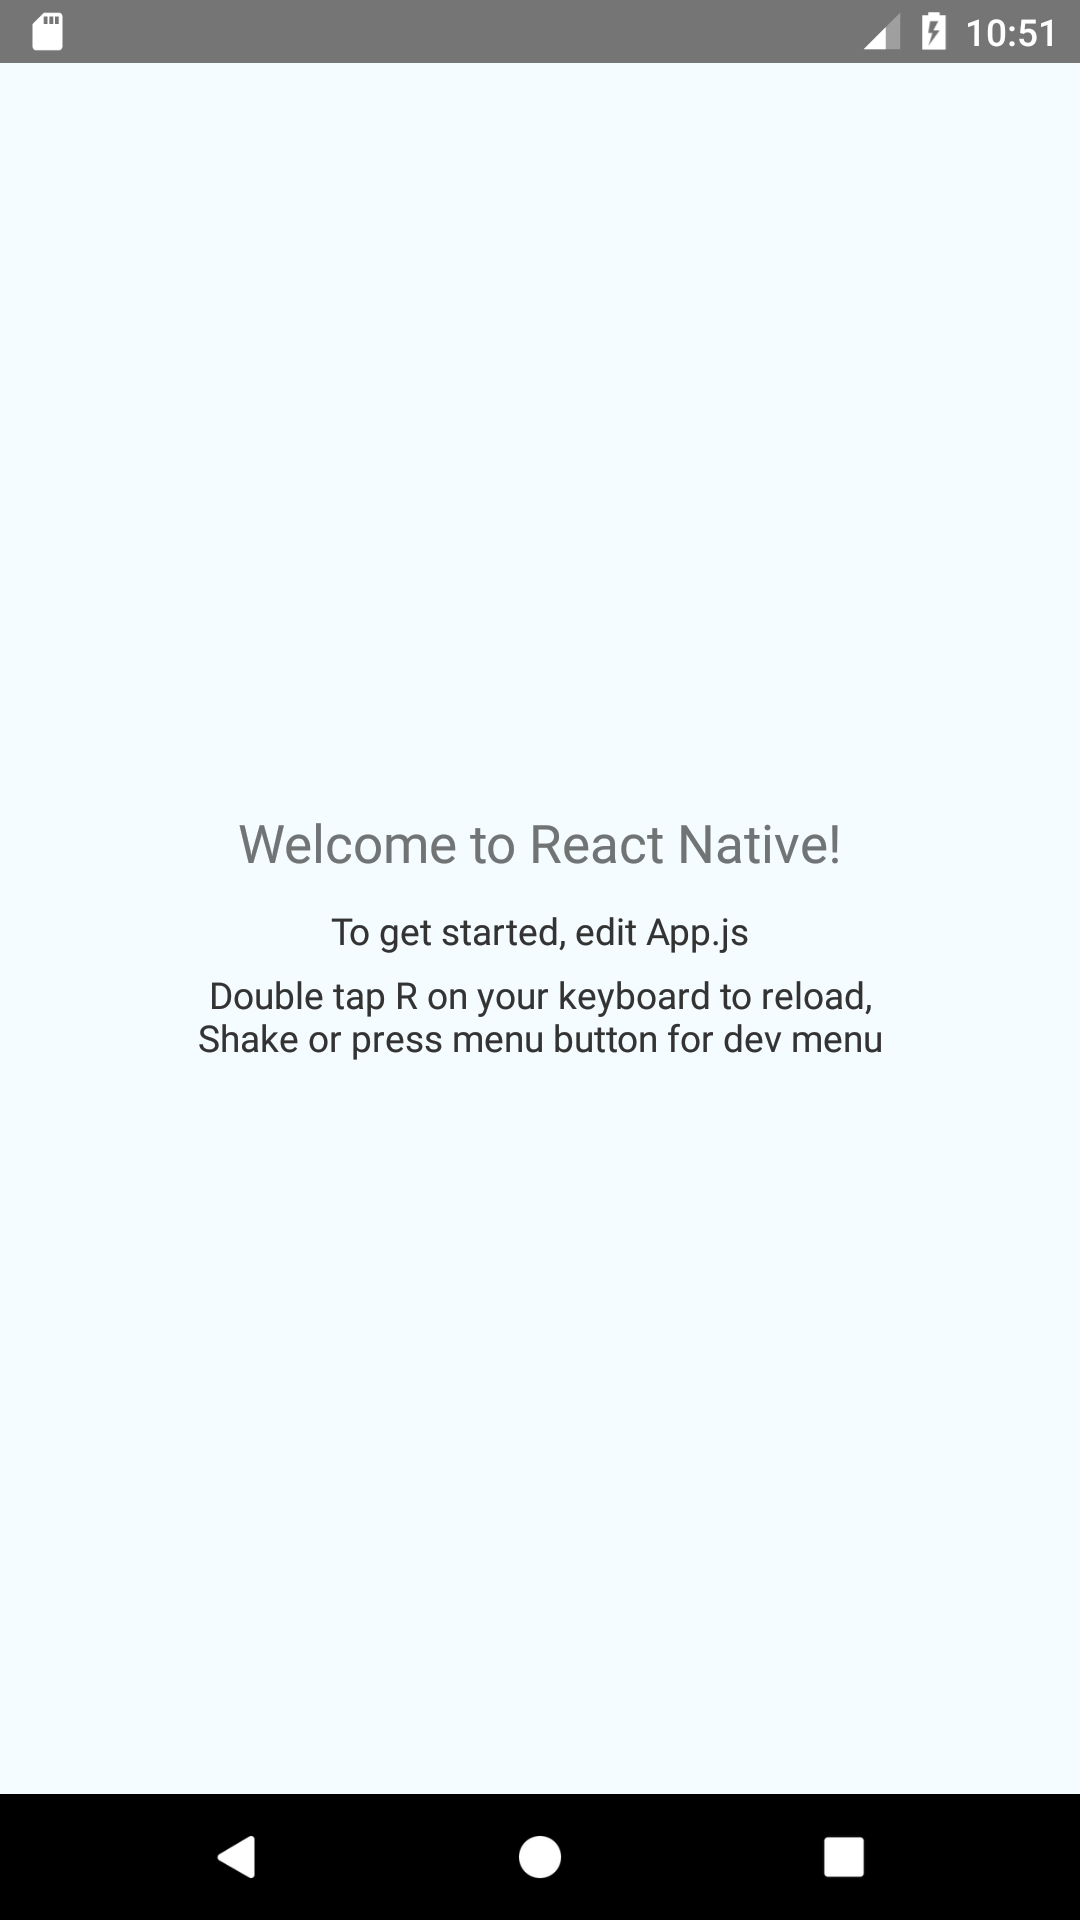
Save your changes to App.js and return to the emulator.

That’s a JavaScript application running in the emulator, rendering a native UI, without a browser in sight!
Still don’t trust me? Verify it for yourself: within Android Studio, select [Tools\Android\Layout Inspector]. Then check [Show All Proceses], select com.propertyfinder and tap [OK] to inspect the view hierarchy:
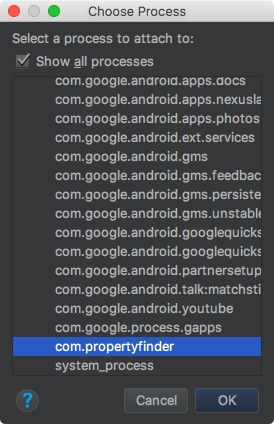
You will see no WebView instances anywhere!
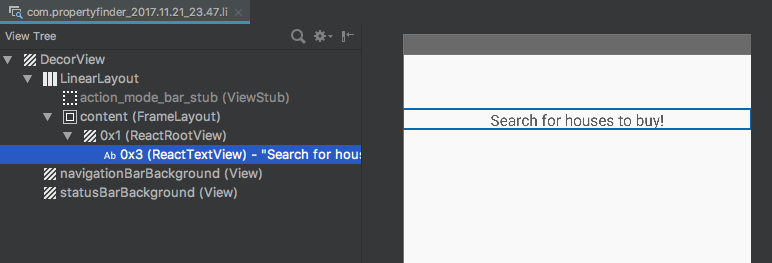
ReactTextViewBut what is that? Go to the project file finder ( facebook/react-native) and enter ReactTextView.java in the prompt. Select the result matching this file to view the source code. Notice ReactTextView inherits directly from TextView. Neat!
Curious as to how it all works? Take a quick look at [MainActivity.java] and [MainApplication.java] which you can find in android/app/src/main/java/com/propertyfinder.
MainApplication sets up a ReactNativeHost which in turn creates a ReactInstanceManager. The instance manager handles the communication between JavaScript and native Android.
MainActivity extends ReactActivity which creates a ReactRootView when launched. ReactRootView uses the instance manager to start the JavaScript application. It also renders the App component to set the Activity’s content view.
The terminal window that was opened when you ran this application started a packager and server that allows your JavaScript code to be fetched, by default on port 8081. For example:
http://localhost:8081/index.bundle?platform=android
Open this URL in your browser; you’ll see the JavaScript code for your app. You can find your “Search for houses to buy!” description code embedded among the React Native framework.
When your app starts, this code is loaded and executed by the JavaScriptCore library. In the case of your application, it loads the App component, then constructs the native Android view.
Using JSX
Your current application uses React.createElement to construct the simple UI for your application, which React turns into the native equivalent. While your JavaScript code is perfectly readable in its present form, a more complex UI with nested elements would rapidly become quite a mess.
Make sure the app is still running, then return to your text editor to edit App.js. Modify the body of render to be the following:
return <Text style={styles.description}>Search for houses to buy! (Again)</Text>;
This is JSX, or JavaScript syntax extension, which mixes HTML-like syntax directly in your JavaScript code; if you’re already a web developer, this should feel rather familiar. You’ll use JSX throughout this article.
Save your changes to App.js and return to the emulator.

Re-running a React Native application is really as simple as refreshing a web browser! Note that this will only reflect changes made to your JavaScript files – native code or resource changes will require you to restart the packager.
You can even skip having to refresh the app by enabling live reload.

In App.js, modify the render method’s body to the following:
return <Text style={styles.description}>Search for houses to buy!</Text>;
Save your changes.

Adding Navigation
Building out the Search Page
Styling with Flexbox
Handling Assets
Adding Component State
Initiating a Search
Performing an API Request
Displaying the Results
A Touch of Style
Where To Go From Here?
Congratulations on completing this React Native tutorial! You can find the complete project here if you want to compare notes.
As a challenge, try showing a property’s details when the user selects one from the search list. You can check out the challenge solution if you get stuck.
Note
Before opening the finished project or the challenge solution, first run yarn in terminal in the root folder of the project.
Check out the React Native’s source code if you’re curious. I suggest taking a look at this ES6 resource to continue brushing up on modern JavaScript.
You may also want to check out the equivalent tutorial for building React Native apps on iOS.
If you’re a web developer, you’ve seen how to use JavaScript to easily create a native app. If you’re a native app developer, you’ve gained some appreciation for React Native’s fast iteration cycle. Whether you decide to use React Native in a future app or simply stick with native Android, I hope you’ve learned some interesting principles to apply to your next project.
If you have any questions or comments on this React Native tutorial, feel free to join the discussion in the forums below!
