Getting Started with Android Wear with Kotlin
Getting Started with Android Wear with Kotlin 관련

It even lets you check the time. Mind blowing, right?
In this Android Wear tutorial we’ll cover the basics of developing for Android Wear by creating a simple recipe app. In the process, you’ll learn:
- How to send messages from your watch to your phone and vice versa
- How to share code between your app module and your Wear module
- About the wearable support library
- How to package and ship your new Wear app
A Brief History of Android Wear
Google officially announced Android Wear in the spring of 2014. Quickly after that, LG and Samsung released the first two Wear watches – the LG G watch and the Samsung Gear Live. Lots of updates ensued, and in the summer of 2015 Google decided to spread the love and released the Android Wear app on iOS. This allowed iPhone users to pair Android Wear watches with their phones. This gives you, our soon-to-be expert Wear app maker, twice the potential audience!
The latest update in our Wear saga came in February of 2017, when Google announced Wear 2.0. This update, among other things, has paved the way for standalone Wear apps. Standalone Wear apps are watch apps without a companion app on the phone. It also introduced a dedicated Wear app store on the watch to find new apps. Nice!
Connecting to a Wear Device
Before you get started, you’ll need to connect your Wear device to your computer so you can debug the app.
Note
If you don’t own an Android Wear device, don’t worry! You can still follow this tutorial with a watch AVD. If you choose this option, you can simply follow the very detailed step-by-step tutorial on the official documentation and skip directly to the next section.
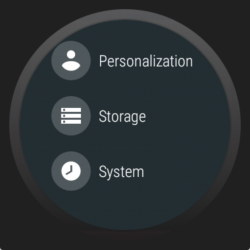
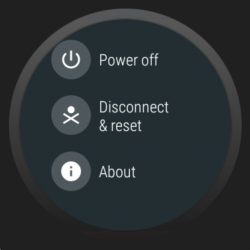
The first thing you’ll want to do is enable developer options on your watch. To do this, navigate to Settings -> System -> About on your watch or emulator and scroll down until you see the build number.
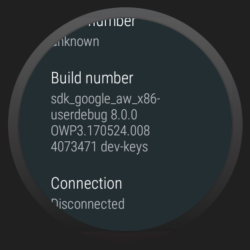
Now tap the build number 7 times.
Wait What?
Yep. Just like on a normal Android Phone, you unlock developer options by tapping the build number 7 times.
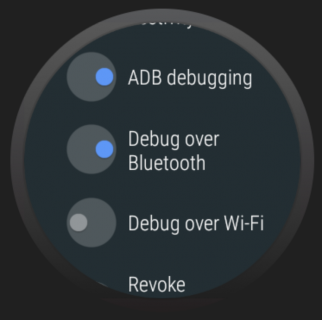
Next, go back to the settings screen and tap the [Developer options] menu item. Make sure [ADB debugging] is turned on. If you see an option for usb-debugging, turn that on as well. Otherwise, turn on [Debug over Bluetooth].
Now that you’ve got ADB debugging all setup, you need to actually connect your Wear device to your computer. If you saw the debug over usb option in the developers option list, congratulations! You should be able to just plug your watch into your computer (via the charging cord) and be ready to go. Otherwise you need to connect over bluetooth.
Debugging over Bluetooth
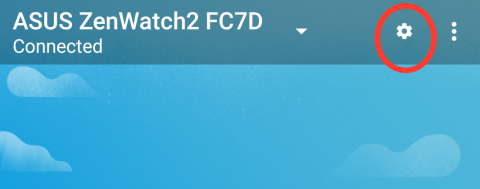
To debug over bluetooth, you’ll need an Android Wear watch paired with an Android phone. Make sure both the watch and the phone have adb debugging enabled. Next, open the Android Wear app on your phone and navigate to settings.
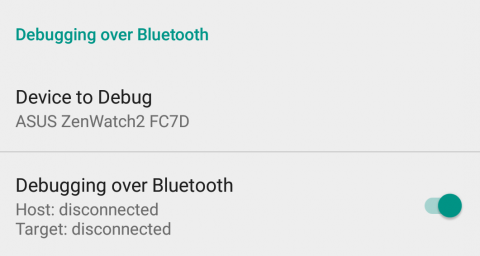
Scroll down to the [Debugging over Bluetooth] section and make sure the [Device to Debug] is set to your paired watch. Next, enable the [Debugging over Bluetooth toggle]. At this point, there should be a subtitle under the toggle that says [Host: Disconnected] and [Target: Disconnected].
But don’t you worry – they won’t stay disconnected for long! Open a terminal and enter the command
adb forward tcp:4444 localabstract:/adb-hub
followed by
adb connect 127.0.0.1:4444
Accept the adb-debugging prompt on your phone and you’re good to go! At this point the Android Wear app on your phone should have changed to connected for both host and target.
This process can be a bit thorny – if you run into any problems, you can check out the official documentation.
Getting Started
Start by downloading the WEARsmyrecipe starter project here.

If you see a message to update the project’s Gradle plugin since you’re using a later version of Android Studio, then go ahead and choose “Update”.
Wait for the Gradle sync to complete.
On the top left hand side of Android Studio, make sure the Android dropdown is selected – this will give you a nice view of the project structure.
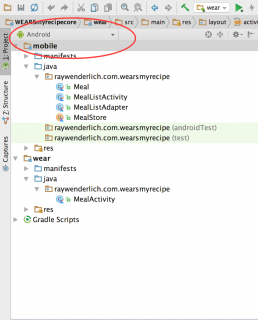
You can see two modules now:
- The
mobilemodule, which is where the phone app code lives. - A new
wearmodule which is where the Wear app code lives.
The code is pretty basic right now – there’s a few helper files in place to show a list of recipes on the phone app, but that’s about it. Don’t worry, you’ll change that soon.
Run the mobile app. You may need to make sure the mobile configuration is set in the configuration dropdown. You should see a screen similar to this on your phone:
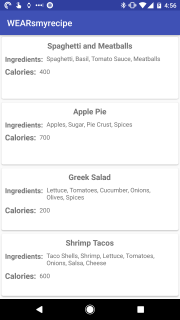
Nothing too crazy going on here – just a simple list of Recipes. (You can tell by the list that I’m an expert chef! Just kidding, I recently burned a can of soup. Turns out you need to take the soup out of the can. Who knew!)
Next you’ll run the Wear app. To point Android Studio towards the Wear module, you need to change the [run configuration] from mobile to Wear. Click the [run configuration] dropdown next to the run button. It should say “mobile” right now. Click the Wear option to change to the Wear configuration:
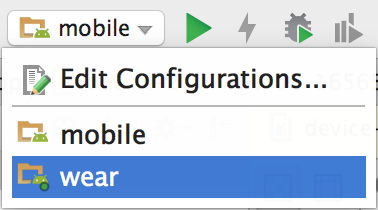
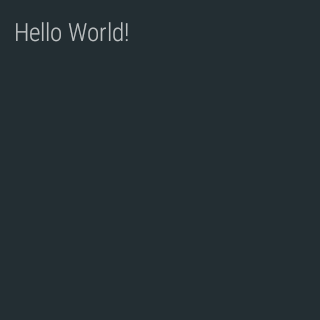
Now that we’re using the Wear run configuration, click the run button and and select your Wear device – you should see a screen similar to this:
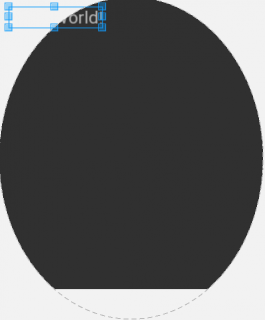
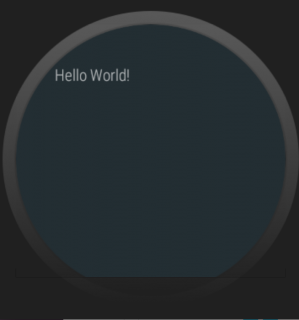
If you have a round watch (like the Moto360) you may see something closer to this:
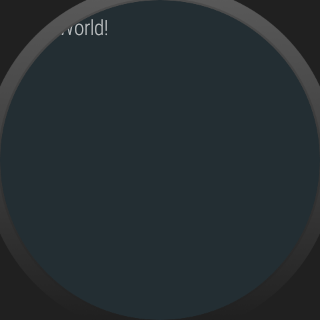
And that cutoff text is just a darn shame. But you’re going to fix it!
Building a Simple Recipe Layout
Android Wear devices come in lots of shapes and sizes. There’s three main form factors you need to consider as a Wear developer:
- Square watches
- Round watches
- Round watches with a chin
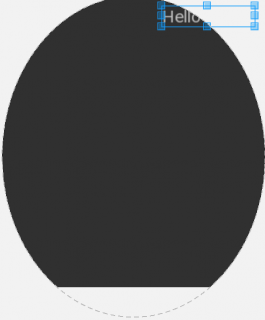
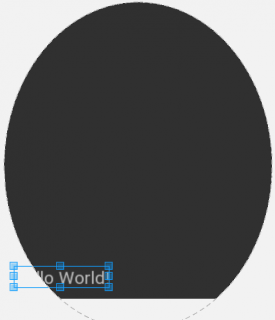
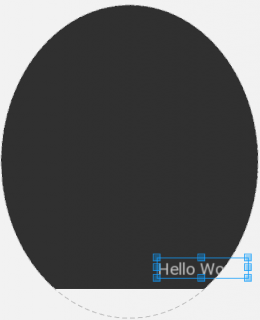
By default, all Wear devices treat the root layout of the view as a square, even if the device itself has a circular form factor. That means your views can be clipped if they sit at the edges of the screen. Here’s a few examples:
Luckily, there’s a handy dandy support widget you can use to work around the clipping issue!
Using the BoxInsetLayout Widget
The BoxInsetLayout is a top-level widget that can box its children into a square that will fit inside a round screen. If your code is running on a square screen it will have no affect. You can define which sides to box in by using the app:boxedEdges attribute on a direct child of the BoxInsetLayout. The possible values are left, right, top, bottom, and all. You can combine different values too – so app:boxedEdges:"left|top|bottom" is totally legal.
Now that you’ve got the idea down, open the wear/res/layout/activity_meal.xml file and replace its contents with the following:
<android.support.wear.widget.BoxInsetLayout
  xmlns:android="http://schemas.android.com/apk/res/android"
  xmlns:app="http://schemas.android.com/apk/res-auto"
  android:layout_width="match_parent"
  android:layout_height="match_parent">

  <LinearLayout
    android:layout_width="match_parent"
    android:layout_height="match_parent"
    app:boxedEdges="all">

    <TextView
      android:layout_width="wrap_content"
      android:layout_height="wrap_content"
      android:text="Hello World!"/>
  </LinearLayout>
</android.support.wear.widget.BoxInsetLayout>
Here’s what’s happening in this new layout:
- The top level layout is now a
BoxInsetLayout - The
BoxInsetLayouthas one child – aLinearLayout - That
LinearLayouthas theapp:boxedEdges="all"layout attribute, meaning that this view will be boxed in on all sides.
Note
In the preview tab, you can change the device type used to render the preview. Feel free to change to Wear Round or Wear Square to see how the BoxInsetLayout works.

Run the Wear app again.
Just for fun, you can set the background of the LinearLayout to gray to see where the bounding box is. Add android:background="@android:color/darker_gray" to the LinearLayout. If you run the app again you should see the following: Fixed
Since you specified app:boxedEdges="all", the box is bounded on all four sides. Cool stuff!
Fleshing out the Recipe Layout
Replace the contents of the wear/res/layout/activity_meal.xml file you just edited with the following:
<android.support.wear.widget.BoxInsetLayout
    xmlns:android="http://schemas.android.com/apk/res/android"
    xmlns:app="http://schemas.android.com/apk/res-auto"
    android:layout_width="match_parent"
    android:layout_height="match_parent">

  <LinearLayout
      android:layout_width="match_parent"
      android:layout_height="match_parent"
      android:orientation="vertical"
      android:padding="8dp"
      app:boxedEdges="all">

    <TextView
        android:id="@+id/mealTitle"
        android:layout_width="wrap_content"
        android:layout_height="wrap_content"
        android:text="Meal title"
        android:textSize="18sp"
        android:textStyle="bold"/>

    <TextView
        android:id="@+id/calories"
        android:layout_width="wrap_content"
        android:layout_height="wrap_content"
        android:paddingTop="8dp"
        android:text="Number of calories"/>

    <TextView
        android:id="@+id/ingredients"
        android:layout_width="wrap_content"
        android:layout_height="wrap_content"
        android:paddingTop="8dp"
        android:text="Ingredients"/>
  </LinearLayout>
</android.support.wear.widget.BoxInsetLayout>
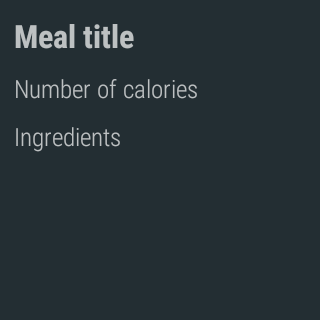
Nothing too crazy going on here – you added 3 new TextView that will contain the recipes title, calories and ingredients. You’ll update them soon, so don’t worry about the placeholder values.
Sharing Code Between the Watch and the Phone
When you create a wearable app you’ll want to share code between the phone and watch apps. The app you’re creating has a Meal model that should be shared across both apps. You can accomplish this by using a shared module.
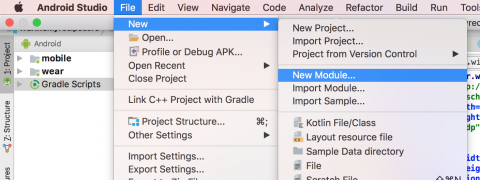
[File] > [New] -> [New Module]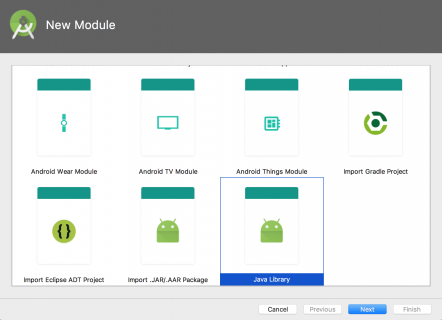
[Java Library].A Java library contains no Android references. If you wanted to include drawable files or other Android files, you would instead choose the Android library option.
Note
Ideally you’d create a Kotlin library instead of a Java library. But this is Android land, and that would be WAY too easy. Android Studio doesn’t have the option to create a pre-configured Kotlin module yet.
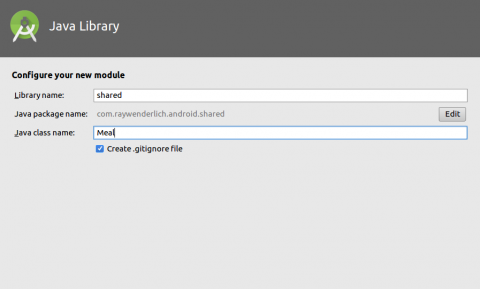
shared and name the class Meal. You can leave the [Create .gitignore file] option checked.Click [Finish].
Gradle will run a sync and if you’ve done the right Gradle dance it will succeed!
However, we now have a Java library. Not a Kotlin library. And let’s be serious – who uses Java anymore?
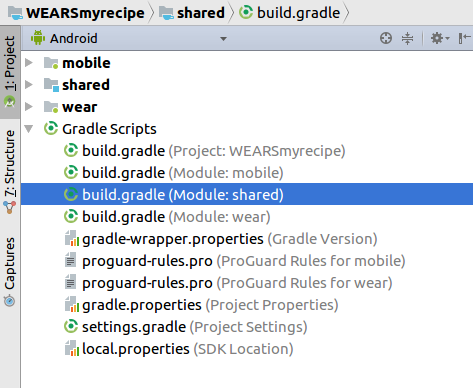
[Gradle Scripts/build.gradle] for the shared moduleReplace the contents with the following code:
dependencies {
  implementation fileTree(dir: "libs", include: ["*.jar"])
  implementation "org.jetbrains.kotlin:kotlin-stdlib-jre7:$kotlin_version"
}

sourceCompatibility = "1.7"
targetCompatibility = "1.7"
The code above adds Kotlin support to the new module.
Importing the Shared Library
Now that you’ve got a helpful shared library, it’s time to actually share that library.
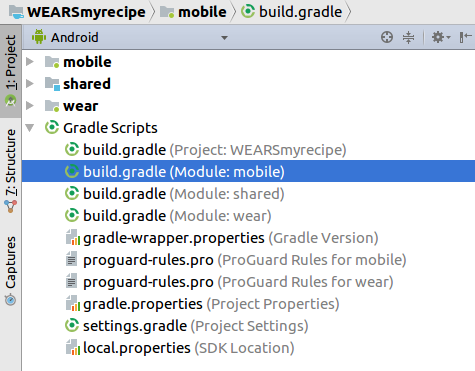
build.gradle file for your mobile appin the dependencies block, add the following line: compile project(':shared')
Your dependencies block should now look like this:
dependencies {
  implementation fileTree(dir: "libs", include: ["*.jar"])
  implementation project(':shared')
  implementation "org.jetbrains.kotlin:kotlin-stdlib-jre7:$kotlin_version"
  implementation 'com.google.android.gms:play-services-wearable:11.6.0'
  implementation "com.android.support:support-v4:$support_version"
  implementation "com.android.support:appcompat-v7:$support_version"
  implementation "com.android.support:recyclerview-v7:$support_version"
  implementation "com.android.support:cardview-v7:$support_version"
  implementation "com.android.support.constraint:constraint-layout:1.0.2"
  implementation "com.google.code.gson:gson:2.8.2"
  androidTestCompile('com.android.support.test.espresso:espresso-core:2.2.2', {
    exclude group: 'com.android.support', module: 'support-annotations'
  })
  testCompile 'junit:junit:4.12'
}
The compile project method is the way to include a local module in your project.
Now you need to do the same thing for the watch app.
build.gradle file for your Wear appJust like before, in the dependencies block, add the compile project(':shared') line.
The dependencies block of the Wear app should now look like this:
dependencies {
  implementation fileTree(dir: 'libs', include: ['*.jar'])
  implementation project(':shared')
  implementation "org.jetbrains.kotlin:kotlin-stdlib-jre7:$kotlin_version"
  implementation "com.android.support:support-v4:$support_version"
  implementation "com.android.support:wear:$support_version"
  implementation "com.google.android.gms:play-services-wearable:11.6.0"
  implementation "com.google.android.support:wearable:2.1.0"
  provided "com.google.android.wearable:wearable:2.1.0"
  implementation "com.google.code.gson:gson:2.8.2"
}
This recipe app is really HEATING up! Because you cook with heat. And the app has to do with meals. Which you cook. With heat. Why does no one understand my witty humor?
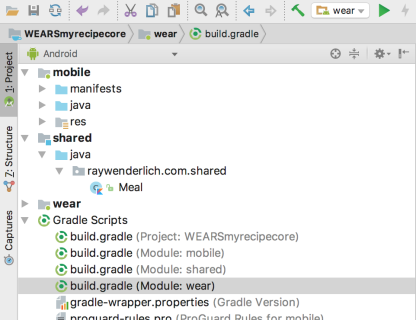
Adding the Meal Class
Your shared library contains one class – a Meal model written in Java. However, your mobile module actually already contains an even better meal class written in Kotlin. That’s the model that you want to share
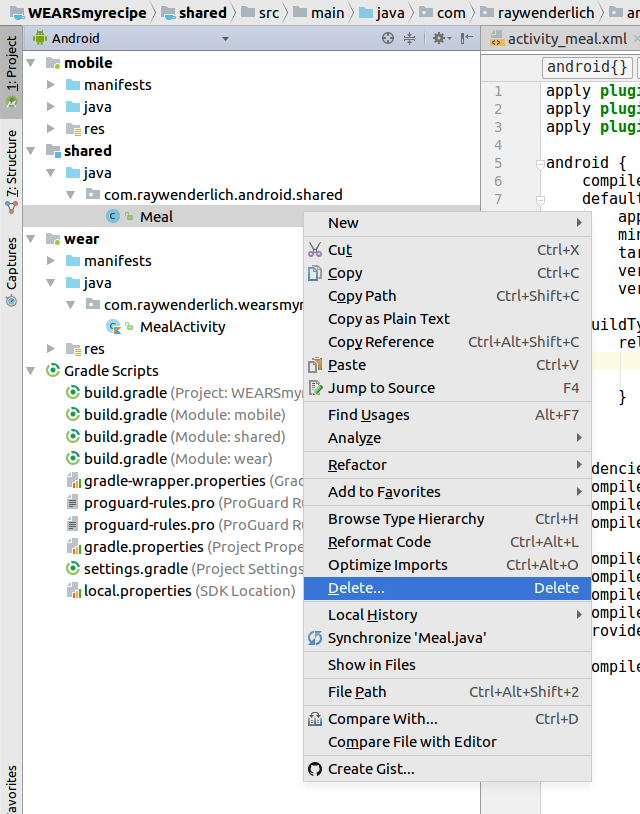
Meal class in your shared library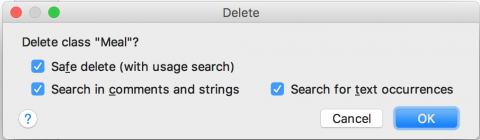
[OK] on the delete dialog
Meal class from your mobile module to your shared moduleClick the [Refactor] button in the popup. Now the phone app is using the Meal class from the shared module.
Sending Messages Between Devices
Now that both the watch app and the phone app know about your Meal class, it’s time to pass some data around.
Phone apps communicate with Wear apps via the Message API and the Data API.
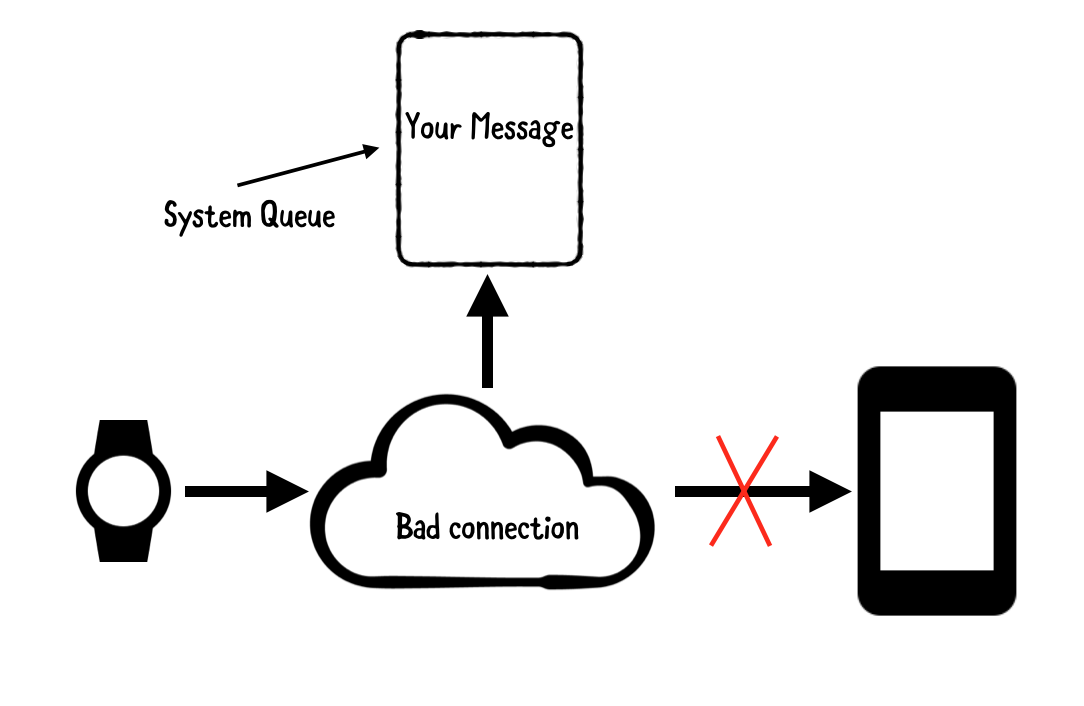
The Data API should be used for messages you need delivered. If the system can’t immediately deliver it, it will queue it up until the watch is connected to the phone.
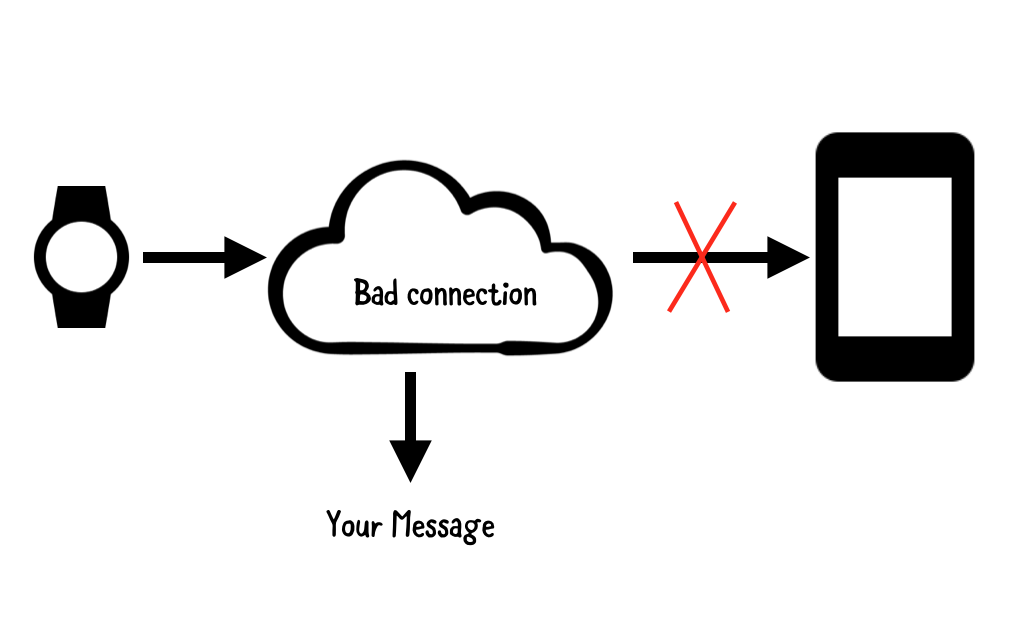
The Message API, on the other hand, should be used for short messages that you don’t mind losing. If the system can’t immediately deliver the message it won’t try again and that will be that. Your message will be dropped on the floor.
Using the Message API
You’re now going to use the Message API to send a recipe from your phone to your watch.
First, open the MealListActivity file. Add the following code to your imports:
import com.google.android.gms.common.api.GoogleApiClient
import com.google.android.gms.wearable.Node
The Message and Data APIs both use the GoogleApiClient system under the hood, so that’s why you’re importing the GoogleApiClient. A Node is fancy speak for a wearable device.
Under the adapter property declaration add the following two properties:
private lateinit var client: GoogleApiClient
private var connectedNode: List<Node>? = null
One is for your GoogleApiClient and the other is for your Nodes. There could be multiple connected watches (cooouuuullllldd be….) so that’s why it’s a List of Nodes.
Next, make the MealListActivity implement the GoogleApiClient.ConnectionCallbacks interface.
class MealListActivity : AppCompatActivity(),
    MealListAdapter.Callback,
    GoogleApiClient.ConnectionCallbacks {
    // ... 생략
    }
When you connect to the GoogleApiClient, the ConnectionCallbacks will provide you with a callback to store your nodes. Now, you need to implement two methods – onConnected and onConnectionSuspended. Add the following below your onCreate method:
override fun onConnected(bundle: Bundle?) {
  Wearable.NodeApi.getConnectedNodes(client).setResultCallback {
    connectedNode = it.nodes
  }
}

override fun onConnectionSuspended(code: Int) {
  connectedNode = null
}
The onConnected method gets called once the GoogleApiClient connects. At that point, you want to get all of the Nodes from the Wearable.NodeApi and save them in your list.
onConnectionSuspended is called when the GoogleApiClient you’re using gets disconnected. In this scenario you no longer have access to your Nodes (wearable devices) so you clear out your connectedNode list.
Next, in your onCreate method, add the following:
client = GoogleApiClient.Builder(this)
    .addApi(Wearable.API)
    .addConnectionCallbacks(this)
    .build()
client.connect()
Here your building up a GoogleApiClient that has access to the Wearable API. You’ll use this client shortly to actually send messages to the watch!
You’ll notice that there’s a stub for the mealClicked method in your activity. Replace that with the following:
override fun mealClicked(meal: Meal) {
  val gson = Gson()
  connectedNode?.forEach { node ->
    val bytes = gson.toJson(meal).toByteArray()
    Wearable.MessageApi.sendMessage(client, node.id, "/meal", bytes)
  }
}
This method uses Gson to serialize your meal. It then uses the MessageApi.sendMessage method to send the meal to your watch. The String can be used to filter messages on the receiving side. You can ignore it for this tutorial.
Alright – onto the watch!
Listening for Messages
Good news: your phone app is sending messages! Bad news: your watch isn’t receiving any messages.
But that’s all about to change.
The code you’re going to add to your watch app is very similar to the code you just added to your phone app.
To start, open the MealActivity class in your Wear module.
Add the following import:
import kotlinx.android.synthetic.main.activity_meal.*.
This will allow you to reference your views without using all that old-school findViewById junk!
Next, add the following two properties to your activity:
private lateinit var client: GoogleApiClient
private var currentMeal: Meal? = null
One is your now-familiar GoogleApiClient, which you’ll use to listen for messages. The other is the current meal being displayed.
Next make your activity implement the GoogleApiClient.ConnectionCallbacks interface. Then, add the following code below your onCreate method:
override fun onConnected(bundle: Bundle?) {
Wearable.MessageApi.addListener(client) { messageEvent ->
currentMeal = Gson().fromJson(String(messageEvent.data), Meal::class.java)
updateView()
}
}
override fun onConnectionSuspended(code: Int) {
Log.w("Wear", "Google Api Client connection suspended!")
}
private fun updateView() {
currentMeal?.let {
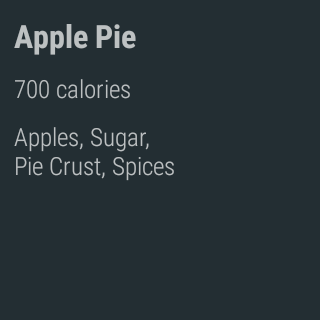
mealTitle.text = it.title
calories.text = getString(R.string.calories, it.calories)
ingredients.text = it.ingredients.joinToString(separator = ", ")
}
}
The updateView() method is pretty simple – it looks at the current Meal and updates your view accordingly.
The onConnectionSuspended method isn’t doing too much. You don’t have anything to clear out when the connection ends.
The onConnected method is where the magic is. Once the GoogleApiClient has connected, you added a MessageListener to listen for new Message API events from the phone. In the callback, you are doing the opposite of what you did on the phones side. The MessageEvent object has a data parameter. You used Gson to deserialize the ByteArray into a Meal.
Finally, initialize your GoogleApiClient in onCreate:
client = GoogleApiClient.Builder(this)
    .addConnectionCallbacks(this)
    .addApi(Wearable.API)
    .build()
client.connect()
Boom! Your Wear app is listening for messages for your phone.
Testing the App
First run the mobile app on your phone. After that, run the Wear app on your watch.
Now, do a rain dance. Followed by a little prayer. Followed by an offering of chocolates to the Android gods.
Then tap the Apple Pie list item on your phone app.
If everything runs smoothly, you should see this screen on your watch:
Using the Data Api
This app is already pretty hot, but its time to make it a bit spicier. Maybe throw some red pepper on there.
You’re going to add a star button to your watch layout so you can favorite specific meals.
Open up the activity_meal.xml file in your wear module.
Add the following widget as the last item in your LinearLayout:
<ImageView
    android:id="@+id/star"
    android:layout_width="wrap_content"
    android:layout_height="0dp"
    android:layout_gravity="center"
    android:layout_weight="1"
    android:src="@drawable/ic_star_border_black_24dp"
    android:tint="@android:color/white"/>
You just added a simple ImageView with a black border star. This will be your “like” button. The height is set to 0dp and the layout_weight is set to 1 so the star fills the rest of the screen.
In your MealActivity class, adding the following method:
private fun sendLike() {
  currentMeal?.let {
    val bytes = Gson().toJson(it.copy(favorited = true)).toByteArray()
    Wearable.DataApi.putDataItem(client, PutDataRequest.create("/liked").setData(bytes).setUrgent())
  }
}
Here’s the breakdown of the new method: First it creates a copy of your meal with the favorited flag set to true. Then it serializes that new copy into a ByteArray. Next it creates a PutDataRequest. You can think of a PutDataRequest as the DataApi version of a Message. Why didn’t they call it something like…DataItem? Again – that’d be too easy. Finally, the method sends that request on the /liked path with the ByteArray attached as the data.
You may also notice the setUrgent call. You can toggle that option to gently encourage the system to deliver the PutDataRequest as fast as possible.
Next, add the following code in your MealActivity onCreate method:
star.setOnClickListener {
  sendLike()
}
Now your Wear app is sending Data API items to your mobile app.
Listening for Data Items
Next up is adding code to your mobile app to listen for Data API items.
Open your MealListActivity class. In the onConnected method, add the following code after the connectedNode = it.nodes line:
Wearable.DataApi.addListener(client) { data ->
  val meal = Gson().fromJson(String(data[0].dataItem.data), Meal::class.java)
  adapter?.updateMeal(meal)
}
This code is very similar to the Message code you added previously. It adds a DataListener to the DataApi. The DataListener deserializes the ByteArray contained in the DataItem. Then it makes a call to the adapter to update the newly favorited meal.
Do a few more rain dances and run the mobile app and the Wear app.
Send one of the recipes to the watch again by tapping a recipe list item.
Once the recipe makes it to the watch, tap the star. If everything went well, you should see a black star appear next to that list item on the phone – like so:

After running that test, try sending a new recipe to the watch and putting your phone in airplane mode. Wait a few seconds and then tap the like button on the watch again. Then take your phone out of airplane mode. Once the phone pairs to the watch again, you should see the item starred!
Adding a Confirmation View
One nice thing about developing for Wear is that it comes with a few juicy animations built in. You’re going to take advantage of that by adding a ConfirmationActivity to your Wear app.
First, add the following import to the top of MealActivity in the wear module:
import android.support.wearable.activity.ConfirmationActivity
Then, add a new method in your MealActivity class:
private fun showConfirmationScreen() {
  val intent = Intent(this, ConfirmationActivity::class.java)
  intent.putExtra(
      ConfirmationActivity.EXTRA_ANIMATION_TYPE,
      ConfirmationActivity.SUCCESS_ANIMATION
  )
  intent.putExtra(
      ConfirmationActivity.EXTRA_MESSAGE,
      getString(R.string.starred_meal)
  )
  startActivity(intent)
}
.ConfirmationActivity is a built-in activity. Specifically, it’s a fullscreen activity that shows a checkmark and then disappears.
The method above creates an Intent to launch the ConfirmationActivity with two extras.
EXTRA_ANIMATION_TYPEdictates the animation type.EXTRA_MESSAGEis used to show a small text message below the animation.
Next up you need to trigger the animation. So, In the sendLike method, replace the putDataItem line with the following:
Wearable.DataApi.putDataItem(
    client,
    PutDataRequest.create("/liked")
        .setData(bytes)
        .setUrgent()
).setResultCallback {
  showConfirmationScreen()
}
The only difference is that after the putDataItem call, it adds a ResultCallback where you check to see if the put request was successful. If it was, you make a call to show the confirmation.
Try it out on your watch. Eventually, once you send a like for a recipe, you should see the following view:
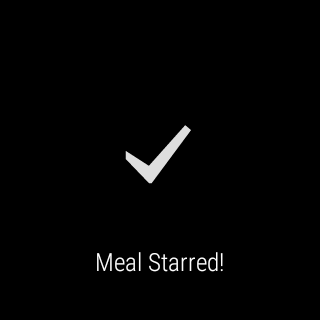
ConfirmationActivityUploading your Wear App to the Play Store
When Android Wear first came out, the only way to get a Wear app to users was to embed the APK in your mobile app. Wear 2.0 changed that. Now you can upload your Wear app to the play store in exactly the same way you’d upload a normal phone app.
The only requirement is that you have the following line in your Wear apps manifest:
uses-feature android:name="android.hardware.type.watch"
As long as you have that line, your Wear app will show up on the Wear play store.
Your Wear app will also be installed whenever a user downloads your phone app from the play store.
Where To Go From Here?
Here is the download for the final project.
In this Android Wear tutorial, you learned:
- how to design for both round and square watches
- how to communicate between the mobile and the Wear device, using both the Message and Data API
- and how to show some snazzy animations right out of the box!
There is a lot more to learn and do with Android Wear! If you’re interested in learning more about Android Wear development, check out the official documentation.
- You can build standalone apps with Wear-specific UI, new interactions and gestures.
- Also, you can create new Watch Faces
- Or you can add Voice Capabilities to control your app with your voice!
- And many more cool features!
If you have any questions, or just want to share your favorite food puns, join the discussion below!
