CocoaPods Tutorial for Swift: Getting Started
CocoaPods Tutorial for Swift: Getting Started 관련

Update
Rony Rozen updated this tutorial for Xcode 11 and Swift 5. Joshua Greene wrote the original.
CocoaPods is a popular dependency manager for Swift and Objective-C Cocoa projects. Thousands of libraries and millions of apps use it, according to the CocoaPods website. But what is a dependency manager and why do you need one?
A dependency manager makes it easy to add, remove, update and manage the third-party dependencies your app uses.
For example, instead of reinventing your own networking library, you can easily pull in Alamofire using a dependency manager. You can specify either the exact version to use or a range of acceptable versions.
This means that even if Alamofire gets an update with changes that aren’t backward-compatible, your app can continue using the older version until you’re ready to update it.
In this tutorial, you’ll learn how to use CocoaPods with Swift. Specifically, you’ll:
- Install CocoaPods.
- Work with a functional demo app that gets you thinking about ice cream.
- Use CocoaPods to add networking.
- Learn about semantic versioning.
- Add another library using a flexible version.
This tutorial also includes classes that use Core Graphics. While knowledge of Core Graphics is beneficial, it’s not required. If you’d like to learn more, read our Modern Core Graphics With Swift series.
Note
This CocoaPods tutorial requires basic familiarity with iOS and Swift development. If you’re completely new to iOS and/or Swift, then please check out some of the other written and/or video tutorials on this site before doing this tutorial. Or, dive into our book, iOS Apprentice.
Getting Started
Download the starter project by clicking the [Download Materials] button at the top or bottom of the tutorial.
Throughout this tutorial, you’ll work with an app called Ice Cream Shop, Inc. You’ll use CocoaPods to add dependencies to the app the easy way, instead of writing your own.
Before you can proceed with this tutorial, you need to install CocoaPods. Fortunately, CocoaPods uses Ruby, which ships with all versions of macOS X since version 10.7.
Open Terminal and enter the following command:
sudo gem install cocoapods
Enter your password when requested. The Terminal output will show various fetching, installing and documentation-related outputs, concluding with “XX gems installed”.
Note
You must use sudo to install CocoaPods, but once it’s installed, you won’t need to use it again in this tutorial.
Finally, enter this command in Terminal to complete the setup:
pod setup --verbose
This process takes a few minutes because it clones the CocoaPods Master Specs repository into ~/.cocoapods/ on your computer.
The verbose option logs progress as the process runs, allowing you to watch the process instead of seeing a seemingly “frozen” screen.
Awesome, you’re now set up to use CocoaPods!
Ice Cream Shop, Inc.
Your top client is Ice Cream Shop, Inc. Their ice cream is so popular they can’t keep up with customer orders at the counter. They’ve recruited you to create a sleek iOS app that allows customers to order ice cream right from their iPhones.
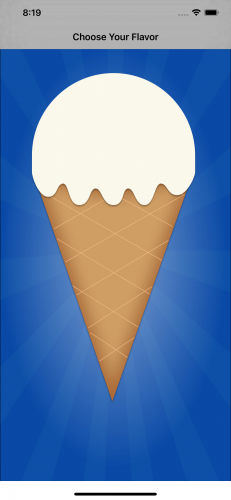
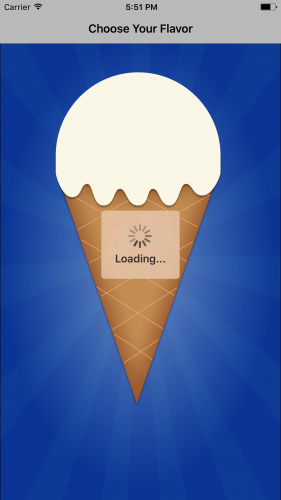
You’ve started developing the app and it’s coming along well. Take a look at your progress by opening IceCreamShop.xcodeproj, then building and running. You’ll see a mouth-watering vanilla ice cream cone:

The user should be able to choose an ice cream flavor from this screen, but that’s not possible yet. Your first step is to finish implementing this functionality.
Open Main.storyboard from the Views/Storyboards & Nibs group to see the app’s layout. Here’s a quick overview of the heart of the app, the [Choose Your Flavor] scene:
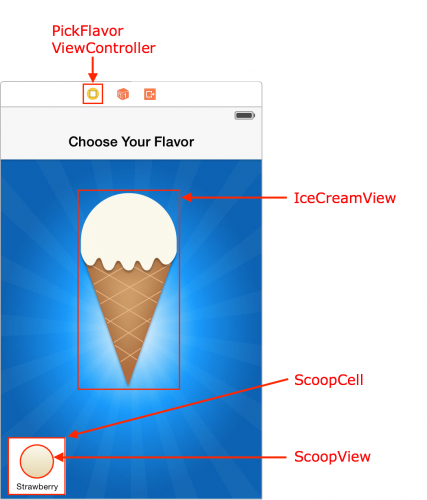
[Choose Your Flavor] scenePickFlavorViewControlleris the view controller for this scene. It handles user interaction and provides the data for the collection view that displays the different ice cream flavors.IceCreamViewis a custom view that displays an ice cream cone based on the backing mode,Flavor.ScoopCellis a custom collection view cell that contains aScoopView, which gets colors from aFlavormodel.
While every Ice Cream Shop, Inc. location has signature flavors in common, each carries its own local flavors, too. For this reason, a web service needs to provide the data for the Flavors.
However, this still doesn’t explain why users can’t select their ice cream flavors.
Open PickFlavorViewController.swift, found under the Controllers group, and you’ll see a stubbed method:
private func loadFlavors() {
  // TO-DO: Implement this
}
Aha, there are no flavors! You need to implement the function!
While you could use URLSession and write your own networking classes, there’s an easier way: Use Alamofire/Alamofire!
You might be tempted to download this library and drag the source files right into your project. However, that’d be doing it the hard way. CocoaPods provides a much more elegant and nimble solution.
Installing Your First Dependency
Your first step is to close Xcode. Yeah, you read that right.
It’s time to create the Podfile, where you’ll define your project’s dependencies.
Open Terminal and navigate to the directory that contains your IceCreamShop project by using the cd command:
cd ~/Path/To/Folder/Containing/IceCreamShop
Next, enter the following command:
pod init
This creates a Podfile for your project.
Finally, type the following command to open the Podfile using Xcode for editing:
open -a Xcode Podfile
Note
Don’t use TextEdit to edit the Podfile because it replaces standard quotes with more graphically-appealing typeset quotes. This can cause CocoaPods to become confused and throw errors. Instead, use Xcode or another programming text editor to edit your Podfile.
The default Podfile looks like this:
# Uncomment the next line to define a global platform for your project
# platform :ios, '9.0'

target 'IceCreamShop' do
  # Comment the next line if you're not using Swift and don't want to use dynamic frameworks
  use_frameworks!

  # Pods for IceCreamShop

end
Delete the # and space before platform, then delete the other lines starting with #.
Your Podfile should now look like this:
platform :ios, '9.0'

target 'IceCreamShop' do
  use_frameworks!

end
This tells CocoaPods your project targets iOS 9.0 and will use frameworks instead of static libraries. While Swift and CocoaPods both support static linking, not all libraries you include do. One of them that you’ll use in this project does not.
If you’ve only programmed in Swift, this may look a bit strange. That’s because the Podfile is actually written in Ruby. You don’t need to know Ruby to use CocoaPods, but you should be aware that even minor text errors will cause CocoaPods to throw errors.
A Word About Libraries
You’ll see the term library often used as a general term that actually means a library or framework. This tutorial is guilty of casually intermixing these words, too.
You may be wondering about the differences between a library, a framework and a CocoaPod. It’s OK if you find the terminology a bit confusing!
A CocoaPod, or pod for short, is a general term for either a library or framework that’s added to your project using CocoaPods.
iOS 8 introduced dynamic frameworks, which allow you to bundle code, images and other assets together. Prior to iOS 8, you created CocoaPods as “fat” static libraries. “Fat” means they contained several code instruction sets, like i386 for the simulator, armv7 for devices, etc. However, Swift doesn’t allow static libraries to contain resources such as images or assets.
Back to Installing Your First Dependency
It’s finally time to add your first dependency using CocoaPods. Add the following to yourPodfile, right after use_frameworks!:
pod 'Alamofire', '4.9.1'
This tells CocoaPods you want to include Alamofire version 4.9.1 as a dependency for your project.
Save and close the Podfile.
You now need to tell CocoaPods to install the dependencies for your project.
Enter the following command in Terminal, after ensuring you’re still in the directory containing the IceCreamShop project and Podfile:
pod install
#
# Analyzing dependencies
# Adding spec repo `trunk` with CDN `https://cdn.cocoapods.org/`
# Downloading dependencies
# Installing Alamofire (4.9.1)
# Generating Pods project
# Integrating client project
#
# [!] Please close any current Xcode sessions and use `IceCreamShop.xcworkspace` for this project from now on.
# Pod installation complete! There is 1 dependency from the Podfile and 1 total pod installed.
Open the project folder using Finder and you’ll see CocoaPods created a new IceCreamShop.xcworkspace file and a Pods folder to store all the project’s dependencies.
Note
From now on, as the command line warning mentioned, you must always open the project with the .xcworkspace file and not the .xcodeproj. Otherwise, you’ll encounter build errors.
Excellent! You’ve just added your first dependency using CocoaPods!
Using Installed Pods
Now, you’ll use your brand new dependency, Alamofire.
If the Xcode project is open, close it now and open IceCreamShop.xcworkspace.
Open PickFlavorViewController.swift and add the following just below the existing import:
import Alamofire
Build and run. You’ll see no change yet but rest assured that Alamofire is now available.
Next, replace loadFlavors() with the following:
  private func loadFlavors() {
    // 1
    Alamofire.request(
      "https://www.raywenderlich.com/downloads/Flavors.plist",
      method: .get,
      encoding: PropertyListEncoding(format: .xml, options: 0))
        .responsePropertyList { [weak self] response in
        // 2
        guard let self = self else { return }

        // 3
        guard
          response.result.isSuccess,
          let dictionaryArray = response.result.value as? [[String: String]]
          else {
            return
        }

        // 4
        self.flavors = self.flavorFactory.flavors(from: dictionaryArray)

        // 5
        self.collectionView.reloadData()
        self.selectFirstFlavor()
    }
  }
Here’s the play-by-play of what’s happening in this code:
- You use Alamofire to create a GET request and download a plist containing ice cream flavors.
- To break a strong reference cycle, you use a weak reference to
selfin the response completion block. Once the block executes, you immediately get a strong reference toselfso you can set properties on it later. - Next, you verify the
response.resultshows success and theresponse.result.valueis an array of dictionaries. - Now, you set
self.flavorsto an array ofFlavorobjects thatFlavorFactorycreates. This is a class a “colleague” wrote for you (you’re welcome!), which takes an array of dictionaries and uses them to create instances ofFlavor. - Finally, you reload the collection view and select the first flavor.
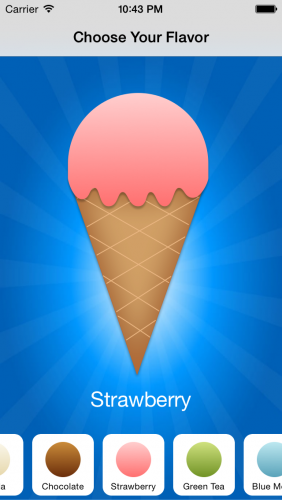
Build and run. You can now choose an ice cream flavor!
Now for a Tasty Topping
The app looks good, but you can still improve it.
Did you notice the app takes a second to download the flavors file? If you’re on a fast Internet connection, you might not notice the delay, but your customers won’t always be so lucky.
Your next step is to show a loading indicator in your app, to help customers understand it’s loading data and not just twiddling its libraries. jdg/MBProgressHUD is a really nice indicator that will work well here. And it supports CocoaPods; what a coincidence!
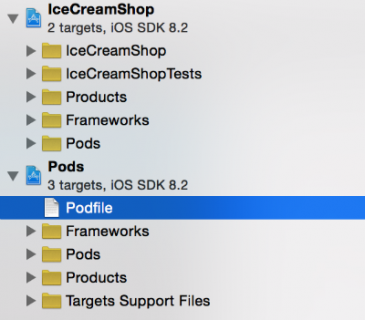
To use this pod, you need to add it to your Podfile. Rather than opening the Podfile from the command line, you can now find it in the Pods target in the workspace:
Open Podfile and add the following, right after the Alamofire line:
pod 'MBProgressHUD', '~> 1.0'
Save the file and install the dependencies via pod install in Terminal, just as you did before.
Notice anything different this time? Yep, you specified the version number as ~> 1.0. But why?
CocoaPods recommends that all pods use Semantic Versioning. Take a moment to understand what that is.
Semantic Versioning
Many times, you’ll see a version written like this: 1.0.0. Those three numbers are major, minor and patch version numbers.
For example, for the version number 1.0.0, 1 is the major number, the first 0 is the minor number, and the second 0 is the patch number.

If the major number increases, it indicates that the version contains non-backward-compatible changes. When you upgrade a pod to the next major version, you may need to fix build errors or the pod may behave differently than before.
If the minor number increases, it indicates that the version contains new functionality that is backward-compatible. When you decide to upgrade, you may or may not need the new functionality, but it shouldn’t cause any build errors or change existing behavior.
If the patch number increases, it means the new version contains bug fixes but no new functionality or behavior changes. In general, you always want to upgrade patch versions as soon as possible to have the latest, stable version of the pod.
Finally, when you increase the highest-order number — major, then minor then patch — per the above rules, you must reset any lower-order numbers to zero.
Here’s an example:
Consider a pod that has a current version number of 1.2.3.
If you make changes that are not backward-compatible, don’t have new functionality, but fix existing bugs, you’d give it version 2.0.0.
Challenge Time
If a pod has a current version of 2.4.6 and you make changes that fix bugs and add backward-compatible functionality, what should the new version number be?
- Answer: 2.5.0
- Explanation: If you make changes that include new functionality that’s backward-compatible, you increase the minor number and reset the patch to zero.
If a pod has a current version of 3.5.8 and you make changes to existing functionality which aren’t backward-compatible, what should the new version number be?
- Answer: 4.0.0
- Explanation: If changes modify existing behavior and are not backward-compatible, you must increase the major number and reset the minor and patch numbers to zero.
If a pod has a current version of 10.20.30 and you only fix bugs, what should the new version number be?
- Answer: 10.20.31
- Explanation: If you only fix bugs, you only increase the patch number.
Having said all this, there’s one exception to these rules:
If a pod’s version number is less than 1.0.0, it’s considered a beta version. Minor number increases may include changes that aren’t backward-compatible.
So back to MBProgressHUB: Using ~> 1.0 means you should install the latest version that’s greater than or equal to 1.0 but less than 2.0.
This ensures you get the latest bug fixes and features when you install this pod, but you won’t accidentally pull in backward-incompatible changes.
There are several other operators you can use as well. For a complete list, see the Podfile Syntax Reference.
Now that you’ve learned how operators work with your CocoaPods, it’s time to finish your app.
Showing Progress
If you recall, you were building a progress indicator to show your users when flavors are loading in the app.
To finish this feature, go back to PickFlavorViewController.swift and add the following right after the other imports:
import MBProgressHUD
Next, add the following helper methods after loadFlavors():
private func showLoadingHUD() {
  let hud = MBProgressHUD.showAdded(to: contentView, animated: true)
  hud.label.text = "Loading..."
}

private func hideLoadingHUD() {
  MBProgressHUD.hide(for: contentView, animated: true)
}
Now, in loadFlavors(), add the following two lines (as indicated):
  private func loadFlavors() {
    showLoadingHUD() // <-- Add this line

    Alamofire.request(
      "https://www.raywenderlich.com/downloads/Flavors.plist",
      method: .get,
      encoding: PropertyListEncoding(format: .xml, options: 0))
        .responsePropertyList { [weak self] response in
        guard let self = self else { return }

        self.hideLoadingHUD() // <-- Add this line
      // ...
As the method names imply, showLoadingHUD() shows an instance of MBProgressHUD while the GET request downloads. hideLoadingHUD() hides the HUD when the request finishes. Since showLoadingHUD() is outside the closure, it doesn't need the self prefix.
Build and run. You'll now see a loading indicator while the flavors are loading. If your internet connection is too fast for this, you can add a sleep(_:) statement just before hideLoadingHUD() so that you can experience the goodness that is MBProgressHUD.
Great work! Customers can now select their favorite ice cream flavor and they see a loading indicator while flavors are downloading.
Where to Go From Here?
You can download the completed project using the [Download Materials] button at the top or bottom of this page.
Congratulations! You now know the basics of using CocoaPods, including creating and modifying dependencies and understanding semantic versioning. You're now ready to start using them in your own projects!
There's lots more that you can do with CocoaPods. You can search for existing pods on the official CocoaPods website. Also, refer to the CocoaPods Guides to learn the finer details of this excellent tool. But be warned, once you begin using it, you'll wonder how you ever managed without it!
I hope you enjoyed reading this CocoaPods tutorial as much I did writing it. What are some of your favorite CocoaPods? Which ones do you rely on the most for everyday projects? Feel free to share, or to ask any questions, in the comments below!
