UIGestureRecognizer Tutorial: Getting Started
UIGestureRecognizer Tutorial: Getting Started 관련

Update note
Ryan Ackermann updated this tutorial for Xcode 11, Swift 5 and iOS 13. Caroline Begbie and Brody Eller wrote earlier updates and Ray Wenderlich wrote the original.
In iOS, gestures like taps, pinches, pans or rotations are used for user input. In your app, you can react to gestures, like a tap on button, without ever thinking about how to detect them. But in case you want to use gestures on views that don’t support them, you can easily do it with the built-in UIGestureRecognizer classes.
In this tutorial, you’ll learn how to add gesture recognizers to your app, both within the storyboard editor in Xcode and programmatically.
You’ll do this by creating an app where you can move a monkey and a banana around by dragging, pinching and rotating with the help of gesture recognizers.
You’ll also try out some cool extra features like:
- Adding deceleration for movement.
- Setting dependencies between gesture recognizers.
- Creating a custom
UIGestureRecognizerso you can tickle the monkey.
This tutorial assumes you’re familiar with the basic concepts of storyboards. If you’re new to them, you may wish to check out our storyboard tutorials first.
The monkey just gave you the thumbs-up gesture, so it’s time to get started!
Getting Started
Getting Started
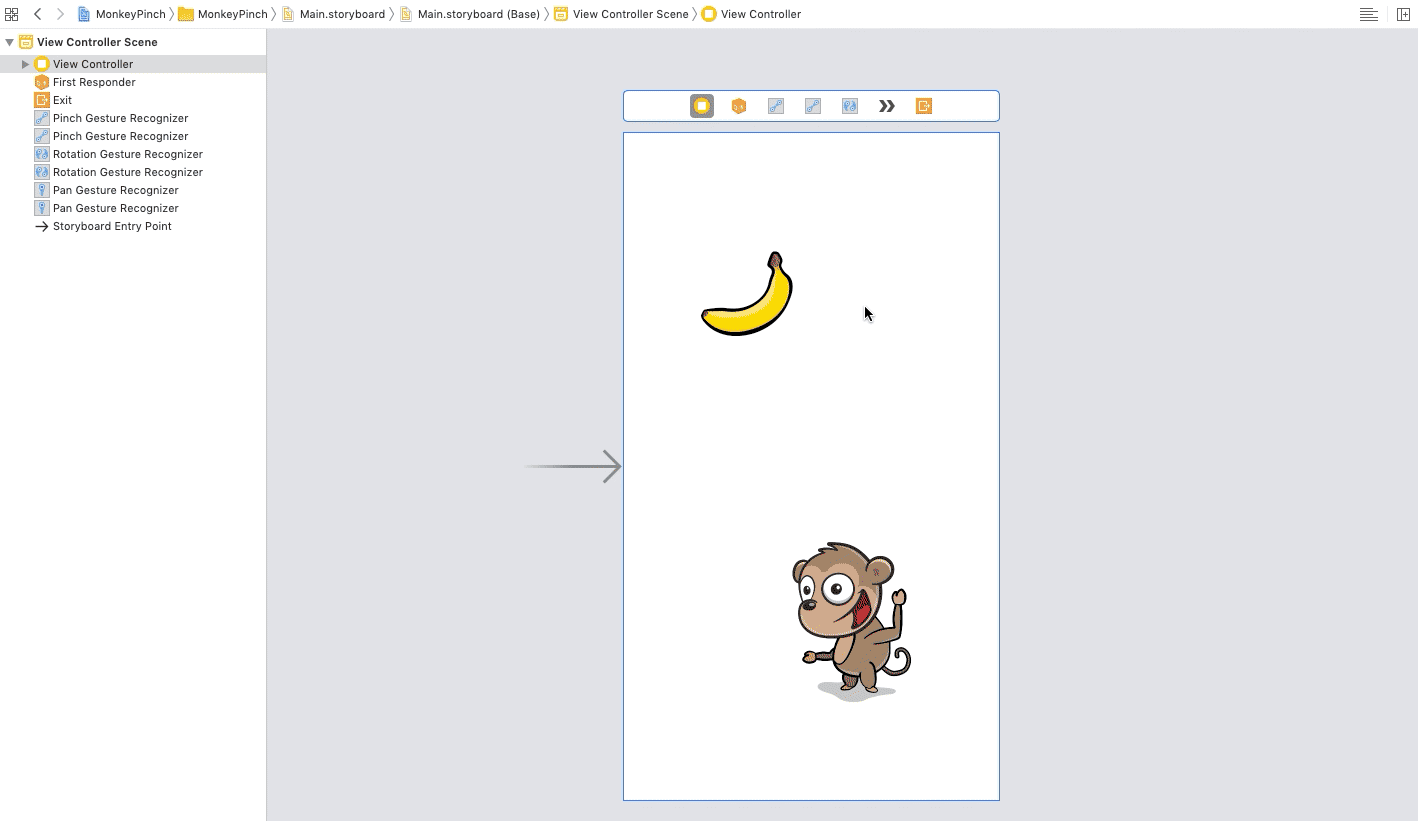
To get started, click the [Download Materials] button at the top or bottom of this tutorial. Inside the zip file, you’ll find two folders: begin and end.
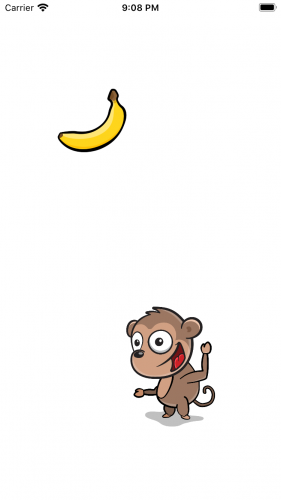
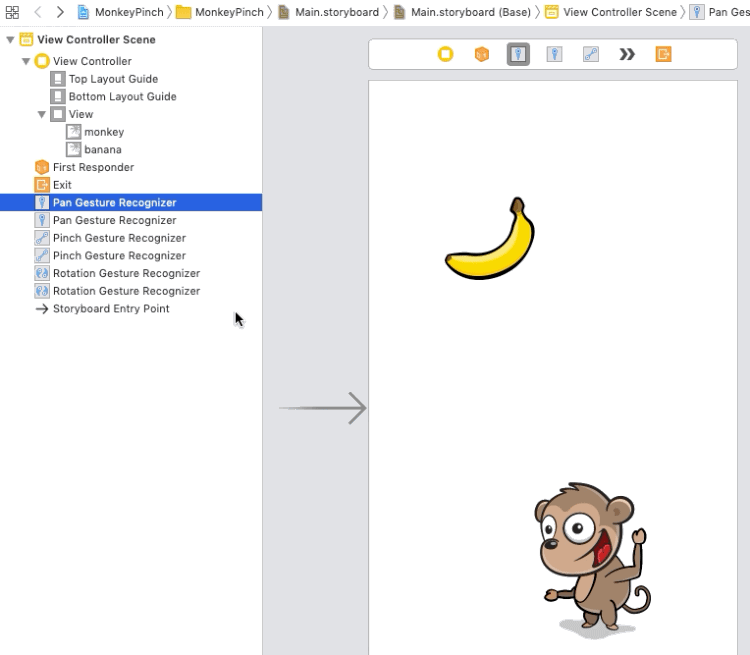
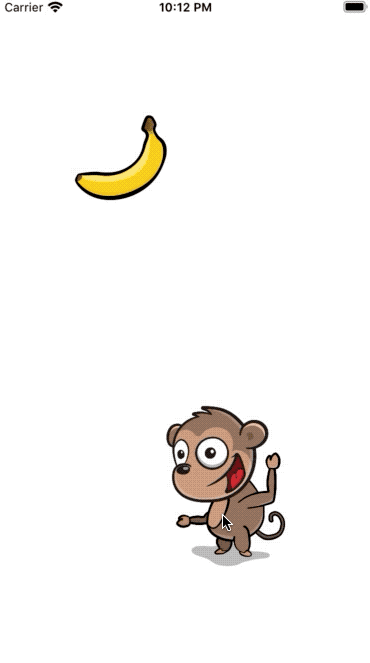
Open the begin folder in Xcode, then build and run the project.
You should see the following in your device or simulator:
UIGestureRecognizer Overview
Before you get started, here’s a brief overview of why UIGestureRecognizers are so handy and how to use them.
Detecting gestures required a lot more work before UIGestureRecognizers were available. If you wanted to detect a swipe, for example, you had to register for notifications — like touchesBegan, touchesMoved and touchesEnded — on every touch in a UIView. This created subtle bugs and inconsistencies across apps because each programmer wrote slightly different code to detect those touches.
In iOS 3.0, Apple came to the rescue with UIGestureRecognizer classes. These provide a default implementation to detect common gestures like taps, pinches, rotations, swipes, pans and long presses. Using them not only saves a ton of code, but it also makes your apps work properly. Of course, you can still use the old touch notifications if your app requires them.
To use UIGestureRecognizer, perform the following steps:
- Create a gesture recognizer: When you create a gesture recognizer, you specify a target and action so the gesture recognizer can send you updates when the gesture starts, changes or ends.
- Add the gesture recognizer to a view: You associate each gesture recognizer with one, and only one, view. When a touch occurs within the bounds of that view, the gesture recognizer will check if it matches the type of touch it’s looking for. If it finds a match, it notifies the target.
You can perform these two steps programmatically, which you’ll do later in this tutorial. But it’s even easier to do with the storyboard editor, which you’ll use next.
Using the UIPanGestureRecognizer
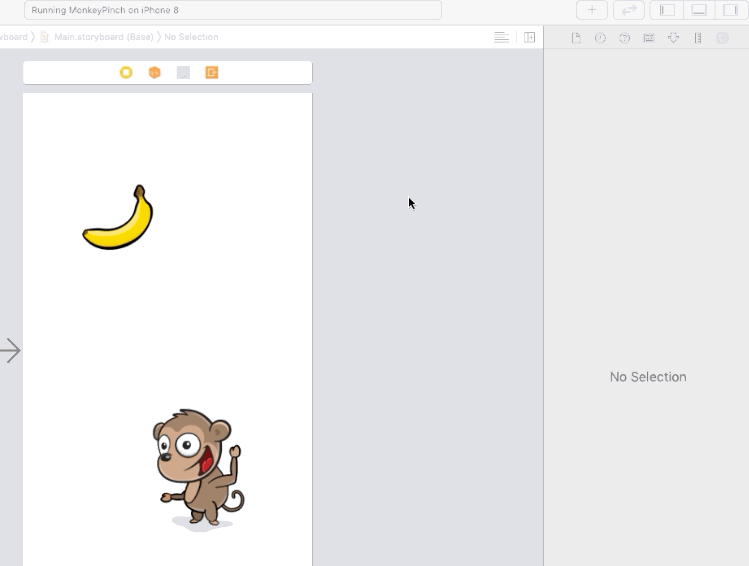
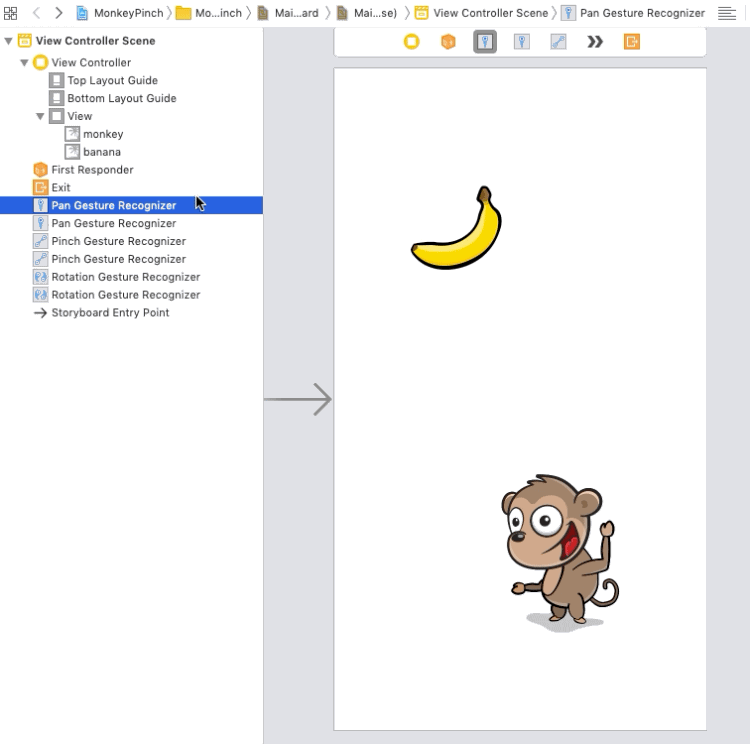
Open Main.storyboard. Click [+] button at the top to open the Library.
Inside the Library panel, look for the pan gesture recognizer object and drag it onto the monkey image view. This creates both the pan gesture recognizer and its association with the monkey image view:
You can verify the connection by clicking on the monkey image view, looking at the Connections inspector in [View > Inspectors > Show Connections Inspector], and making sure the pan gesture recognizer is in the gestureRecognizers‘s Outlet Collection.
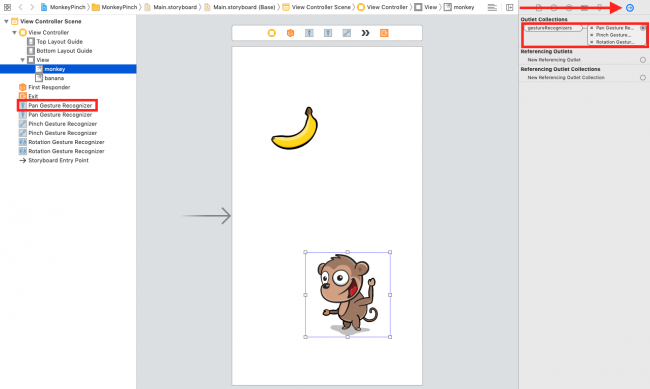
The begin project connected two other gesture recognizers for you: the Pinch Gesture Recognizer and Rotation Gesture Recognizer. It also connected the pan, pinch and rotation gesture recognizers to the banana image view.
So why did you associate the UIGestureRecognizer with the image view instead of the view itself?
You could connect it to the view if that makes the most sense for your project. But since you tied it to the monkey, you know that any touches are within the bounds of the monkey. If this is what you want, you’re good to go.
If you want to detect touches beyond the bounds of the image, you’ll need to add the gesture recognizer to the view itself. But note that you’ll need to write additional code to check if the user is touching within the bounds of the image itself and to react accordingly.
Now that you’ve created the pan gesture recognizer and associated it with the image view, you have to write the action so something actually happens when the pan occurs.
Implementing the Panning Gesture
Open ViewController.swift and add the following method right below viewDidLoad(), inside the ViewController:
@IBAction func handlePan(_ gesture: UIPanGestureRecognizer) {
  // 1
  let translation = gesture.translation(in: view)

  // 2
  guard let gestureView = gesture.view else {
    return
  }

  gestureView.center = CGPoint(
    x: gestureView.center.x + translation.x,
    y: gestureView.center.y + translation.y
  )

  // 3
  gesture.setTranslation(.zero, in: view)
}
The UIPanGestureRecognizer calls this method when it first detects a pan gesture, then continuously as the user continues to pan and one last time when the pan completes — usually when the user’s finger lifts.
Here’s what’s going on in this code:
- The
UIPanGestureRecognizerpasses itself as an argument to this method. You can retrieve the amount the user’s finger moved by callingtranslation(in:). You then use that amount to move the center of the monkey the same distance. - Note that instead of hard-coding the monkey image view into this method, you get a reference to the monkey image view by calling
gesture.view. This makes your code more generic so that you can re-use this same routine for the banana image view later on. - It’s important to set the translation back to zero once you finish. Otherwise, the translation will keep compounding each time and you’ll see your monkey move rapidly off the screen!
Now that this method is complete, you’ll hook it up to the UIPanGestureRecognizer.
Connecting the Panning Gesture to the Recognizer
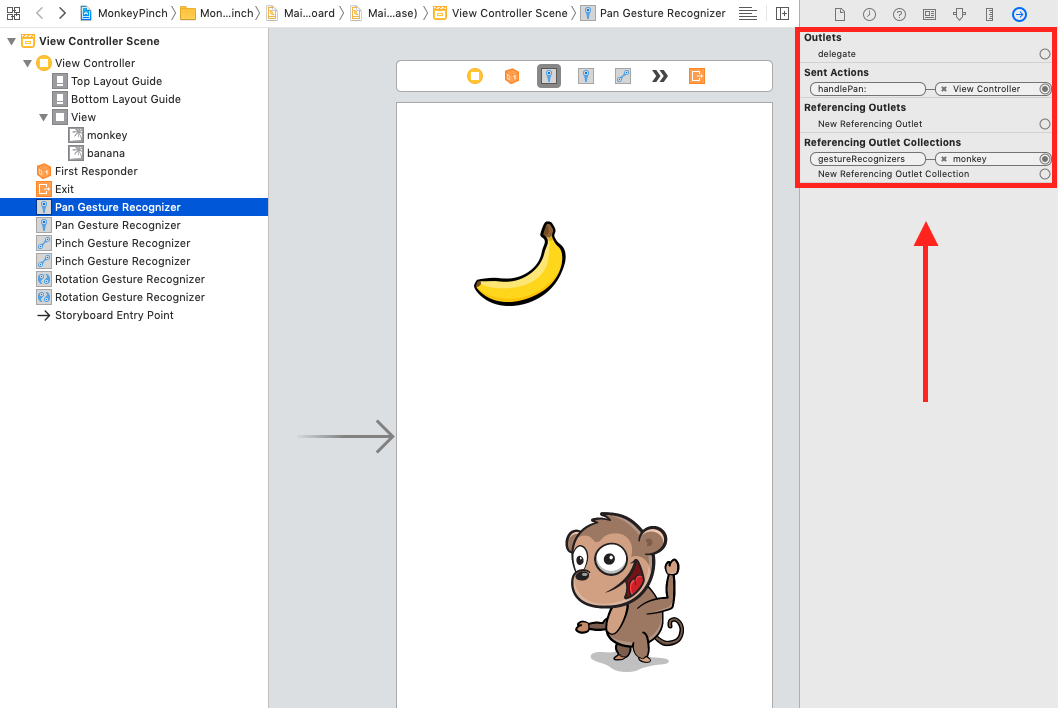
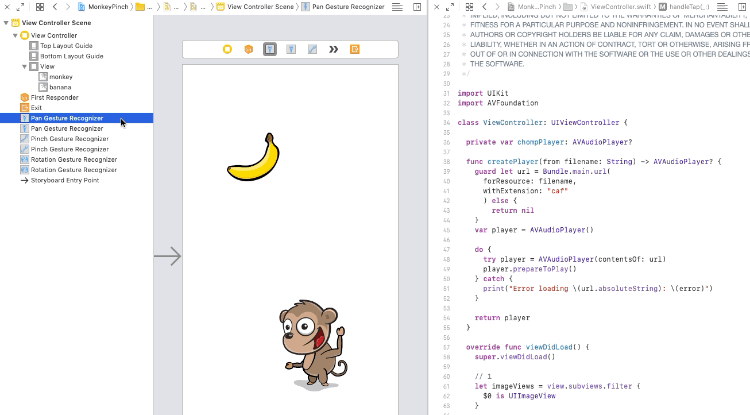
In the document outline for Main.storyboard, control-drag from the monkey’s pan gesture recognizer to the view controller. Select handlePan: from the pop-up.
handlePan method to UIPanGestureRecognizerAt this point your Connections inspector for the pan gesture recognizer should look like this:
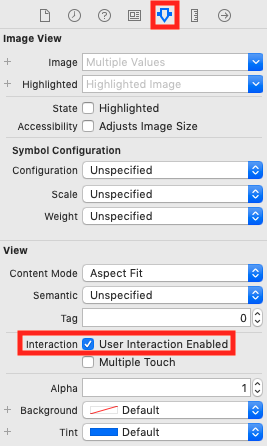
Build and run and try to drag the monkey. It doesn’t work?! This is because Xcode disables touches by default on views that normally don’t accept touches — like image views.
Letting the Image Views Accept Touches
Fix this by selecting both image views, opening the Attributes inspector and checking User Interaction Enabled.
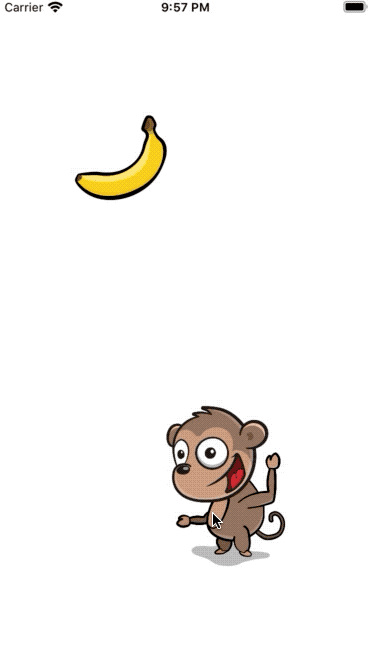
Build and run again. This time, you can drag the monkey around the screen!
Notice that you still can’t drag the banana because you need to connect its own pan gesture recognizer to handlePan(_:). You’ll do that now.
- Control-drag from the banana pan gesture recognizer to the view controller and select
handlePan:. - Double-check to make sure you’ve checked User Interaction Enabled on the banana as well.
Build and run. You can now drag both image views across the screen. It’s pretty easy to implement such a cool and fun effect, eh?
Adding Deceleration to the Images
Apple apps and controls typically have a bit of deceleration before an animation finishes. You see this when scrolling a web view, for example. You’ll often want to use this type of behavior in your apps.
There are many ways of doing this. The approach you’ll use for this tutorial produces a nice effect without much effort. Here’s what you’ll do:
- Detect when the gesture ends.
- Calculate the speed of the touch.
- Animate the object moving to a final destination based on the touch speed.
And here’s how you’ll accomplish those goals:
- To detect when the gesture ends: Multiple calls to the gesture recognizer’s callback occur as the gesture recognizer’s state changes. Examples of those states are:
began,changedorended. You can find the current state of a gesture recognizer by looking at itsstateproperty. - To detect the touch velocity: Some gesture recognizers return additional information. For example,
UIPanGestureRecognizerhas a handy method calledvelocity(in:)that returns, you guessed it, the velocity!
Note
You can view a full list of the methods for each gesture recognizer in the API guide.
Easing Out Your Animations
Start by adding the following to the bottom of handlePan(_:) in ViewController.swift:
guard gesture.state == .ended else {
  return
}

// 1
let velocity = gesture.velocity(in: view)
let magnitude = sqrt((velocity.x * velocity.x) + (velocity.y * velocity.y))
let slideMultiplier = magnitude / 200

// 2
let slideFactor = 0.1 * slideMultiplier
// 3
var finalPoint = CGPoint(
  x: gestureView.center.x + (velocity.x * slideFactor),
  y: gestureView.center.y + (velocity.y * slideFactor)
)

// 4
finalPoint.x = min(max(finalPoint.x, 0), view.bounds.width)
finalPoint.y = min(max(finalPoint.y, 0), view.bounds.height)

// 5
UIView.animate(
  withDuration: Double(slideFactor * 2),
  delay: 0,
  // 6
  options: .curveEaseOut,
  animations: {
    gestureView.center = finalPoint
})
This simple deceleration equation uses the following strategy:
- Calculates the length of the velocity vector (i.e. the magnitude).
- Decreases the speed if the length is
< 200. Otherwise, it increases it. - Calculates a final point based on the velocity and the slideFactor.
- Makes sure the final point is within the view’s bounds
- Animates the view to the final resting place.
- Uses the ease out animation option to slow the movement over time.
Build and run to try it out. You should now have some basic but nice deceleration! Feel free to play around with it and improve it. If you come up with a better implementation, please share it in the forum discussion at the end of this article.
Pinch and Rotation Gestures
Your app is coming along great so far, but it would be even cooler if you could scale and rotate the image views by using pinch and rotation gestures as well!
The begin project gives you a great start. It created handlePinch(_:) and handleRotate(_:) for you. It also connected those methods to the monkey image view and the banana image view. Now, you’ll complete the implementation.
Implementing the Pinch and Rotation Gestures
Open ViewController.swift. Add the following to handlePinch(_:):
guard let gestureView = gesture.view else {
  return
}

gestureView.transform = gestureView.transform.scaledBy(
  x: gesture.scale,
  y: gesture.scale
)
gesture.scale = 1
Next add the following to handleRotate(_:):
guard let gestureView = gesture.view else {
  return
}

gestureView.transform = gestureView.transform.rotated(
  by: gesture.rotation
)
gesture.rotation = 0
Just like you got the translation from the UIPanGestureRecognizer, you get the scale and rotation from the UIPinchGestureRecognizer and UIRotationGestureRecognizer.
Every view has a transform applied to it, which gives information on the rotation, scale and translation that the view should have. Apple has many built-in methods to make working with a transform easier. These include CGAffineTransform.scaledBy(x:y:) to scale a given transform and CGAffineTransform.rotated(by:) to rotate a given transform.
Here, you use these methods to update the view’s transform based on the user’s gestures.
Again, since you’re updating the view each time the gesture updates, it’s very important to set the scale and rotation back to the default state so you don’t have craziness going on.
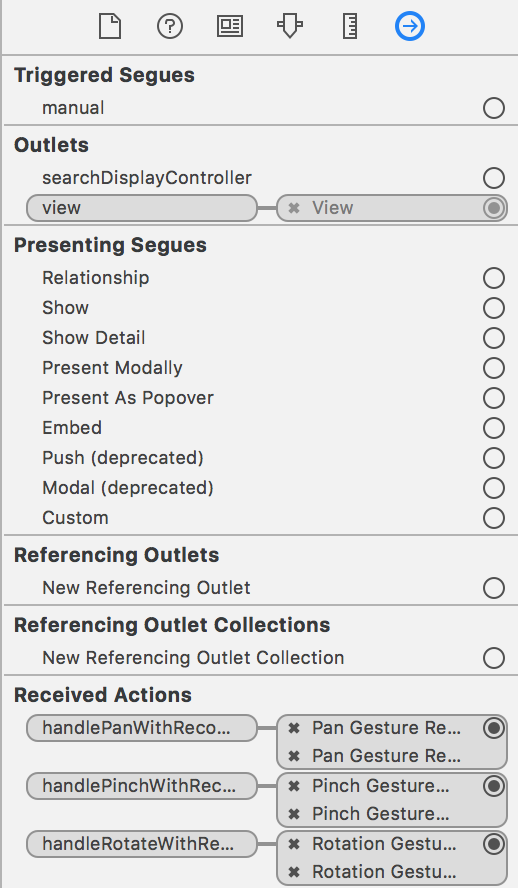
Now, hook these methods up in the storyboard editor. Open Main.storyboard and perform the following steps:
- As you did previously, connect the two pinch gesture recognizers to the view controller’s
handlePinch:. - Connect the two rotation gesture recognizers to the view controller’s
handleRotate:.
Your view controller connections should now look like this:
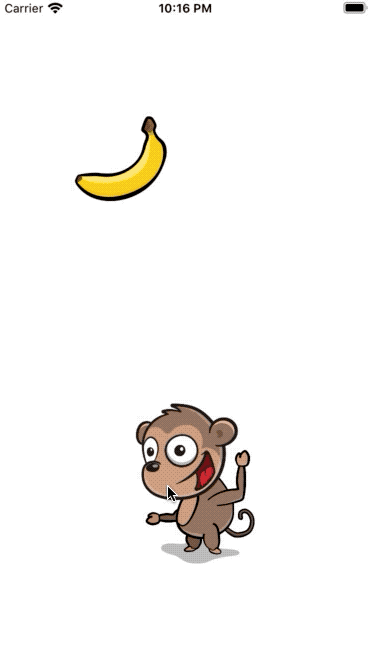
Build and run on a device, if possible, because pinches and rotations are hard to do on the simulator.
If you are running on the simulator, hold down the Option key and drag to simulate two fingers. Then hold down Shift and Option at the same time to move the simulated fingers together to a different position.
You can now scale and rotate the monkey and the banana!
Monkey and banana respond to pinch and rotate gestures
Simultaneous Gesture Recognizers
You may notice that if you put one finger on the monkey and one on the banana, you can drag them around at the same time. Kinda cool, eh?
However, you’ll notice that if you try to drag the monkey around and in the middle of dragging, bring down a second finger to pinch to zoom, it doesn’t work. By default, once one gesture recognizer on a view “claims” the gesture, other gesture recognizers can’t take over.
However, you can change this by overriding a method in the UIGestureRecognizer delegate.
Allowing Two Gestures to Happen at Once
Open ViewController.swift. Below the ViewController, create a ViewController class extension and conform it to UIGestureRecognizerDelegate:
extension ViewController: UIGestureRecognizerDelegate {
}
Then, implement one of the delegate’s optional methods:
func gestureRecognizer(
  _ gestureRecognizer: UIGestureRecognizer,
  shouldRecognizeSimultaneouslyWith otherGestureRecognizer: UIGestureRecognizer
) -> Bool {
  return true
}
This method tells the gesture recognizer whether it’s OK to recognize a gesture if another recognizer has already detected a gesture. The default implementation always returns false, but you’ve switched it to always return true.
Next, open Main.storyboard and connect each gesture recognizer’s delegate outlet to the view controller. You’ll connect six gesture recognizers in total.
Build and run again. Now, you can drag the monkey, pinch to scale it and continue dragging afterward! You can even scale and rotate at the same time in a natural way. This makes for a much nicer experience for the user.
Programmatic UIGestureRecognizers
So far, you’ve created gesture recognizers with the storyboard editor, but what if you wanted to do things programmatically?
Well, why not try it out? You’ll do so by adding a tap gesture recognizer to play a sound effect when you tap either of the image views.
To play a sound, you’ll need to access AVFoundation. At the top of ViewController.swift, add:
import AVFoundation
Add the following changes to ViewController.swift, just before viewDidLoad():
private var chompPlayer: AVAudioPlayer?

func createPlayer(from filename: String) -> AVAudioPlayer? {
  guard let url = Bundle.main.url(
    forResource: filename,
    withExtension: "caf"
    ) else {
      return nil
  }
  var player = AVAudioPlayer()

  do {
    try player = AVAudioPlayer(contentsOf: url)
    player.prepareToPlay()
  } catch {
    print("Error loading \(url.absoluteString): \(error)")
  }

  return player
}
Add the following code at the end of viewDidLoad():
// 1
let imageViews = view.subviews.filter {
  $0 is UIImageView
}

// 2
for imageView in imageViews {
  // 3
  let tapGesture = UITapGestureRecognizer(
    target: self,
    action: #selector(handleTap)
  )

  // 4
  tapGesture.delegate = self
  imageView.addGestureRecognizer(tapGesture)

  // TODO: Add a custom gesture recognizer too
}

chompPlayer = createPlayer(from: "chomp")
The begin project contains handleTap(_:). Add the following inside of this method:
chompPlayer?.play()
The audio playing code is outside the scope of this tutorial, but if you want to learn more check out our AVFoundation Course. The important part is in viewDidLoad():
- Create an array of image views — in this case, the monkey and banana.
- Cycle through the array.
- Create a
UITapGestureRecognizerfor each image view, specifying the callback. This is an alternate way of adding gesture recognizers. Previously, you added the recognizers to the storyboard. - Set the delegate of the recognizer programmatically and add the recognizer to the image view.
That’s it! Build and run. You can now tap the image views for a sound effect!
Setting UIGestureRecognizer Dependencies
Everything works pretty well, except for one minor annoyance. Dragging an object very slightly causes it to both pan and play the sound effect. You really want the sound effect to play only when you tap an object, not when you pan it.
To solve this, you could remove or modify the delegate callback to behave differently when a touch and pinch coincide. But there’s another approach you can use with gesture recognizers: setting dependencies.
You can call a method called require(toFail:) on a gesture recognizer. Can you guess what it does?
Open Main.storyboard and another editor on the right by clicking the button on the top-right of the storyboard panel.
On the left of the new panel that just opened, click the button with four squares. Finally, select the third item from the list, Automatic, which will ensure that ViewController.swift shows there.
Now Control-drag from the monkey pan gesture recognizer to below the class declaration and connect it to an outlet named monkeyPan. Repeat this for the banana pan gesture recognizer, but name the outlet bananaPan.
Make sure you add the correct names to the recognizers to prevent mixing them up! You can check this in the Connections inspector.
Next, add these two lines to viewDidLoad(), right before the TODO:
tapGesture.require(toFail: monkeyPan)
tapGesture.require(toFail: bananaPan)
Now, the app will only call the tap gesture recognizer if it doesn’t detect a pan. Pretty cool, eh?
Creating Custom UIGestureRecognizers
At this point, you know pretty much everything you need to know to use the built-in gesture recognizers in your apps. But what if you want to detect some kind of gesture that the built-in recognizers don’t support?
Well, you can always write your own! For example, what if you wanted to detect a “tickle” when the user rapidly moves the object left and right several times? Ready to do this?
“Tickling” the Monkey
Create a new file via [File ▸ New ▸ File…] and pick the [iOS ▸ Source ▸ Swift File] template. Name the file TickleGestureRecognizer.
Then replace the import statement in TickleGestureRecognizer.swift with the following:
import UIKit

class TickleGestureRecognizer: UIGestureRecognizer {
  // 1
  private let requiredTickles = 2
  private let distanceForTickleGesture: CGFloat = 25

  // 2
  enum TickleDirection {
    case unknown
    case left
    case right
  }

  // 3
  private var tickleCount = 0
  private var tickleStartLocation: CGPoint = .zero
  private var latestDirection: TickleDirection = .unknown
}
Here’s what you just declared, step-by-step:
tickleCount: How many times the user switches the direction of the gesture, while moving a minimum number of points. Once the user changes gesture direction three times, you count it as a tickle gesture.tickleStartLocation: The point where the user started moving in this tickle. You’ll update this each time the user switches direction, while moving a minimum number of points.latestDirection: The latest direction the finger moved, which starts as unknown. After the user moves a minimum amount, you’ll check whether the gesture went left or right and update this appropriately.
- The constants that define what the gesture will need. Note that you infer
requiredTicklesas anInt, but you need to specifydistanceForTickleGestureas aCGFloat. If you don’t, then the app will infer it as an Int, which causes difficulties when calculating withCGPointslater. - The possible tickle directions.
- Three properties to keep track of this gesture, which are:
Of course, these properties are specific to the gesture you’re detecting here. You’ll create your own if you’re making a recognizer for a different type of gesture.
Managing the Gesture’s State
One of the things that you’ll change is the state of the gesture. When a tickle completes, you’ll change the state of the gesture to ended.
Switch to TickleGestureRecognizer.swift and add the following methods to the class:
override func reset() {
  tickleCount = 0
  latestDirection = .unknown
  tickleStartLocation = .zero

  if state == .possible {
    state = .failed
  }
}

override func touchesBegan(_ touches: Set<UITouch>, with event: UIEvent) {
  guard let touch = touches.first else {
    return
  }

  tickleStartLocation = touch.location(in: view)
}

override func touchesMoved(_ touches: Set<UITouch>, with event: UIEvent) {
  guard let touch = touches.first else {
    return
  }

  let tickleLocation = touch.location(in: view)

  let horizontalDifference = tickleLocation.x - tickleStartLocation.x

  if abs(horizontalDifference) < distanceForTickleGesture {
    return
  }

  let direction: TickleDirection

  if horizontalDifference < 0 {
    direction = .left
  } else {
    direction = .right
  }

  if latestDirection == .unknown ||
    (latestDirection == .left && direction == .right) ||
    (latestDirection == .right && direction == .left) {

    tickleStartLocation = tickleLocation
    latestDirection = direction
    tickleCount += 1

    if state == .possible && tickleCount > requiredTickles {
      state = .ended
    }
  }
}

override func touchesEnded(_ touches: Set<UITouch>, with event: UIEvent) {
  reset()
}

override func touchesCancelled(_ touches: Set<UITouch>, with event: UIEvent) {
  reset()
}
There’s a lot of code here and you don’t need to know the specifics for this tutorial.
To give you a general idea of how it works, you’re overriding the UIGestureRecognizer‘s reset(), touchesBegan(_:with:), touchesMoved(_:with:), touchesEnded(_:with:) and touchesCancelled(_:with:) methods. And you’re writing custom code to look at the touches and detect the gesture.
Once you’ve found the gesture, you’ll want to send updates to the callback method. You do this by changing the state property of the gesture recognizer.
Once the gesture begins, you’ll usually set the state to .began. After that, you’ll send any updates with .changed and finalize it with .ended.
For this simple gesture recognizer, once the user has tickled the object, that’s it. You’ll just mark it as .ended.
OK, now to use this new recognizer!
Implementing Your Custom Recognizer
Open ViewController.swift and make the following changes.
Add the following code to the top of the class, right after chompPlayer:
private var laughPlayer: AVAudioPlayer?
In viewDidLoad(), add the gesture recognizer to the image view by replacing the TODO:
let tickleGesture = TickleGestureRecognizer(
  target: self,
  action: #selector(handleTickle)
)
tickleGesture.delegate = self
imageView.addGestureRecognizer(tickleGesture)
At end of viewDidLoad() add:
laughPlayer = createPlayer(from: "laugh")
Finally, create a new method at the end of the class to handle your tickle gesture:
@objc func handleTickle(_ gesture: TickleGestureRecognizer) {
  laughPlayer?.play()
}
Using this custom gesture recognizer is as simple as using the built-in ones!
Build and run. “Hehe, that tickles!”

Where to Go From Here?
Download the completed version of the project using the [Download Materials] button at the top or bottom of this tutorial.
Congrats, you’re now a master of gesture recognizers — both built-in and custom ones! Touch interaction is such an important part of iOS devices and UIGestureRecognizer is the key to adding easy-to-use gestures beyond simple button taps.
I hope you enjoyed this tutorial! If you have any questions or comments, please join the discussion below.