
Adding TabView and tabItem()
Adding TabView and tabItem() 관련

Updated for Xcode 15
When you want to show two separate views with SwiftUI, the easiest and most user-intuitive approach is with a tab bar across the bottom of our app. In our case, that means we'll put our menu view in one tab and the active order in another. SwiftUI gives us a TabView for just this purpose, and it works much like a UITabBarController.
Press Cmd+N to create a new SwiftUI View, calling it “MainView”. Creating tabs is as easy as putting different views inside an instance of TabView, but in order to add an image and text to the tab bar item of each view we need to use the tabItem() modifier.
Before we write the code MainView, it's important to remember to add an Order instance into the preview environment so the OrderView can work:
struct MainView_Previews: PreviewProvider {
    static var previews: some View {
        MainView()
            .environmentObject(Order())
    }
}
Now we can go ahead and change MainView to this:
struct MainView: View {
var body: some View {
TabView {
ContentView()
.tabItem {
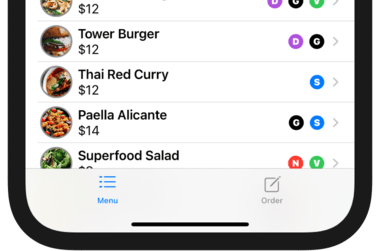
Label("Menu", systemImage: "list.dash")
}
OrderView()
.tabItem {
Label("Order", systemImage: "square.and.pencil")
}
}
}
}
Let's take a closer look at one of our views:
TabView {
    ContentView()
        .tabItem {
            Label("Menu", systemImage: "list.dash")
        }
That creates an instance of ContentView, but for its tab item we're using a new view type called Label that handles both showing text and showing an image at the same time. This is more or less the same as using a separate Text and Image pair, but Label adds some extra smarts – it ensures both stay aligned the same, even when they change size.
This label is the thing that represents its view in the tab bar. The image is created using the systemImage form of Label, which lets us load images from the built-in SF Symbols icon set – this is over 2400 icons that Apple designed specifically for apps to use.
To bring the tab bar to life, we need to change iDineApp.swift so it creates an MainView rather than a ContentView. So, find this code:
ContentView()
    .environmentObject(order)
And replace it with this:
MainView()
    .environmentObject(order)
Now – at last! – you should be able to press Cmd+R to build and run your app, select some food, add it to your order, and see that information appear in the Order tab automatically.
What I love about this approach is that we're not doing the real heavy lifting of making different parts of our UI sync up – the ObservableObject protocol and @EnvironmentObject attribute are making sure all parts of our UI stay up to date. So, as soon as the ItemDetail screen announces that something has been added to the order, the OrderView screen will automatically refresh to show the changes.
In the background, any view that relies on an environment object will be refreshed when it announces changes. In practice that means SwiftUI will re-invoke the body property, which in turn means everything inside body will read the latest values from the environment.
Menu and Order.Similar solutions…
