Day 15
Day 15 관련

Swift review, day three
This is the final consolidation day for now, and is the last step before we start building real apps tomorrow. This time we’ll be reviewing access control, typecasting, closures, and more.
Today you have just five topics to review. Once you’ve completed them you can, if you want, go back over the tests from earlier days to improve on your scores.
1. Properties
1. Properties
Structs and classes (collectively: "types") can have their own variables and constants, and these are called properties. These let you attach values to your types to represent them uniquely, but because types can also have methods you can have them behave according to their own data.
Let's take a look at an example now:
struct Person {
    var clothes: String
    var shoes: String

    func describe() {
        print("I like wearing \(clothes) with \(shoes)")
    }
}

let taylor = Person(clothes: "T-shirts", shoes: "sneakers")
let other = Person(clothes: "short skirts", shoes: "high heels")
taylor.describe()
other.describe()
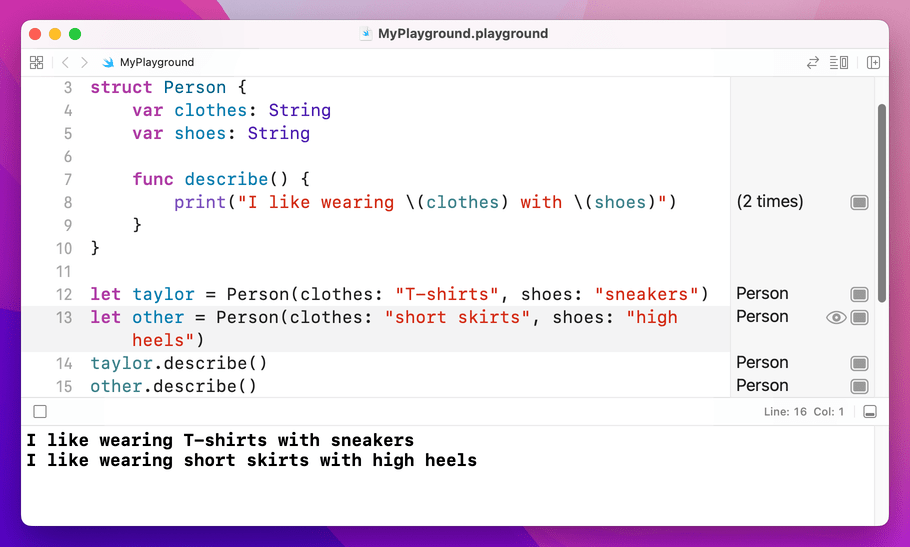
describe automatically uses object's property values.As you can see, when you use a property inside a method it will automatically use the value that belongs to the same object.
Property observers
Swift lets you add code to be run when a property is about to be changed or has been changed. This is frequently a good way to have a user interface update when a value changes, for example.
There are two kinds of property observer: willSet and didSet, and they are called before or after a property is changed. In willSet Swift provides your code with a special value called newValue that contains what the new property value is going to be, and in didSet you are given oldValue to represent the previous value.
Let's attach two property observers to the clothes property of a Person struct:
struct Person {
    var clothes: String {
        willSet {
            updateUI(msg: "I'm changing from \(clothes) to \(newValue)")
        }

        didSet {
            updateUI(msg: "I just changed from \(oldValue) to \(clothes)")
        }
    }
}

func updateUI(msg: String) {
    print(msg)
}

var taylor = Person(clothes: "T-shirts")
taylor.clothes = "short skirts"
That will print out the messages "I'm changing from T-shirts to short skirts" and "I just changed from T-shirts to short skirts."
Computed properties
It's possible to make properties that are actually code behind the scenes. We already used the uppercased() method of strings, for example, but there’s also a property called capitalized that gets calculated as needed, rather than every string always storing a capitalized version of itself.
To make a computed property, place an open brace after your property then use either get or set to make an action happen at the appropriate time. For example, if we wanted to add a ageInDogYears property that automatically returned a person's age multiplied by seven, we'd do this:
struct Person {
    var age: Int

    var ageInDogYears: Int {
        get {
            return age * 7
        }
    }
}

var fan = Person(age: 25)
print(fan.ageInDogYears)

ageInDogYears is computed using the get code, printing 175.Note: If you intend to use them only for reading data you can just remove the get part entirely, like this:
var ageInDogYears: Int {
    return age * 7
}
2. Static properties and methods
2. Static properties and methods
Swift lets you create properties and methods that belong to a type, rather than to instances of a type. This is helpful for organizing your data meaningfully by storing shared data.
Swift calls these shared properties “static properties”, and you create one just by using the static keyword. Once that's done, you access the property by using the full name of the type. Here's a simple example:
struct TaylorFan {
    static var favoriteSong = "Look What You Made Me Do"

    var name: String
    var age: Int
}

let fan = TaylorFan(name: "James", age: 25)
print(TaylorFan.favoriteSong)
So, a Taylor Swift fan has a name and age that belongs to them, but they all have the same favorite song.
Because static methods belong to the struct itself rather than to instances of that struct, you can't use it to access any non-static properties from the struct.
3. Access control
3. Access control
Access control lets you specify what data inside structs and classes should be exposed to the outside world, and you get to choose four modifiers:
- Public: this means everyone can read and write the property.
- Internal: this means only your Swift code can read and write the property. If you ship your code as a framework for others to use, they won’t be able to read the property.
- File Private: this means that only Swift code in the same file as the type can read and write the property.
- Private: this is the most restrictive option, and means the property is available only inside methods that belong to the type, or its extensions.
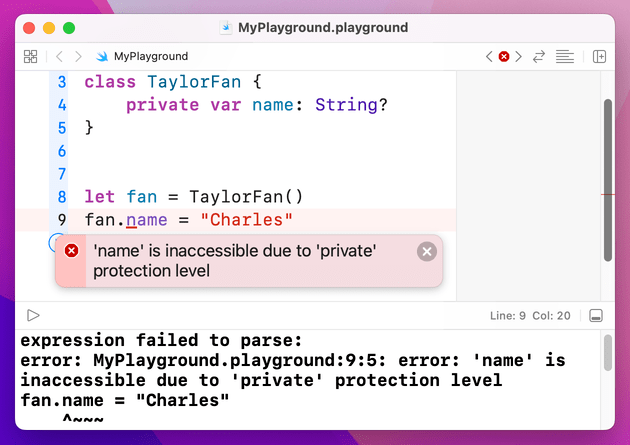
Most of the time you don't need to specify access control, but sometimes you'll want to explicitly set a property to be private because it stops others from accessing it directly. This is useful because your own methods can work with that property, but others can't, thus forcing them to go through your code to perform certain actions.
To declare a property private, just do this:
class TaylorFan {
    private var name: String?
}
If you want to use “file private” access control, just write it as one word like so: fileprivate.
4. Polymorphism and typecasting
4. Polymorphism and typecasting
Because classes can inherit from each other (e.g. CountrySinger can inherit from Singer) it means one class is effectively a superset of another: class B has all the things A has, with a few extras. This in turn means that you can treat B as type B or as type A, depending on your needs.
Confused? Let's try some code:
class Album {
    var name: String

    init(name: String) {
        self.name = name
    }
}

class StudioAlbum: Album {
    var studio: String

    init(name: String, studio: String) {
        self.studio = studio
        super.init(name: name)
    }
}

class LiveAlbum: Album {
    var location: String

    init(name: String, location: String) {
        self.location = location
        super.init(name: name)
    }
}
That defines three classes: albums, studio albums and live albums, with the latter two both inheriting from Album. Because any instance of LiveAlbum is inherited from Album it can be treated just as either Album or LiveAlbum – it's both at the same time. This is called "polymorphism," but it means you can write code like this:
var taylorSwift = StudioAlbum(name: "Taylor Swift", studio: "The Castles Studios")
var fearless = StudioAlbum(name: "Speak Now", studio: "Aimeeland Studio")
var iTunesLive = LiveAlbum(name: "iTunes Live from SoHo", location: "New York")

var allAlbums: [Album] = [taylorSwift, fearless, iTunesLive]
There we create an array that holds only albums, but put inside it two studio albums and a live album. This is perfectly fine in Swift because they are all descended from the Album class, so they share the same basic behavior.
We can push this a step further to really demonstrate how polymorphism works. Let's add a getPerformance() method to all three classes:
class Album {
    var name: String

    init(name: String) {
        self.name = name
    }

    func getPerformance() -> String {
        return "The album \(name) sold lots"
    }
}

class StudioAlbum: Album {
    var studio: String

    init(name: String, studio: String) {
        self.studio = studio
        super.init(name: name)
    }

    override func getPerformance() -> String {
        return "The studio album \(name) sold lots"
    }
}

class LiveAlbum: Album {
    var location: String

    init(name: String, location: String) {
        self.location = location
        super.init(name: name)
    }

    override func getPerformance() -> String {
        return "The live album \(name) sold lots"
    }
}
The getPerformance() method exists in the Album class, but both child classes override it. When we create an array that holds Albums, we're actually filling it with subclasses of albums: LiveAlbum and StudioAlbum. They go into the array just fine because they inherit from the Album class, but they never lose their original class. So, we could write code like this:
var taylorSwift = StudioAlbum(name: "Taylor Swift", studio: "The Castles Studios")
var fearless = StudioAlbum(name: "Speak Now", studio: "Aimeeland Studio")
var iTunesLive = LiveAlbum(name: "iTunes Live from SoHo", location: "New York")

var allAlbums: [Album] = [taylorSwift, fearless, iTunesLive]

for album in allAlbums {
    print(album.getPerformance())
}
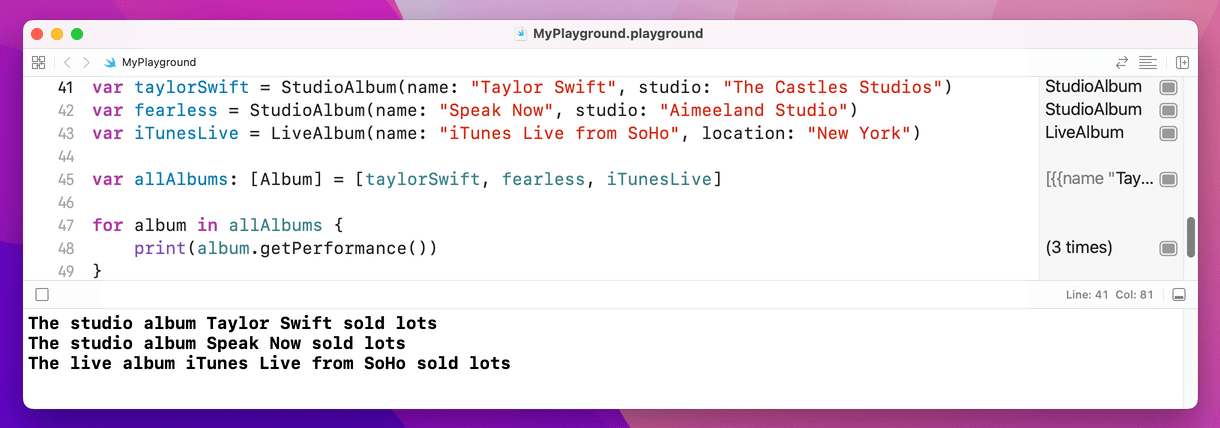
That will automatically use the override version of getPerformance() depending on the subclass in question. That's polymorphism in action: an object can work as its class and its parent classes, all at the same time.
Converting types with typecasting
You will often find you have an object of a certain type, but really you know it's a different type. Sadly, if Swift doesn't know what you know, it won't build your code. So, there's a solution, and it's called typecasting: converting an object of one type to another.
Chances are you're struggling to think why this might be necessary, but I can give you a very simple example:
for album in allAlbums {
    print(album.getPerformance())
}
That was our loop from a few minutes ago. The allAlbums array holds the type Album, but we know that really it's holding one of the subclasses: StudioAlbum or LiveAlbum. Swift doesn't know that, so if you try to write something like print(album.studio) it will refuse to build because only StudioAlbum objects have that property.
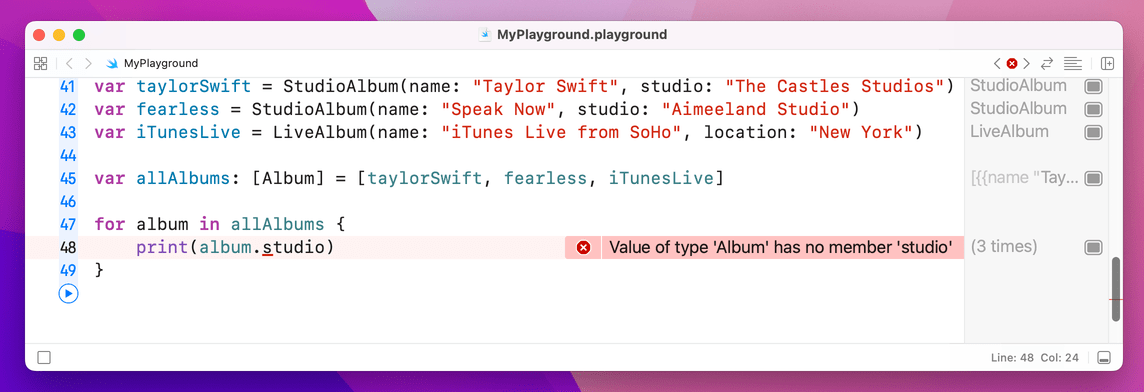
studio on Album results in an error.Typecasting in Swift comes in three forms, but most of the time you'll only meet two: as? and as!, known as optional downcasting and forced downcasting. The former means "I think this conversion might be true, but it might fail," and the second means "I know this conversion is true, and I'm happy for my app to crash if I'm wrong."
Note: when I say "conversion" I don't mean that the object literally gets transformed. Instead, it's just converting how Swift treats the object – you're telling Swift that an object it thought was type A is actually type E.
The question and exclamation marks should give you a hint of what's going on, because this is very similar to optional territory. For example, if you write this:
for album in allAlbums {
    let studioAlbum = album as? StudioAlbum
}
Swift will make studioAlbum have the data type StudioAlbum?. That is, an optional studio album: the conversion might have worked, in which case you have a studio album you can work with, or it might have failed, in which case you have nil.
This is most commonly used with if let to automatically unwrap the optional result, like this:
for album in allAlbums {
    print(album.getPerformance())

    if let studioAlbum = album as? StudioAlbum {
        print(studioAlbum.studio)
    } else if let liveAlbum = album as? LiveAlbum {
        print(liveAlbum.location)
    }
}
That will go through every album and print its performance details, because that's common to the Album class and all its subclasses. It then checks whether it can convert the album value into a StudioAlbum, and if it can it prints out the studio name. The same thing is done for the LiveAlbum in the array.
Forced downcasting is when you're really sure an object of one type can be treated like a different type, but if you're wrong your program will just crash. Forced downcasting doesn't need to return an optional value, because you're saying the conversion is definitely going to work – if you're wrong, it means you wrote your code wrong.
To demonstrate this in a non-crashy way, let's strip out the live album so that we just have studio albums in the array:
var taylorSwift = StudioAlbum(name: "Taylor Swift", studio: "The Castles Studios")
var fearless = StudioAlbum(name: "Speak Now", studio: "Aimeeland Studio")

var allAlbums: [Album] = [taylorSwift, fearless]

for album in allAlbums {
    let studioAlbum = album as! StudioAlbum
    print(studioAlbum.studio)
}
That's obviously a contrived example, because if that really were your code you would just change allAlbums so that it had the data type [StudioAlbum]. Still, it shows how forced downcasting works, and the example won't crash because it makes the correct assumptions.
Swift lets you downcast as part of the array loop, which in this case would be more efficient. If you wanted to write that forced downcast at the array level, you would write this:
for album in allAlbums as! [StudioAlbum] {
    print(album.studio)
}
That no longer needs to downcast every item inside the loop, because it happens when the loop begins. Again, you had better be correct that all items in the array are StudioAlbums, otherwise your code will crash.
Swift also allows optional downcasting at the array level, although it's a bit more tricksy because you need to use the nil coalescing operator to ensure there's always a value for the loop. Here's an example:
for album in allAlbums as? [LiveAlbum] ?? [LiveAlbum]() {
    print(album.location)
}
What that means is, “try to convert allAlbums to be an array of LiveAlbum objects, but if that fails just create an empty array of live albums and use that instead” – i.e., do nothing.
Converting common types with initializers
Typecasting is useful when you know something that Swift doesn’t, for example when you have an object of type A that Swift thinks is actually type B. However, typecasting is useful only when those types really are what you say – you can’t force a type A into a type Z if they aren’t actually related.
For example, if you have an integer called number, you couldn’t write code like this to make it a string:
let number = 5
let text = number as! String
That is, you can’t force an integer into a string, because they are two completely different types. Instead, you need to create a new string by feeding it the integer, and Swift knows how to convert the two. The difference is subtle: this is a new value, rather than just a re-interpretation of the same value.
So, that code should be rewritten like this:
let number = 5
let text = String(number)
print(text)
This only works for some of Swift’s built-in data types: you can convert integers and floats to strings and back again, for example, but if you created two custom structs Swift can’t magically convert one to the other – you need to write that code yourself.
5. Closures
5. Closures
You've met integers, strings, doubles, floats, Booleans, arrays, dictionaries, structs and classes so far, but there's another type of data that is used extensively in Swift, and it's called a closure. These are complicated, but they are so powerful and expressive that they are used pervasively in Swift, so you won't get very far without understanding them.
A closure can be thought of as a variable that holds code. So, where an integer holds "0" or "500", a closure holds lines of Swift code. Closures also capture the environment where they are created, which means they take a copy of the values that are used inside them.
You never need to design your own closures so don't be afraid if you find the following quite complicated. However, Apple’s frameworks will often ask you to write closures to match their needs, so you at least need to know how they work.
Here’s an example from SwiftUI:
let message = "Button pressed"

Button("Press Me", action: {
    print(message)
})
Button is one of the many user interface controls we have in SwiftUI, and provides something that user can press on to execute some sort of action.
In this code, creating a button takes two parameters: some text to show as the button’s title, and a closure containing the code to be executed when the button is pressed. I've specified “Press Me” for the first parameter, and for the second I've made the system print a message string.
This method needs to use a closure because SwiftUI won’t run the code until the button is pressed – it will stash the action code away for later on, then call it only when needed. This wouldn't be possible if we just ran our code directly.
The above code also shows how closures capture their environment: I intentionally declared the message constant outside of the closure, then used it inside. Swift detects this, and makes that data available inside the closure too.
Swift's system of automatically capturing a closure's environment is very helpful, but can occasionally trip you up: if object A stores a closure as a property, and that property also references object A, you have something called a retain cycle and you'll have unhappy users. This is a substantially more advanced topic than you need to know right now, so don't worry too much about it just yet.
Trailing closures
As closures are used so frequently, Swift can apply a little syntactic sugar to make your code easier to read. The rule is this: if the last parameters to a method are closures, you can eliminate those parameters and instead provide them as a block of code inside braces. For example, we could convert the previous code to this:
let message = "Button pressed"

Button("Press Me") {
    print(message)
}
It does make your code shorter and easier to read, so this syntax form – known as trailing closure syntax – is preferred.
A function can have multiple trailing closures if needed, and this is particularly common in SwiftUI. For example, one way to create a button is to provide code to run when it’s pressed as the first closure, then something custom to show inside the button on the screen, like this:
Button {
    print("The button was pressed")
} label: {
    Image("press-me")
}
That uses an image rather than a simple piece of text, but it could be any kind of SwiftUI user interface control.
Optional: once you’ve finished reviewing those, you can go back to the review page and go over the tests related to the topics above.
At this point, you now know enough about Swift that you should be looking to expand your learning material a little. Coming at the same topic from multiple angles will help round out your understanding, while also helping keep you up to date with future changes.
While there are lots of places you can try, I’d like to recommend the podcast I make with Sean Allen. It’s called Swift over Coffee, and we think it’s pretty awesome: it’s always 30 minutes or less, we always cover news and views from the community, and we always try to explain everything in a way that newcomers can follow. You can listen here
Bonus: find the Swifty words!
I’ve made a word search to help you test your knowledge of the most useful terms for Swift developers. You can download it as a PDF here, then use the clues below to figure out what words to look for. If you get stuck, try looking through my Swift glossary.
There are 50 in total, and words can go in all directions – good luck!
- Fixed-size collection of values of any type
- A custom type with cases and associated values
- Makes a method shared across all instances of a class or struct
- How we check for and extract the value inside an optional
- Type that stores data as pairs of keys and values
- Places variables into strings easily
- Loop type commonly used to make infinite loops
- A list of criteria that a type must conform to
- Evaluates multiple conditions in one block of code
- Special method that creates instances of structs and classes
- Functions that accept one or more parameters of a specific type
- Code to handle errors thrown by
do - Value passed into a function
- Unwrapping alternative to
if let - Sends back a value from a function
- A catch-all case for switch blocks
- An anonymous function that you can pass around as data
- A whole number
- Telling Swift the specific type a variable should be
- Question marks after optionals
- Code that is triggered when properties change
- May or may not exist
- Keyword that lets function parameters be modified outside the function
- Access control that restricts a property to being used only inside its type
- Skips the rest of the current loop iteration
- Loop that always executes at least once
- The return type of a function that returns nothing
- How we refer to the current instance of an object
- Struct initializer that assigns values to all properties
- The name for how values used in a closure are stored for later use
- A variable attached to a struct or class
- A type that spans values between two numbers
- Special syntax for final parameter closures
- Type that holds a large floating-point number
- The name for math symbols like + and -
- The ability to treat an object of one type as another type
- Adds extra functionality to a type
- The name for a function that exists inside a struct or class
- Exits a loop immediately
- Keyword for a function that can trigger errors
- Key that lets us replace a method inherited from a superclass
- When one class builds on another
- Reads the length of a string
- Apple's all-in-one code editing environment
- Operator that takes three operands
- Puts off work until later
- Name for a method called before class destruction
- Ordered collection of values stored in a single value
- A class that cannot be inherited from
- Holds either true or false