Day 77
Day 77 관련

Project 23, part one
Are you ready to start one of the longest projects in this series? I’m not trying to put you off, honest – in fact, if anything I think you’ll be inspired to continue once you see how good the finished product looks.
Winston Churchill once said, “success is not final, failure is not fatal: it is the courage to continue that counts.” So, don’t worry if you’ve hit a few difficult patches in previous days because it’s perfectly natural and won’t hold you back from success today.
In this new project you’re going to get a chance to return to UIBezierPath, SKSpriteNode, physics, and more, but there’s also a lot new to learn. I hope you’re getting a sense of how my “three steps forward, one step back” approach works: we’re constantly learning new things, but also constantly bringing back older things to keep them fresh in your memory.
When these 100 days finish (in just over 20 days from now!), I hope you’ll be so used to UIKit, SpriteKit, and more that you’ll be able to make something new without thinking twice.
Today you have four topics to work through, and you’ll learn about SKShapeNode, touchesEnded(), AVAudioPlayer, and more.
Setting up
Setting up
I don't want to put you off, but this is by far the longest project in the series. It's not the most complicated, but it's long, coming in just short of 500 lines in total. That said, I hope it'll be worth it, because the end result is great: we're going to make a Fruit Ninja-style game, where slicing penguins is good and slicing bombs is bad. I think I must unconsciously have something against penguins…
Anyway, in this project you're going to meet SKShapeNode and AVAudioPlayer, you're going to create SKAction groups, you're going to create shapes with UIBezierPath, and more. So, it's the usual recipe: make something cool, and learn at the same time.
This project is hard because you need to write a lot of code before you can start to see results, which I personally find frustrating. I much prefer it when I can write a few lines, see the result, write a few lines more, see the result again, and so on. That isn't possible here, so I suggest you make some coffee before you begin.
Still here? OK!
Create a new SpriteKit project in Xcode, name it Project23, then do the usual cleaning job to create a completely empty SpriteKit project: remove all the code from didMove(to:) and touchesBegan(), change the anchor point and size of GameScene.sks, and so on.
You should also download the files for this project from twostraws/HackingWithSwift, then copy its Content folder into your Xcode project.
Please force the app to run only on landscape iPads before continuing.
Reminder: Don’t forget to use a real device for this project, or, if you must, the lowest-spec iPad in the simulator.
Basics quick start: SKShapeNode
Basics quick start: SKShapeNode
The only way we can get through this project with our sanity intact is by whizzing through the things you know already so I can spend more time focusing on the new bits. So, be prepared for abrupt changes of pace: fast, slow, fast, slow, as appropriate.
Open up GameScene.swift and put this into didMove(to:):
let background = SKSpriteNode(imageNamed: "sliceBackground")
background.position = CGPoint(x: 512, y: 384)
background.blendMode = .replace
background.zPosition = -1
addChild(background)

physicsWorld.gravity = CGVector(dx: 0, dy: -6)
physicsWorld.speed = 0.85

createScore()
createLives()
createSlices()
The last three are all methods we'll create in a moment, but first there are two new lines in there. The default gravity of our physics world is -0.98, which is roughly equivalent to Earth's gravity. I'm using a slightly lower value so that items stay up in the air a bit longer.
I'm also telling the physics world to adjust its speed downwards, which causes all movement to happen at a slightly slower rate.
The first two new methods are easy and require little explanation, but you will need to add some properties to the GameScene class to support them:
var gameScore: SKLabelNode!
var score = 0 {
    didSet {
        gameScore.text = "Score: \(score)"
    }
}

var livesImages = [SKSpriteNode]()
var lives = 3
That's all old news for you – if nothing else, this should show how far you've come! Now here are the two new methods:
func createScore() {
    gameScore = SKLabelNode(fontNamed: "Chalkduster")
    gameScore.horizontalAlignmentMode = .left
    gameScore.fontSize = 48
    addChild(gameScore)

    gameScore.position = CGPoint(x: 8, y: 8)
    score = 0
}

func createLives() {
    for i in 0 ..< 3 {
        let spriteNode = SKSpriteNode(imageNamed: "sliceLife")
        spriteNode.position = CGPoint(x: CGFloat(834 + (i * 70)), y: 720)
        addChild(spriteNode)

        livesImages.append(spriteNode)
    }
}
You'll notice I'm adding the lives images to the livesImages array, which is done so that we can cross off lives when the player loses.

That leaves the createSlices() method, and this bit is new. In this game, swiping around the screen will lead a glowing trail of slice marks that fade away when you let go or keep on moving. To make this work, we're going to do three things:
- Track all player moves on the screen, recording an array of all their swipe points.
- Draw two slice shapes, one in white and one in yellow to make it look like there's a hot glow.
- Use the
zPositionproperty to make sure the slices go above everything else in the game.
Drawing a shape in SpriteKit is easy thanks to a special node type called SKShapeNode. This lets you define any kind of shape you can draw, along with line width, stroke color and more, and it will render it to the screen. We're going to draw two lines – one for a yellow glow, and one for a white glow in the middle of the yellow glow – so we're going to need two SKShapeNode properties:
var activeSliceBG: SKShapeNode!
var activeSliceFG: SKShapeNode!
And here's the code for the createSlices() method:
func createSlices() {
    activeSliceBG = SKShapeNode()
    activeSliceBG.zPosition = 2

    activeSliceFG = SKShapeNode()
    activeSliceFG.zPosition = 3

    activeSliceBG.strokeColor = UIColor(red: 1, green: 0.9, blue: 0, alpha: 1)
    activeSliceBG.lineWidth = 9

    activeSliceFG.strokeColor = UIColor.white
    activeSliceFG.lineWidth = 5

    addChild(activeSliceBG)
    addChild(activeSliceFG)
}
Note that the background slice has a thicker line width than the foreground, and has a higher Z position than the background slice. I'm using Z positions 2 and 3 for the slice shapes, because I'll be using Z position 1 for bombs and Z position 0 for everything else – this ensures the slice shapes are on top, then bombs, then everything else.
Shaping up for action: CGPath and UIBezierPath
Shaping up for action: CGPath and UIBezierPath
Like I already explained, we're going to keep an array of the user's swipe points so that we can draw a shape resembling their slicing. To make this work, we're going to need four new methods, two of which you've met already. They are: touchesBegan(), touchesMoved(), touchesEnded() and redrawActiveSlice(). You already know how touchesBegan() and touchesMoved() works, and the other "touches" methods all work the same way.
First things first: add this new property to your class so that we can store swipe points:
var activeSlicePoints = [CGPoint]()
We're going to tackle the two easiest methods first: touchesMoved() and touchesEnded(). All the touchesMoved() method needs to do is figure out where in the scene the user touched, add that location to the slice points array, then redraw the slice shape, so that's easy enough:
override func touchesMoved(_ touches: Set<UITouch>, with event: UIEvent?) {
    guard let touch = touches.first else { return }
    let location = touch.location(in: self)
    activeSlicePoints.append(location)
    redrawActiveSlice()
}
When the user finishes touching the screen, touchesEnded() will be called. I'm going to make this method fade out the slice shapes over a quarter of a second. We could remove them immediately but that looks ugly, and leaving them sitting there for no reason would rather destroy the effect. So, fading it is – add this touchesEnded() method:
override func touchesEnded(_ touches: Set<UITouch>, with event: UIEvent?) {
    activeSliceBG.run(SKAction.fadeOut(withDuration: 0.25))
    activeSliceFG.run(SKAction.fadeOut(withDuration: 0.25))
}
You haven't used the fadeOut(withDuration:) action before, but I think it's pretty obvious what it does!
So far this is all easy stuff, but we're going to look at an interesting method now: touchesBegan(). One we’ve read out the touch from the UITouch set, this needs to do several things:
- Remove all existing points in the
activeSlicePointsarray, because we're starting fresh. - Get the touch location and add it to the
activeSlicePointsarray. - Call the (as yet unwritten)
redrawActiveSlice()method to clear the slice shapes. - Remove any actions that are currently attached to the slice shapes. This will be important if they are in the middle of a
fadeOut(withDuration:)action. - Set both slice shapes to have an alpha value of 1 so they are fully visible.
We can convert that to code with ease – in fact, I've put numbered comments in the code below so you can match them up to the points above:
override func touchesBegan(_ touches: Set<UITouch>, with event: UIEvent?) {
    guard let touch = touches.first else { return }

    // 1
    activeSlicePoints.removeAll(keepingCapacity: true)

    // 2
    let location = touch.location(in: self)
    activeSlicePoints.append(location)

    // 3
    redrawActiveSlice()

    // 4
    activeSliceBG.removeAllActions()
    activeSliceFG.removeAllActions()

    // 5
    activeSliceBG.alpha = 1
    activeSliceFG.alpha = 1
}
So, there's some challenge there but not a whole lot. Where it gets interesting is the redrawActiveSlice() method, because this is going to use a UIBezierPath that will be used to connect our swipe points together into a single line.
As with the previous method, let's take a look at what redrawActiveSlice() needs to do:
- If we have fewer than two points in our array, we don't have enough data to draw a line so it needs to clear the shapes and exit the method.
- If we have more than 12 slice points in our array, we need to remove the oldest ones until we have at most 12 – this stops the swipe shapes from becoming too long.
- It needs to start its line at the position of the first swipe point, then go through each of the others drawing lines to each point.
- Finally, it needs to update the slice shape paths so they get drawn using their designs – i.e., line width and color.
To make this work, you're going to need to know that an SKShapeNode object has a property called path which describes the shape we want to draw. When it's nil, there's nothing to draw; when it's set to a valid path, that gets drawn with the SKShapeNode's settings. SKShapeNode expects you to use a data type called CGPath, but we can easily create that from a UIBezierPath.
Drawing a complex path using UIBezierPath is a cinch: we'll use its move(to:) method to position the start of our lines, then loop through our activeSlicePoints array and call the path's addLine(to:) method for each point.
To stop the array storing more than 12 slice points, we’re going new method called removeFirst(), which lets us remove a certain number of items from the start of an array. In this case we know we want at most 12, so we can subtract 12 from our current count to see how many excess we have, and pass that to removeFirst().
I'm going to insert numbered comments into the code again to help you match up the goals with the code more easily:
func redrawActiveSlice() {
    // 1
    if activeSlicePoints.count < 2 {
        activeSliceBG.path = nil
        activeSliceFG.path = nil
        return
    }

    // 2
    if activeSlicePoints.count > 12 {
        activeSlicePoints.removeFirst(activeSlicePoints.count - 12)
    }

    // 3
    let path = UIBezierPath()
    path.move(to: activeSlicePoints[0])

    for i in 1 ..< activeSlicePoints.count {
        path.addLine(to: activeSlicePoints[i])
    }

    // 4
    activeSliceBG.path = path.cgPath
    activeSliceFG.path = path.cgPath
}
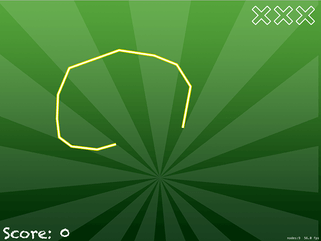
At this point, we have something you can run: press Cmd+R to run the game, then tap and swipe around on the screen to see the slice effect – I think you'll agree that SKShapeNode is pretty powerful!
Before we're done with the slice effect, we're going to add one more thing: a "swoosh" sound that plays as you swipe around. You've already seen the playSoundFileNamed() method of SKAction, but we're going to use it a little differently here.
You see, if we just played a swoosh every time the player moved, there would be 100 sounds playing at any given time – one for every small movement they made. Instead, we want only one swoosh to play at once, so we're going to set to true a property called isSwooshSoundActive, make the waitForCompletion of our SKAction true, then use a completion closure for runAction() so that isSwooshSoundActive is set to false.
So, when the player first swipes we set isSwooshSoundActive to be true, and only when the swoosh sound has finished playing do we set it back to false again. This will allow us to ensure only one swoosh sound is playing at a time.
First, give your class this new property:
var isSwooshSoundActive = false
Now we need to check whether that's false when touchesMoved() is called, and, if it is false, call a new method called playSwooshSound(). Add this to code just before the end of touchesMoved():
if !isSwooshSoundActive {
    playSwooshSound()
}
I've provided you with three different swoosh sounds, all of which are effectively the same just at varying pitches. The playSwooshSound() method needs to set isSwooshSoundActive to be true (so that no other swoosh sounds are played until we're ready), play one of the three sounds, then when the sound has finished set isSwooshSoundActive to be false again so that another swoosh sound can play.
By playing our sound with waitForCompletion set to true, SpriteKit automatically ensures the completion closure given to runAction() isn't called until the sound has finished, so this solution is perfect.
func playSwooshSound() {
    isSwooshSoundActive = true

    let randomNumber = Int.random(in: 1...3)
    let soundName = "swoosh\(randomNumber).caf"

    let swooshSound = SKAction.playSoundFileNamed(soundName, waitForCompletion: true)

    run(swooshSound) { [weak self] in
        self?.isSwooshSoundActive = false
    }
}
If you try running the game now you should hear only one swipe sound at a time.
Enemy or bomb: AVAudioPlayer
Enemy or bomb: AVAudioPlayer
In this section we're going to look at just one method, which should tell you immediately that this is a complicated method. This method is called createEnemy(), and is responsible for launching either a penguin or a bomb into the air for the player to swipe. That's it – that's all it does. And yet it's going to take quite a lot of code because it takes quite a lot of functionality in order to make the game complete:
- Should this enemy be a penguin or a bomb?
- Where should be it created on the screen?
- What direction should it be moving in?
It should be obvious that 3) relies on 2) – if you create something on the left edge of the screen, having it move to the left would make the game impossible for players!
An additional complexity is that in the early stages of the game we sometimes want to force a bomb, and sometimes force a penguin, in order to build a smooth learning curve. For example, it wouldn't be fair to make the very first enemy a bomb, because the player would swipe it and lose immediately.
We're going to specify what kind of enemy we want using an enum. You've used enums already (not least in project 2), but you've never created one before. To make createEnemy() work, we need to declare a new enum that tracks what kind of enemy should be created: should we force a bomb always, should we force a bomb never, or use the default randomization?
Add this above your class definition in GameScene.swift:
enum ForceBomb {
    case never, always, random
}
You can now use those values in your code, for example like this:
if forceBomb == .never {
    enemyType = 1
} else if forceBomb == .always {
    enemyType = 0
}
OK, it's time to start looking at the createEnemy() method. I say "start" because we're going to look at it in three passes: the code required to create bombs, the code to position enemies and set up their physics, and the code required to do everything else. Your code probably won't run until all three parts are in place, so don't worry!
We're going to need to track enemies that are currently active in the scene, so please add this array as a property of your class:
var activeEnemies = [SKSpriteNode]()
And now let's look at the core of the createEnemy() method. It needs to:
- Accept a parameter of whether we want to force a bomb, not force a bomb, or just be random.
- Decide whether to create a bomb or a penguin (based on the parameter input) then create the correct thing.
- Add the new enemy to the scene, and also to our
activeEnemiesarray.
That's it. Not too much, I hope. To decide whether to create a bomb or a player, I'll choose a random number from 0 to 6, and consider 0 to mean "bomb". Here's the code:
func createEnemy(forceBomb: ForceBomb = .random) {
    let enemy: SKSpriteNode

    var enemyType = Int.random(in: 0...6)

    if forceBomb == .never {
        enemyType = 1
    } else if forceBomb == .always {
        enemyType = 0
    }

    if enemyType == 0 {
        // bomb code goes here
    } else {
        enemy = SKSpriteNode(imageNamed: "penguin")
        run(SKAction.playSoundFileNamed("launch.caf", waitForCompletion: false))
        enemy.name = "enemy"
    }

    // position code goes here

    addChild(enemy)
    activeEnemies.append(enemy)
}
Note: Xcode will show you a compiler error for now, but don’t worry – we’re going to fix it.
There's nothing complicated in there, but I have taken out two fairly meaty chunks of code. That // position code goes here comment masks a lot of missing functionality that really makes the game come alive, so we're going to fill that in now.
I'm going to use numbered comments again so you can see exactly how this code matches up with what it should do. So, here is what that missing position code needs to do:
- Give the enemy a random position off the bottom edge of the screen.
- Create a random angular velocity, which is how fast something should spin.
- Create a random X velocity (how far to move horizontally) that takes into account the enemy's position.
- Create a random Y velocity just to make things fly at different speeds.
- Give all enemies a circular physics body where the
collisionBitMaskis set to 0 so they don't collide.
The only thing that might catch you out in the actual code is my use of magic numbers, which is what programmers call seemingly random (but actually important) numbers appearing in code. Ideally you don't want these, because it's better to make them constants with names, but then how would I be able to give you any homework?
Turning those five points into code is easy enough – just replace the // position code goes here with this:
// 1
let randomPosition = CGPoint(x: Int.random(in: 64...960), y: -128)
enemy.position = randomPosition

// 2
let randomAngularVelocity = CGFloat.random(in: -3...3 )
let randomXVelocity: Int

// 3
if randomPosition.x < 256 {
    randomXVelocity = Int.random(in: 8...15)
} else if randomPosition.x < 512 {
    randomXVelocity = Int.random(in: 3...5)
} else if randomPosition.x < 768 {
    randomXVelocity = -Int.random(in: 3...5)
} else {
    randomXVelocity = -Int.random(in: 8...15)
}

// 4
let randomYVelocity = Int.random(in: 24...32)

// 5
enemy.physicsBody = SKPhysicsBody(circleOfRadius: 64)
enemy.physicsBody?.velocity = CGVector(dx: randomXVelocity * 40, dy: randomYVelocity * 40)
enemy.physicsBody?.angularVelocity = randomAngularVelocity
enemy.physicsBody?.collisionBitMask = 0
The last missing part of the createEnemy() method is about creating bombs, and I've left it separate because it requires some thinking. A "bomb" node in our game is actually going to be made up of three parts: the bomb image, a bomb fuse particle emitter, and a container that puts the two together so we can move and spin them around together.
The reason we need to keep the bomb image and bomb fuse separate is because tapping on a bomb is a fatal move that causes the player to lose all their lives immediately. If the fuse particle emitter were inside the bomb image, then the user could accidentally tap a stray fuse particle and lose unfairly.
As a reminder, we're going to force the Z position of bombs to be 1, which is higher than the default value of 0. This is so that bombs always appear in front of penguins, because hours of play testing has made it clear to me that it's awful if you don't realize there's a bomb lurking behind something when you swipe it!
Creating a bomb also needs to play a fuse sound, but that has its own complexity. You've already seen that SKAction has a very simple way to play sounds, but it's so simple that it's not useful here because we want to be able to stop the sound and SKAction sounds don't let you do that. It would be confusing for the fuse sound to be playing when no bombs are visible, so we need a better solution.
That solution is called AVAudioPlayer, and it's not a SpriteKit class – it's available to use in your UIKit apps too if you want. We're going to have an AVAudioPlayer property for our class that will store a sound just for bomb fuses so that we can stop it as needed.
Let's put numbers to the tasks this chunk of code needs to perform:
- Create a new
SKSpriteNodethat will hold the fuse and the bomb image as children, setting its Z position to be 1. - Create the bomb image, name it "bomb", and add it to the container.
- If the bomb fuse sound effect is playing, stop it and destroy it.
- Create a new bomb fuse sound effect, then play it.
- Create a particle emitter node, position it so that it's at the end of the bomb image's fuse, and add it to the container.
That's all you need to know in order to continue. We need to start by importing the AVFoundation framework, so add this line now next to import SpriteKit:
import AVFoundation
You'll also need to declare the bombSoundEffect property, so put this just after the declaration of isSwooshSoundActive:
var bombSoundEffect: AVAudioPlayer?
Now for the real work. Please replace the // bomb code goes here comment with this, watching out for my numbered comments to help you match code against meaning:
// 1
enemy = SKSpriteNode()
enemy.zPosition = 1
enemy.name = "bombContainer"

// 2
let bombImage = SKSpriteNode(imageNamed: "sliceBomb")
bombImage.name = "bomb"
enemy.addChild(bombImage)

// 3
if bombSoundEffect != nil {
    bombSoundEffect?.stop()
    bombSoundEffect = nil
}

// 4
if let path = Bundle.main.url(forResource: "sliceBombFuse", withExtension: "caf") {
    if let sound = try?  AVAudioPlayer(contentsOf: path) {
        bombSoundEffect = sound
        sound.play()
    }
}

// 5
if let emitter = SKEmitterNode(fileNamed: "sliceFuse") {
    emitter.position = CGPoint(x: 76, y: 64)
    enemy.addChild(emitter)
}
After all that work, you're almost done with bombs. But there's one small bug that we can either fix now or fix when you can see it, but we might as well fix it now because your brain is thinking about all that bomb code.
The bug is this: we're using AVAudioPlayer so that we can stop the bomb fuse when bombs are no longer on the screen. But where do we actually stop the sound? Well, we don't yet – but we need to.
To fix the bug, we need to modify the update() method, which is something we haven't touched before – in fact, so far we’ve just been deleting it! This method is called every frame before it's drawn, and gives you a chance to update your game state as you want. We're going to use this method to count the number of bomb containers that exist in our game, and stop the fuse sound if the answer is 0.
Change your update() method to this:
override func update(_ currentTime: TimeInterval) {
    var bombCount = 0

    for node in activeEnemies {
        if node.name == "bombContainer" {
            bombCount += 1
            break
        }
    }

    if bombCount == 0 {
        // no bombs – stop the fuse sound!
        bombSoundEffect?.stop()
        bombSoundEffect = nil
    }
}