Day 57
Day 57 관련

Project 15, part one
Today we’re going to be looking at a fundamentally important part of iOS development: animation.
Years ago animation was often considered inconsequential – it was there to make something look nice, rather than adding real value. But today we recognize that animation helps guide users through state changes in our app: when they delete an email it moved into the trash can, so they can see that it’s gone and know where to go if they want it back.
John Maeda, design lead at Automattic (the company behind Wordpress), put this rather succinctly: “Design used to be the seasoning you’d sprinkle on for taste; now it’s the flour you need at the start of the recipe.” That means we need to be thinking about animation at the early stages of our app – deciding how the user should interact with everything we show them needs to be at the core of our design.
Today is all about bringing your user interfaces to life with movement, scaling, rotation, and more. We’ll be working in a sandbox, but you can use these principles anywhere!
Today you have three topics to work through, and you’ll learn about animate(withDuration:), CGAffineTransform, alpha, and more.
Setting up
Setting up
It's time to introduce one of the most important techniques in iOS development: animation. Sadly, many people don't consider animation important at all, which makes for some thoroughly awful user interface design.
Animation – making things move, scale, and so on – of your views is not only about making things pretty, although that's certainly a large part. Its main purpose is to give users a sense of what's changing and why, and it helps them make sense of a state change in your program.
When we use a navigation controller to show a new view controller, we don't just want it to appear. Instead, we want it to slide in, making it clear that the old screen hasn't gone away, it's just to the left of where we were.
You're almost certainly tired of hearing me say this, but iOS has a ridiculously powerful animation toolkit that's also easy to use. I know, I'm a broken record, right?
Well, don't just take my word for it – let's try out some animation together so you can see exactly how it works. So, create a new Single View App project in Xcode, naming it Project15.
Please download the files for this project from twostraws/HackingWithSwift and copy its Content folder into your Xcode project. Finally, set it to work on landscape iPads only. Animation of course works on all devices and in all orientations, but it's easier to work with a fixed size for now.
Preparing for action
Preparing for action
Open Interface Builder with Main.storyboard and place a button on there with the title "Tap" – position it in the middle of the screen, near the bottom. Don’t worry that we’re positioning things using an iPhone XR-sized screen – Auto Layout will automatically make it look great on iPads.
We want our button to always stay near the bottom of the view controller, so Ctrl-drag from the button to the view directly below it and choose “Bottom Space to Safe Area.” Now Ctrl-drag the same way again and choose "Center Horizontally in Safe Area.”
That's it for Auto Layout, so please switch to the assistant view so we can add an action and an outlet. Ctrl-drag from the button to your code to create an action for the button called tapped().
Every time the user taps the "Tap" button, we're going to execute a different animation. This will be accomplished by cycling through a counter, and moving an image view. To make all that work, you need to add two more properties to the class:
var imageView: UIImageView!
var currentAnimation = 0
There isn't an image view in the storyboard – we're going to create it ourself in viewDidLoad() using an initializer that takes a UIImage and makes the image view the correct size for the image.
Add this code to viewDidLoad():
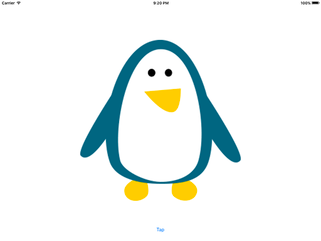
imageView = UIImageView(image: UIImage(named: "penguin"))
imageView.center = CGPoint(x: 512, y: 384)
view.addSubview(imageView)
That places the penguin in the middle of an iPad-sized landscape screen, ready for us to animate.
There's one more thing we're going to do before we start looking at the animations, and that's to put a little bit of code into the tapped() method so that we cycle through animations each time the button is tapped. Put this in there:
currentAnimation += 1

if currentAnimation > 7 {
    currentAnimation = 0
}
That will add 1 to the value of currentAnimation until it reaches 7, at which point it will set it back to 0.
Switch, case, animate: animate(withDuration:)
Switch, case, animate: animate(withDuration:)
The currentAnimation property can have a value between 0 and 7, each one triggering a different animation. We're going to create a big switch/case block inside tapped(), but we're going to start small and work our way up – the default case will handle any values we don't explicitly catch.
This switch/case statement is going to go inside a new method of the UIView class called animate(withDuration:), which is a kind of method you haven't seen before because it actually accepts two closures. The parameters we'll be using are how long to animate for, how long to pause before the animation starts, any options you want to provide, what animations to execute, and finally a closure that will execute when the animation finishes.
Update your tapped() method to this:
@IBAction func tapped(_ sender: UIButton) {
    sender.isHidden = true

    UIView.animate(withDuration: 1, delay: 0, options: [],
       animations: {
        switch self.currentAnimation {
        case 0:
            break

        default:
            break
        }
    }) { finished in
        sender.isHidden = false
    }

    currentAnimation += 1

    if currentAnimation > 7 {
        currentAnimation = 0
    }
}
Note: Because we want to show and hide the “Tap” button, we need to make the sender parameter to that method be a UIButton rather than Any.
All that code won't do anything yet, which is remarkable given that it's quite a lot! However, it has put us in a position where we can start dabbling with animations. But first, here's a breakdown of the code:
- When the method begins, we hide the
senderbutton so that our animations don't collide; it gets unhidden in the completion closure of the animation. - We call
animate(withDuration:)with a duration of 1 second, no delay, and no interesting options. - For the
animationsclosure we don’t need to use[weak self]because there’s no risk of strong reference cycles here – the closures passed toanimate(withDuration:)method will be used once then thrown away. - We switch using the value of
self.currentAnimation. We need to useselfto make the closure capture clear, remember. Thisswitch/casedoes nothing yet, because both possible cases just callbreak. - We use trailing closure syntax to provide our completion closure. This will be called when the animation completes, and its
finishedvalue will be true if the animations completed fully. - As I said, the completion closure unhides the
senderbutton so it can be tapped again. - After the
animate(withDuration:)call, we have the old code to modify and wrapcurrentAnimation.
If you run the app now and tap the button, you'll notice it doesn't actually hide and show as you might expect. This is because UIKit detects that no animation has taken place, so it calls the completion closure straight away.
Transform: CGAffineTransform
Transform: CGAffineTransform
Our code now has the perfect structure in place to let us dabble with animations freely, so it's time to learn about CGAffineTransform. This is a structure that represents a specific kind of transform that we can apply to any UIView object or subclass.
Unless you're into mathematics, affine transforms can seem like a black art. But Apple does provide some great helper functions to make it easier: there are functions to scale up a view, functions to rotate, functions to move, and functions to reset back to default.
All of these functions return a CGAffineTransform value that you can put into a view's transform property to apply it. As we'll be doing this inside an animation block, the transform will automatically be animated. This illustrates one of the many powerful things of Core Animation: you tell it what you want to happen, and it calculates all the intermediary states automatically.
Let's start with something simple: when we're at currentAnimation value 0, we want to make the view 2x its default size. Change the switch/case code to this:
switch self.currentAnimation {
case 0:
    self.imageView.transform = CGAffineTransform(scaleX: 2, y: 2)

default:
    break
}
That uses an initializer for CGAffineTransform that takes an X and Y scale value as its two parameters. A value of 1 means "the default size," so 2, 2 will make the view twice its normal width and height. By default, UIKit animations have an "ease in, ease out" curve, which means the movement starts slow, accelerates, then slows down again before reaching the end.
Run the app now and tap the button to watch the penguin animate from 1x to 2x its size over one second, all by setting the transform inside an animation. You can keep tapping the button as many times more as you want, but nothing else will happen at this time. If you apply a 2x scale transform to a view that already has a 2x scale transform, nothing happens.
The next case is going to be 1, and we're going to use a special existing transform called CGAffineTransform.identity, or just .identity. This effectively clears our view of any pre-defined transform, resetting any changes that have been applied by modifying its transform property.
Add this to the switch/case statement after the existing case:
case 1:
    self.imageView.transform = .identity
For the sake of clarity, your code should now read:

switch self.currentAnimation {
case 0:
    self.imageView.transform = CGAffineTransform(scaleX: 2, y: 2)

case 1:
    self.imageView.transform = .identity

default:
    break
}
With the second case in there, tapping the button repeatedly will first scale the penguin up, then scale it back down (resetting to defaults), then do nothing for lots of taps, then repeat the scale up/scale down. This is because our currentAnimation value is told to wrap (return to 0) when it's greater than 7, so the default case executes quite a few times.
Let's continue adding more cases: one to move the image view, then another to reset it back to the identity transform:
case 2:
    self.imageView.transform = CGAffineTransform(translationX: -256, y: -256)

case 3:
    self.imageView.transform = .identity
That uses another new initializer for CGAffineTransform that takes X and Y values for its parameters. These values are deltas, or differences from the current value, meaning that the above code subtracts 256 from both the current X and Y position.
Tapping the button now will scale up then down, then move and return back to the center, all smoothly animated by Core Animation.
We can also use CGAffineTransform to rotate views, using its rotationAngle initializer. This accepts one parameter, which is the amount in radians you want to rotate. There are three catches to using this function:
- You need to provide the value in radians specified as a
CGFloat. This usually isn't a problem – if you type 1.0 in there, Swift is smart enough to make that aCGFloatautomatically. If you want to use a value like pi, useCGFloat.pi. - Core Animation will always take the shortest route to make the rotation work. So, if your object is straight and you rotate to 90 degrees (radians: half of pi), it will rotate clockwise. If your object is straight and you rotate to 270 degrees (radians: pi + half of pi) it will rotate counter-clockwise because it's the smallest possible animation.
- A consequence of the second catch is that if you try to rotate 360 degrees (radians: pi times 2), Core Animation will calculate the shortest rotation to be "just don't move, because we're already there." The same goes for values over 360, for example if you try to rotate 540 degrees (one and a half full rotations), you'll end up with just a 180-degree rotation. With all that in mind, here's are two more cases that show off rotation:
case 4:
    self.imageView.transform = CGAffineTransform(rotationAngle: CGFloat.pi)
case 5:
    self.imageView.transform = .identity
As well as animating transforms, Core Animation can animate many of the properties of your views. For example, it can animate the background color of the image view, or the level of transparency. You can even change multiple things at once if you want something more complicated to happen.
As an example, to make our view almost fade out then fade back in again while also changing its background color, we're going to modify its transparency by setting its alpha value, where 0 is invisible and 1 is fully visible, and also set its backgroundColor property – first to green, then to clear.
Add these two new cases:
case 6:
    self.imageView.alpha = 0.1
    self.imageView.backgroundColor = UIColor.green

case 7:
    self.imageView.alpha = 1
    self.imageView.backgroundColor = UIColor.clear
That completes all possible cases, 0 to 7. But Core Animation isn't finished just yet. In fact, we've only scratched its surface in these tests, and there's much more it can do.
To give you the briefest glimpse of its power, replace this line of code:
UIView.animate(withDuration: 1, delay: 0, options: [],
…with this:
UIView.animate(withDuration: 1, delay: 0, usingSpringWithDamping: 0.5, initialSpringVelocity: 5, options: [],
This changes the animate(withDuration:) so that it uses spring animations rather than the default, ease-in-ease-out animation. I'm not even going to tell you what this does because I'm sure you're going to be impressed – press Cmd+R to run the app and tap the button for yourself. We're done!