Day 27
Day 27 관련

Project 5, part one
You probably remember learning about closures a couple of weeks ago, mostly because it was a particularly tough part of the course. Since then I’ve tried to work them back in slowly so you can master them little by little, and today it’s time to dive into them with our own closure.
I think you already know what I’m going to say, but I’ll say it anyway: this isn’t going to be easy. But the US general George Patton once said, “accept the challenges so that you can feel the exhilaration of victory” – when you finally feel like you understand closures (which might be today!) that’s when you know you’re really getting comfortable with Swift.
Today I’ll be introducing a new aspect of closures called capture lists. To make things easier, I prepared a new article just for this series that explains in detail what capture lists are and how they work – you should start by reading that.
Today you should work through the article on capture lists, then the three topics from project 5.
Capture lists in Swift: what’s the difference between weak, strong, and unowned references?
Capture lists in Swift: what’s the difference between weak, strong, and unowned references?
Capture lists come before a closure’s parameter list in your code, and capture values from the environment as either strong, weak, or unowned. We use them a lot, mainly to avoid strong reference cycles – aka retain cycles.
Deciding which to use isn’t easy when you’re learning, so you can spend time trying to figure out strong vs weak, or weak vs unowned, but as you progress with your learning you’ll start to realize there’s often only one right choice.
First, let’s take a look at the problem. First, here’s a simple class:
class Singer {
    func playSong() {
        print("Shake it off!")
    }
}
Second, here’s a function that creates an instance of Singer, creates a closure that uses the singer’s playSong() method, and returns that closure for us to use elsewhere:
func sing() -> () -> Void {
    let taylor = Singer()

    let singing = {
        taylor.playSong()
        return
    }

    return singing
}
Finally, we can call sing() to get back a function we can call wherever we want to have playSong() printed:
let singFunction = sing()
singFunction()
That will print “Shake it off!” thanks to the call to singFunction().
Strong capturing
Unless you ask for something special, Swift uses strong capturing. This means the closure will capture any external values that are used inside the closure, and make sure they never get destroyed.
Look again at our sing() function:
func sing() -> () -> Void {
    let taylor = Singer()

    let singing = {
        taylor.playSong()
        return
    }

    return singing
}
That taylor constant is made inside the sing() function, so normally it would be destroyed when the function ends. However, it gets used inside the closure, which means Swift will automatically make sure it stays alive for as long as the closure exists somewhere, even after the function has returned.
This is strong capturing in action. If Swift allowed taylor to be destroyed, then the closure would no longer be safe to call – its taylor.playSong() method wouldn’t be valid any more.
Weak capturing
Swift lets us specify a capture list to determine how values used inside the closure should be captured. The most common alternative to strong capturing is called weak capturing, and it changes two things:
- Weakly captured values aren’t kept alive by the closure, so they might be destroyed and be set to
nil. - As a result of 1, weakly captured values are always optional in Swift. This stops you assuming they are present when in fact they might not be.
We can modify our example to use weak capturing and you’ll see an immediate difference:
func sing() -> () -> Void {
    let taylor = Singer()

    let singing = { [weak taylor] in
        taylor?.playSong()
        return
    }

    return singing
}
That [weak taylor] part is our capture list, which is a specific part of closures where we give specific instructions as to how values should be captured. Here we’re saying that taylor should be captured weakly, which is why we need to use taylor?.playSong() – it’s an optional now, because it could be set to nil at any time.
If you run the code now you’ll see that calling singFunction() doesn’t print anything any more. The reason is that taylor exists only inside sing(), because the closure it returns doesn’t keep a strong hold of it.
To see this behavior in action, try changing sing() to this:
func sing() -> () -> Void {
    let taylor = Singer()

    let singing = { [weak taylor] in
        taylor!.playSong()
        return
    }

    return singing
}
That force unwraps taylor inside the closure, which will cause your code to crash because taylor becomes nil.
Unowned capturing
An alternative to weak is unowned, which behaves more like implicitly unwrapped optionals. Like weak capturing, unowned capturing allows values to become nil at any point in the future. However, you can work with them as if they are always going to be there – you don’t need to unwrap optionals.
For example:
func sing() -> () -> Void {
    let taylor = Singer()

    let singing = { [unowned taylor] in
        taylor.playSong()
        return
    }

    return singing
}
That will crash in a similar way to our force-unwrapped example from earlier: unowned taylor says I know for sure that taylor will always exist for the lifetime of the closure I’m sending back so I don’t need to hold on to the memory, but in practice taylor will be destroyed almost immediately so the code will crash.
You should use unowned very carefully indeed.
Common problems
There are four problems folks commonly hit when using closure capturing:
- They aren’t sure where to use capture lists when closures accept parameters.
- They make strong reference cycles, causing memory to get eaten up.
- They accidentally use strong references, particularly when using multiple captures.
- They make copies of closures and share captured data.
Let’s walk through each of those with some code examples, so you can see what happens.
Capture lists alongside parameters
This is a common problem to hit when you’re first starting out with capture lists, but fortunately it’s one that Swift catches for us.
When using capture lists and closure parameters together the capture list must always come first, then the word in to mark the start of your closure body – trying to put it after the closure parameters will stop your code from compiling.
For example:
writeToLog { [weak self] user, message in
    self?.addToLog("\(user) triggered event: \(message)")
}
Strong reference cycles
When thing A owns thing B, and thing B owns thing A, you have what’s called a strong reference cycle, or often just a retain cycle.
As an example, consider this code:
class House {
    var ownerDetails: (() -> Void)?

    func printDetails() {
        print("This is a great house.")
    }

    deinit {
        print("I'm being demolished!")
    }
}
That creates a House class with one property (a closure), one method, and a deinitializer so it prints a message when it’s being destroyed.
Now here’s an Owner class that is the same, except its closure stores house details:
class Owner {
    var houseDetails: (() -> Void)?

    func printDetails() {
        print("I own a house.")
    }

    deinit {
        print("I'm dying!")
    }
}
We can try creating two instances of those classes inside a do block. We don’t need a catch block here, but using do ensures they will be destroyed as soon as the } is reached:
print("Creating a house and an owner")

do {
    let house = House()
    let owner = Owner()
}

print("Done")
That should print “Creating a house and an owner”, “I’m dying!”, “I'm being demolished!”, then “Done” – everything works as expected.
Now let’s create a strong reference cycle:
print("Creating a house and an owner")

do {
    let house = House()
    let owner = Owner()
    house.ownerDetails = owner.printDetails
    owner.houseDetails = house.printDetails
}

print("Done")
Now it will print “Creating a house and an owner” then “Done”, with neither deinitializer being called.
What’s happening here is that house has a property that points to a method of owner, and owner has a property that points to a method of house, so neither can be safely destroyed. In real code this causes memory that can’t be freed, known as a memory leak, which degrades system performance and can even cause your app to be terminated.
To fix this we need to create a new closure and use weak capturing for one or both values, like this:
print("Creating a house and an owner")

do {
    let house = House()
    let owner = Owner()
    house.ownerDetails = { [weak owner] in owner?.printDetails() }
    owner.houseDetails = { [weak house] in house?.printDetails() }
}

print("Done")
It isn’t necessary to have both values weakly captured – all that matters is that at least one is, because it allows Swift to destroy them both when necessary.
Now, in real project code it’s rare to find strong reference cycles that are so obvious, but that just means it’s all the more important to use weak capturing to avoid the problem entirely.
Accidental strong references
Swift defaults to strong capturing, which can cause unintentional problems.
Going back to our singing example from earlier, consider this code:
func sing() -> () -> Void {
    let taylor = Singer()
    let adele = Singer()

    let singing = { [unowned taylor, adele] in
        taylor.playSong()
        adele.playSong()
        return
    }

    return singing
}
Now we have two values being captured by the closure, and both values are being used the same way inside the closure. However, only taylor is being captured as unowned – adele is being captured strongly, because the unowned keyword must be used for each captured value in the list.
Now, if you want taylor to be unowned but adele to be strongly captured, that’s fine. But if you want both to be unowned you need to say so:
[unowned taylor, unowned adele]
Swift does offer some protection against accidental capturing, but it’s limited: if you use self implicitly inside a closure, Swift forces you to add self. or self?. to make your intentions clear.
Implicit use of self happens a lot in Swift. For example, this initializer calls playSong(), but what it really means is self.playSong() – the self part is implied by the context:
class Singer {
    init() {
        playSong()
    }

    func playSong() {
        print("Shake it off!")
    }
}
Swift won’t let you use implicit self inside closures, which helps reduce a common type of retain cycle.
Copies of closures
The last thing that trips people up is the way closures themselves are copied, because their captured data becomes shared amongst copies.
For example, here’s a simple closure that captures the numberOfLinesLogged integer created outside so that it can increment and print its value whenever its called:
var numberOfLinesLogged = 0

let logger1 = {
    numberOfLinesLogged += 1
    print("Lines logged: \(numberOfLinesLogged)")
}

logger1()
That will print “Lines logged: 1” because we call the closure at the end.
Now, if we take a copy of that closure, that copy shares the same capturing values as its original, so whether we call the original or the copy you’ll see the log line count increasing:
let logger2 = logger1
logger2()
logger1()
logger2()
That will now print that 1, 2, 3, and 4 lines have been logged, because both logger1 and logger2 are pointing at the same captured numberOfLinesLogged value.
When to use strong, when to use weak, when to use unowned
Now that you understand how everything works, let’s try to summarize whether to use strong, weak, or unowned references:
- If you know for sure your captured value will never go away while the closure has any chance of being called, you can use
unowned. This is really only for the handful of times whenweakwould cause annoyances to use, but even when you could useguard letinside the closure with a weakly captured variable. - If you have a strong reference cycle situation – where thing A owns thing B and thing B owns thing A – then one of the two should use weak capturing. This should usually be whichever of the two will be destroyed first, so if view controller A presents view controller B, view controller B might hold a weak reference back to A.
- If there’s no chance of a strong reference cycle you can use strong capturing. For example, performing animation won’t cause
selfto be retained inside the animation closure, so you can use strong capturing.
If you’re not sure which to use, start out with weak and change only if you need to.
Where now?
As you’ve seen, closure capture lists help us avoid memory problems by controlling each how values are captured inside our closures. They are captured strongly by default, but we can use weak and even unowned to allow values to be destroyed even if they are used inside our closure.
I go into a lot more detail on closures in my book Pro Swift, so for more information you might want to check that out.
And if you still have questions about the way closures capture values, let me know on Twitter – I’m @twostraws there.
Setting up
Setting up
ojects 1 to 4 were all fairly easy, because my goal was to teach you the basics of iOS development while also trying to make something useful. But now that you're hopefully starting to become familiar with the core tools we have, it's time to change up a gear and tackle something a bit harder.
In this project you're going to learn how to make a word game that deals with anagrams, but as per usual I'll be hijacking it as a method to teach you more about iOS development. This time around we're going back to the table views as seen in project 1, but you're also going to learn how to load text from files, how to ask for user input in UIAlertController, and get a little more insight to how closures work.
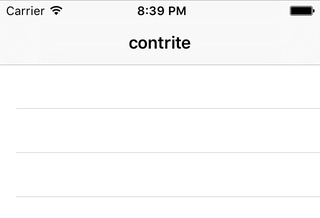
In Xcode, create a new Single View App called Project5. We’re going to turn this into a table view controller, just like we did in project 1. So, open ViewController.swift and find this line:
class ViewController: UIViewController {
Please change it to read this instead:
class ViewController: UITableViewController {
If you remember, that only changes the definition of our view controller in code. We need to change in the storyboard too, so open Main.storyboard now.
Inside Interface Builder, use the document outline to select and delete the existing view controller so that the document is blank, then replace it with a new table view controller. Use the identity inspector to change the class of the new controller to be “ViewController”, then select its prototype cell and give it the re-use identifier “Word” and the cell style Basic.
All this was covered in project 1, but it’s OK if you forgot – don’t be afraid to go back to project 1 and re-read any bits you’re not sure about.
Now select the view controller again (use the document outline – it’s easier!) then make sure the “Is Initial View Controller” box is checked under the attributes inspector. Finally, go to the Editor menu and choose Embed In > Navigation Controller. We won’t be pushing anything onto the navigation controller stack like we did with project 1, but it does automatically provide the navigation bar at the top, which we will be using.
Note: This app asks users to make anagrams out of a word, e.g. when given the word “anagrams” they might provide “rags”. If you look at that and think “that’s not an anagram – it doesn’t use all the letters!” then you need to search the internet for “well actually” and have a good, long think about life.
Reading from disk: contentsOfFile
Reading from disk: contentsOfFile
We're going to make an anagram game, where the user is asked to make words out of a larger word. We're going to put together a list of possible starter words for the game, and that list will be stored in a separate file. But how do we get the text from the file into the app? Well, it turns out that Swift's String data type makes it a cinch – thanks, Apple!
If you haven't already downloaded the assets for this project from GitHub ( twostraws/HackingWithSwift), please do so now. In the project5-files folder you'll find the file start.txt – please drag that into your Xcode project, making sure that "Copy items if needed" is checked.
The start.txt file contains over 12,000 eight-letter words we can use for our game, all stored one word per line. We need to turn that into an array of words we can play with. Behind the scenes, those line breaks are marked with a special line break character that is usually expressed as \n. So, we need to load that word list into a string, then split it into an array by breaking up wherever we see \n.
First, go to the start of your class and make two new arrays. We’re going to use the first one to hold all the words in the input file, and the second one will hold all the words the player has currently used in the game.
So, open ViewController.swift and add these two properties:
var allWords = [String]()
var usedWords = [String]()
Second, loading our array. This is done in three parts: finding the path to our start.txt file, loading the contents of that file, then splitting it into an array.
Finding a path to a file is something you'll do a lot, because even though you know the file is called "start.txt" you don't know where it might be on the filesystem. So, we use a built-in method of Bundle to find it: path(forResource:). This takes as its parameters the name of the file and its path extension, and returns a String? – i.e., you either get the path back or you get nil if it didn’t exist.
Loading a file into a string is also something you'll need to get familiar with, and again there's an easy way to do it: when you create a String instance, you can ask it to create itself from the contents of a file at a particular path.
Finally, we need to split our single string into an array of strings based on wherever we find a line break (\n). This is as simple as another method call on String: components(separatedBy:). Tell it what string you want to use as a separator (for us, that's \n), and you'll get back an array.
Before we get onto the code, there are two things you should know: path(forResource:) and creating a String from the contents of a file both return String?, which means we need to check and unwrap the optional using if let syntax.
OK, time for some code. Put this into viewDidLoad(), after the super call:
if let startWordsURL = Bundle.main.url(forResource: "start", withExtension: "txt") {
    if let startWords = try? String(contentsOf: startWordsURL) {
        allWords = startWords.components(separatedBy: "\n")
    }
}

if allWords.isEmpty {
    allWords = ["silkworm"]
}
If you look carefully, there's a new keyword in there: try?. You already saw try! previously, and really we could use that here too because we're loading a file from our app's bundle so any failure is likely to be catastrophic. However, this way I have a chance to teach you something new: try? means "call this code, and if it throws an error just send me back nil instead." This means the code you call will always work, but you need to unwrap the result carefully.
I also added in a new and useful property of arrays: isEmpty. This returns true if the array is empty, and is effectively equal to writing allWords.count == 0. The reason we use isEmpty is because some collection types, such as string, have to calculate their size by counting over all the elements they contain, so reading count == 0 can be significantly slower than using isEmpty.
As you can see, that code carefully checks for and unwraps the contents of our start file, then converts it to an array. When it has finished, allWords will contain 12,000+ strings ready for us to use in our game.
To prove that everything is working before we continue, let's create a new method called startGame(). This will be called every time we want to generate a new word for the player to work with, and it will use the randomElement() method of Swift’s arrays to choose one random item from all the strings.
Here’s the code:
func startGame() {
    title = allWords.randomElement()
    usedWords.removeAll(keepingCapacity: true)
    tableView.reloadData()
}
Line 1 sets our view controller's title to be a random word in the array, which will be the word the player has to find.
Line 2 removes all values from the usedWords array, which we'll be using to store the player's answers so far. We aren't adding anything to it right now, so removeAll() won't do anything just yet.
Line 3 is the interesting part: it calls the reloadData() method of tableView. That table view is given to us as a property because our ViewController class comes from UITableViewController, and calling reloadData() forces it to call numberOfRowsInSection again, as well as calling cellForRowAt repeatedly. Our table view doesn't have any rows yet, so this won't do anything for a few moments. However, the method is ready to be used, and allows us to check we've loaded all the data correctly, so add this just before the end of viewDidLoad():
startGame()
Now press Cmd+R to run the app, and you ought to see an eight-letter word at the top, ready for play to begin.
Before we’re done, we need to add a few methods to handle the table view data: numberOfRowsInSection and cellForRowAt. These are identical to the implementations in project 1, except now we’re drawing on the usedWords array and the “Word” cell identifier. Add these two methods now:
override func tableView(_ tableView: UITableView, numberOfRowsInSection section: Int) -> Int {
    return usedWords.count
}

override func tableView(_ tableView: UITableView, cellForRowAt indexPath: IndexPath) -> UITableViewCell {
    let cell = tableView.dequeueReusableCell(withIdentifier: "Word", for: indexPath)
    cell.textLabel?.text = usedWords[indexPath.row]
    return cell
}
They won’t have any effect just yet because the usedWords array never changes, but at least the foundation is in place now.
Pick a word, any word: UIAlertController
Pick a word, any word: `UIAlertController`
This game will prompt the user to enter a word that can be made from the eight-letter prompt word. For example, if the eight-letter word is "agencies", the user could enter "cease." We're going to solve this with UIAlertController, because it's a nice fit, and also gives me the chance to introduce some new teaching. I'm all about ulterior motives!
Add this code to viewDidLoad(), just after the call to super:
navigationItem.rightBarButtonItem = UIBarButtonItem(barButtonSystemItem: .add, target: self, action: #selector(promptForAnswer))
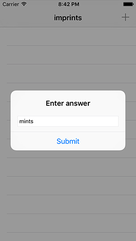
That created a new UIBarButtonItem using the "add" system item, and configured it to run a method called promptForAnswer() when tapped – we haven’t created it yet, so you’ll get a compiler error for a few minutes as you read on. This new method will show a UIAlertController with space for the user to enter an answer, and when the user clicks Submit to that alert controller the answer is checked to make sure it's valid.
Before I give you the code, let me explain what you need to know.
You see, we're about to use a closure, and things get a little complicated. As a reminder, these are chunks of code that can be treated like a variable – we can send the closure somewhere, where it gets stored away and executed later. To make this work, Swift takes a copy of the code and captures any data it references, so it can use them later.
But there's a problem: what if the closure references the view controller? Then what could happen is a strong reference cycle: the view controller owns an object that owns a closure that owns the view controller, and nothing could ever be destroyed.
I'm going to try (and likely fail!) to give you a metaphorical example, so please bear with me. Imagine if you built two cleaning robots, red and blue. You told the red robot, "don't stop cleaning until the blue robot stops," and you told the blue robot "don't stop cleaning until the red robot stops."
When would they stop cleaning? The answer is “never”, because neither will make the first move.
This is the problem we are facing with a strong reference cycle: object A owns object B, and object B owns a closure that referenced object A. And when closures are created, they capture everything they use, thus object B owns object A.
Strong reference cycles used to be hard to find, but you'll be glad to know Swift makes them trivial. In fact, Swift makes it so easy that you will use its solution even when you're not sure if there's a cycle simply because you might as well.
So, please brace yourself: we're about to take our first look at actual closures. The syntax will hurt. And when you finally understand it, you'll come across examples online that make your brain hurt all over again.
Ready? Here's the promptForAnswer() method:
@objc func promptForAnswer() {
    let ac = UIAlertController(title: "Enter answer", message: nil, preferredStyle: .alert)
    ac.addTextField()

    let submitAction = UIAlertAction(title: "Submit", style: .default) { [weak self, weak ac] action in
        guard let answer = ac?.textFields?[0].text else { return }
        self?.submit(answer)
    }

    ac.addAction(submitAction)
    present(ac, animated: true)
}
That code won’t build just yet, so don’t worry if you see errors – we’ll fix them soon. But first, let’s talk about what the code above does. It introduces quite a few new things, but before we look at them let's eliminate the easy stuff.
- It needs to be called from a
UIBarButtonItemaction, so we must mark it@objc. Hopefully you’re starting to sense when this is needed, but don’t worry if you forget – Xcode will always complain loudly if@objc is required and not present! - Creating a new
UIAlertController: we did that in project 2. - The
addTextField()method just adds an editable text input field to theUIAlertController. We could do more with it, but it's enough for now. - The
addAction()method is used to add aUIAlertActionto aUIAlertController. We used this in project 2 also. - The
present()method is also from project 2. Clearly project 2 was brilliant!
That leaves the tricky stuff: creating submitAction. These handful of lines of code demonstrate no fewer than four new things to learn, all of which are important. I'm going to sort them easiest first, starting with UITextField.
UITextField is a simple editable text box that shows the keyboard so the user can enter something. We added a single text field to the UIAlertController using its addTextField() method, and we now read out the value that was inserted.
Next up is trailing closure syntax. We covered this while you were learning the Swift fundamentals, but now you can see it in action: rather than specifying a handler parameter, we pass the code we want to run in braces after the method call.
Next, action in. If you remember project 2, we had to modify the askQuestion() method so that it accepted a UIAlertAction parameter saying what button was tapped, like this:
func askQuestion(action: UIAlertAction!) {
We had no choice but to do that, because the handler parameter for UIAlertAction expects a method that takes itself as a parameter, and we also added a default value of “nil” so we could call it ourselves – hence the ! part. And that's what's happening here: we're giving the UIAlertAction some code to execute when it is tapped, and it wants to know that that code accepts a parameter of type UIAlertAction.
The in keyword is important: everything before that describes the closure; everything after that is the closure. So action in means that it accepts one parameter in, of type UIAlertAction.
In our current project, we could simplify this even further: we don't make any reference to the action parameter inside the closure, which means we don't need to give it a name at all. In Swift, to leave a parameter unnamed you just use an underscore character, like this:
_ in
Fourth is weak. Swift "captures" any constants and variables that are used in a closure, based on the values of the closure's surrounding context. That is, if you create an integer, a string, an array and another class outside of the closure, then use them inside the closure, Swift captures them.
This is important, because the closure references the variables, and might even change them. But I haven't said yet what "capture" actually means, and that's because it depends what kind of data you're using. Fortunately, Swift hides it all away so you don't have to worry about it…
…except for those strong reference cycles I mentioned. Those you need to worry about. That's where objects can't even be destroyed because they all hold tightly on to each other – known as strong referencing.
Swift's solution is to let you declare that some variables aren't held onto quite so tightly. It's a two-step process, and it's so easy you'll find yourself doing it for everything just in case. In the event that Xcode thinks you’re taking it a bit too far, you’ll get a warning saying you can relax a bit.
First, you must tell Swift what variables you don't want strong references for. This is done in one of two ways: unowned or weak. These are somewhat equivalent to implicitly unwrapped optionals (unowned) and regular optionals (weak): a weakly owned reference might be nil, so you need to unwrap it or use optional chaining; an unowned reference is one you're certifying cannot be nil and so doesn't need to be unwrapped, however you'll hit a problem if you were wrong.
In our code we use this: [weak self, weak ac]. That declares self (the current view controller) and ac (our UIAlertController) to be captured as weak references inside the closure. It means the closure can use them, but won't create a strong reference cycle because we've made it clear the closure doesn't own either of them.
But that's not enough for Swift. Inside our method we're calling the submit() method of our view controller. We haven't created it yet, but you should be able to see it's going to take the answer the user entered and try it out in the game.
This submit() method is external to the closure’s current context, so when you're writing it you might not realize that calling submit() implicitly requires that self be captured by the closure. That is, the closure can't call submit() if it doesn't capture the view controller.
We've already declared that self is weakly owned by the closure, but Swift wants us to be absolutely sure we know what we're doing: every call to a method or property of the current view controller must prefixed with "self?.”, as in self?.submit().
In project 1, I told you there were two trains of thought regarding use of self, and said, "The first group of people never like to use self. unless it's required, because when it's required it's actually important and meaningful, so using it in places where it isn't required can confuse matters."
Implicit capture of self in closures is that place when using self is required and meaningful: Swift won't let you avoid it here. By restricting your use of self to closures you can easily check your code doesn’t have any reference cycles by searching for "self" – there ought not to be too many to look through!
I realize all that sounds very dense, but let’s take a look at the code again:
let submitAction = UIAlertAction(title: "Submit", style: .default) { [weak self, weak ac] action in
    guard let answer = ac?.textFields?[0].text else { return }
    self?.submit(answer)
}
Hopefully you can start to see how it breaks down:
- We use trailing closure syntax to provide some code to run when the alert action is selected.
- That code will use
selfandacso we declare them as beingweakso that Swift won’t create a strong reference cycle. - The closure expects to receive a
UIAlertActionas its parameter, so we write that inside the opening brace. - Everything after
inis the actual code of the closure. - Inside the closure we need to reference methods on our view controller using
selfso that we’re clearly acknowledging the possibility of a strong reference cycle.
It’s complicated and I’m not going to pretend otherwise, but we are going to be coming back to this repeatedly in the future – you’ll have more than enough chance to understand it better.
Before we move on, let's make your code compile again because right now it's calling self?.submit() and we haven't made that method yet. So, add this new method somewhere in the class:
func submit(_ answer: String) {
}
That's right, it's empty – but it's enough to make the code compile cleanly so we can carry on.