Day 95
Day 95 관련

Project 29, part two
Today we’ll be completing our SpriteKit game, and I think you’ll be pleased by the end result. However to get to the end we’ll need to do a little mathematics: we need to convert between degrees and radians, and we need to calculator a vector from an angle and a speed.
I realize that for some reading this it has been a while since you studied mathematics at school, but if you stick with it I hope everything will become clear. As Ernest Rutherford once said, “all of physics is either impossible or trivial: it is impossible until you understand it, and then it becomes trivial.”
What’s more, I think the same is true of programming – today is day 95 of your learning journey, but if I’d talked to you about collision bitmasks, @IBAction, and Core Graphics back when you first started learning you wouldn’t have understood a word of it. Now these things are slowly becoming second nature for you: bitmasks let us define what each of our objects are and what they should bounce off, @IBAction marks a method being called when a user interface event happens, and Core Graphics lets us render images dynamically.
That’s another fantastic measure of how much progress you’ve made, and you’re not even done yet – keep going!
Today you have two topics to work through, and you’ll learn how to make texture atlases, how to simplify collision detection, how to transition between scenes, and more.
Unleash the bananas: SpriteKit texture atlases
Unleash the bananas: SpriteKit texture atlases
It's time to get down to the nitty-gritty business of writing code: we need to create our players then fill in the launch() method so that the fun can begin.
We're going to start with the easy bit, which is creating players. This needs to do two things:
- Create a player sprite and name it "player1".
- Create a physics body for the player that collides with bananas, and set it to not be dynamic.
- Position the player at the top of the second building in the array. (This is why we needed to keep an array of the buildings.)
- Add the player to the scene.
- Repeat all the above for player 2, except they should be on the second to last building.
The player physics body can be made using a circle, because the sprite used (which is the same for both players) is more or less round. We used the second building for player 1 and the second to last for player 2 so that they aren't at the very edges of the screen. Positioning them at the top is just a matter of adding the building's height to the player's height and dividing by two, then adding that to the building's Y co-ordinate. SpriteKit measures from the center of nodes, remember!
Before we look at the code, you'll need to create some properties to hold both players, plus the banana and which player is currently in control:
var player1: SKSpriteNode!
var player2: SKSpriteNode!
var banana: SKSpriteNode!

var currentPlayer = 1
Now here's the code for createPlayers() – please put this in GameScene.swift:
func createPlayers() {
    player1 = SKSpriteNode(imageNamed: "player")
    player1.name = "player1"
    player1.physicsBody = SKPhysicsBody(circleOfRadius: player1.size.width / 2)
    player1.physicsBody?.categoryBitMask = CollisionTypes.player.rawValue
    player1.physicsBody?.collisionBitMask = CollisionTypes.banana.rawValue
    player1.physicsBody?.contactTestBitMask = CollisionTypes.banana.rawValue
    player1.physicsBody?.isDynamic = false

    let player1Building = buildings[1]
    player1.position = CGPoint(x: player1Building.position.x, y: player1Building.position.y + ((player1Building.size.height + player1.size.height) / 2))
    addChild(player1)

    player2 = SKSpriteNode(imageNamed: "player")
    player2.name = "player2"
    player2.physicsBody = SKPhysicsBody(circleOfRadius: player2.size.width / 2)
    player2.physicsBody?.categoryBitMask = CollisionTypes.player.rawValue
    player2.physicsBody?.collisionBitMask = CollisionTypes.banana.rawValue
    player2.physicsBody?.contactTestBitMask = CollisionTypes.banana.rawValue
    player2.physicsBody?.isDynamic = false

    let player2Building = buildings[buildings.count - 2]
    player2.position = CGPoint(x: player2Building.position.x, y: player2Building.position.y + ((player2Building.size.height + player2.size.height) / 2))
    addChild(player2)
}
Now, one thing we haven't done yet is actually add in the images to be used inside the game, and the reason for that is because we're going to use a special technique called texture atlases. SpriteKit doesn't use them by default, which is why we haven't used them yet – there are bigger things to worry about! But this game is perfect for texture atlases, so we're going to use them now.
A texture atlas is a set of pictures that are combined into a single image. They might be stored in their original orientation, or they might be rotated. Alongside those images, the atlas also contains positions and sizes, which means to render one of those pictures SpriteKit loads the whole atlas and just draws the small window that represents the image you want.
Texture atlases allows SpriteKit to draw lots of images without having to load and unload textures – it effectively just crops the big image as needed. Xcode automatically generates these atlases for us, even rotating sprites to make them fit more efficiently. And the best bit: just like using Assets.xcassets, you don't need to change your code to make them work; just load sprites the same way you've always done.
We want to use a texture atlas for our game, so open Assets.xcassets, right-click in the big empty space below AppIcon, and choose New Sprite Atlas. You should then drag all the images for this project onto that atlas, and drag the two particle systems directly into your Xcode project.
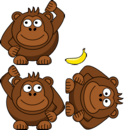
(Note: observant readers may notice that the player images are in fact monkeys not gorillas. This is largely down to me not being able to find a public domain gorilla picture that was good enough, and I figured penguins deserved a break.)
With the createPlayers() method in place, all you need to is call it inside didMove(to:), just after the createBuildings() line:
override func didMove(to view: SKView) {
    backgroundColor = UIColor(hue: 0.669, saturation: 0.99, brightness: 0.67, alpha: 1)

    createBuildings()
    createPlayers()
}
It's now time to flesh out the launch() method. This is a complicated method because it needs to do quite a few things:
- Figure out how hard to throw the banana. We accept a velocity parameter, but I'll be dividing that by 10. You can adjust this based on your own play testing.
- Convert the input angle to radians. Most people don't think in radians, so the input will come in as degrees that we will convert to radians.
- If somehow there's a banana already, we'll remove it then create a new one using circle physics.
- If player 1 was throwing the banana, we position it up and to the left of the player and give it some spin.
- Animate player 1 throwing their arm up then putting it down again.
- Make the banana move in the correct direction.
- If player 2 was throwing the banana, we position it up and to the right, apply the opposite spin, then make it move in the correct direction.
There are few things you need to know before we translate that long list into Swift. First, converting degrees to radians is done with a fixed formula that we will put into a method called deg2rad():
func deg2rad(degrees: Int) -> Double {
    return Double(degrees) * Double.pi / 180
}
Second, SpriteKit uses a number of optimizations to help its physics simulation work at high speed. These optimizations don't work well with small, fast-moving objects, and our banana is just such a thing. To be sure everything works as intended, we're going to enable the usesPreciseCollisionDetection property for the banana's physics body. This works slower, but it's fine for occasional use.
Third, I said we needed to make the banana move in "the correct direction" without really explaining how we get to that. This isn't a trigonometry book, so here's the answer as briefly as possible: if we calculate the cosine of our angle in radians it will tell us how much horizontal momentum to apply, and if we calculate the sine of our angle in radians it will tell us how much vertical momentum to apply.
Once that momentum is calculated, we multiply it by the velocity we calculated (or negative velocity in the case of being player 2, because we want to throw to the left), and turn it into a CGVector. Remember, a vector is like an arrow where its base is at 0,0 (our current position) and tip at the point we specify, so this effectively points an arrow in the direction the banana should move.
To make the banana actually move, we use the applyImpulse() method of its physics body, which accepts a CGVector as its only parameter and gives it a physical push in that direction.
Time for the code; so you don't have to flick around so much while reading, here's a repeat list of what this method will do, with numbers matching comments in the code:
- Figure out how hard to throw the banana. We accept a velocity parameter, but I'll be dividing that by 10. You can adjust this based on your own play testing.
- Convert the input angle to radians. Most people don't think in radians, so the input will come in as degrees that we will convert to radians.
- If somehow there's a banana already, we'll remove it then create a new one using circle physics.
- If player 1 was throwing the banana, we position it up and to the left of the player and give it some spin.
- Animate player 1 throwing their arm up then putting it down again.
- Make the banana move in the correct direction.
- If player 2 was throwing the banana, we position it up and to the right, apply the opposite spin, then make it move in the correct direction. And here's the code:
func launch(angle: Int, velocity: Int) {
    // 1
    let speed = Double(velocity) / 10.0

    // 2
    let radians = deg2rad(degrees: angle)

    // 3
    if banana != nil {
        banana.removeFromParent()
        banana = nil
    }

    banana = SKSpriteNode(imageNamed: "banana")
    banana.name = "banana"
    banana.physicsBody = SKPhysicsBody(circleOfRadius: banana.size.width / 2)
    banana.physicsBody?.categoryBitMask = CollisionTypes.banana.rawValue
    banana.physicsBody?.collisionBitMask = CollisionTypes.building.rawValue | CollisionTypes.player.rawValue
    banana.physicsBody?.contactTestBitMask = CollisionTypes.building.rawValue | CollisionTypes.player.rawValue
    banana.physicsBody?.usesPreciseCollisionDetection = true
    addChild(banana)

    if currentPlayer == 1 {
        // 4
        banana.position = CGPoint(x: player1.position.x - 30, y: player1.position.y + 40)
        banana.physicsBody?.angularVelocity = -20

        // 5
        let raiseArm = SKAction.setTexture(SKTexture(imageNamed: "player1Throw"))
        let lowerArm = SKAction.setTexture(SKTexture(imageNamed: "player"))
        let pause = SKAction.wait(forDuration: 0.15)
        let sequence = SKAction.sequence([raiseArm, pause, lowerArm])
        player1.run(sequence)

        // 6
        let impulse = CGVector(dx: cos(radians) * speed, dy: sin(radians) * speed)
        banana.physicsBody?.applyImpulse(impulse)
    } else {
        // 7
        banana.position = CGPoint(x: player2.position.x + 30, y: player2.position.y + 40)
        banana.physicsBody?.angularVelocity = 20

        let raiseArm = SKAction.setTexture(SKTexture(imageNamed: "player2Throw"))
        let lowerArm = SKAction.setTexture(SKTexture(imageNamed: "player"))
        let pause = SKAction.wait(forDuration: 0.15)
        let sequence = SKAction.sequence([raiseArm, pause, lowerArm])
        player2.run(sequence)

        let impulse = CGVector(dx: cos(radians) * -speed, dy: sin(radians) * speed)
        banana.physicsBody?.applyImpulse(impulse)
    }
}
With that code, the game is starting to come together. Sure, the bananas don't actually explode, and player 2 never actually gets a shot, but all in good time…
Destructible terrain: presentScene
Destructible terrain: presentScene
It's time for the most challenging part of our project, but as per usual I've tried to keep things as simple as possible because the fun is in getting results not in learning algorithms. We're going to add collision detection to our code so that players can carve chunks out of the buildings or, better, blow up their opponents.
You will, as always, need to assign self to be the delegate of your scene's physics world so that you can get notified of collisions. So, put this in didMove(to:):
physicsWorld.contactDelegate = self
Make sure you modify your class definition to say that you conform to the SKPhysicsContactDelegate protocol.
When it comes to implementing the didBegin() method, there are various possible contacts we need to consider: banana hit building, building hit banana (remember the philosophy?), banana hit player1, player1 hit banana, banana hit player2 and player2 hit banana.
This is a lot to check, so we're going to eliminate half of them by eliminating whether "banana hit building" or "building hit banana". Take another look at our category bitmasks:
enum CollisionTypes: UInt32 {
    case banana = 1
    case building = 2
    case player = 4
}
They are ordered numerically and alphabetically, so what we're going to do is create two new variables of type SKPhysicsBody and assign one object from the collision to each: the first physics body will contain the lowest number, and the second the highest.
So, if we get banana (collision type 1) and building (collision type 2) we'll put banana in body 1 and building in body 2, but if we get building (2) and banana (1) then we'll still put banana in body 1 and building in body 2.
Once we have eliminated half the checks, we're going to optionally unwrap both the bodies. They are optional because they might be nil, and this is highly likely in our project. The reason it's likely is because we might get "banana hit building" and "building hit banana" one after the other, but when either of these happens we'll destroy the banana so the second one will definitely be nil.
If the banana hit a player, we're going to call a new method named destroy(player:). If the banana hit a building, we'll call a different new method named bananaHit(building:), but we'll also pass in the contact point. This value tells us where on the screen the impact actually happened, and it's important because we're going to destroy the building at that point.
That's all you need to know, so here's the code for didBegin():
func didBegin(_ contact: SKPhysicsContact) {
    let firstBody: SKPhysicsBody
    let secondBody: SKPhysicsBody

    if contact.bodyA.categoryBitMask < contact.bodyB.categoryBitMask {
        firstBody = contact.bodyA
        secondBody = contact.bodyB
    } else {
        firstBody = contact.bodyB
        secondBody = contact.bodyA
    }

    guard let firstNode = firstBody.node else { return }
    guard let secondNode = secondBody.node else { return }

    if firstNode.name == "banana" && secondNode.name == "building" {
        bananaHit(building: secondNode, atPoint: contact.contactPoint)
    }

    if firstNode.name == "banana" && secondNode.name == "player1" {
        destroy(player: player1)
    }

    if firstNode.name == "banana" && secondNode.name == "player2" {
        destroy(player: player2)
    }
}
Note: We haven’t written those functions yet, so Xcode will complain.
If a banana hits a player, it means they have lost the game: we need to create an explosion (yay, particles!), remove the destroyed player and the banana from the scene, then… what? Well, so far we've just left it there – we haven't looked at how to make games restart.
There are a number of things you could do: take players to a results screen, take them to a menu screen, and so on. In our case, we're going to reload the level so they can carry on playing. We could just delete all the buildings and generate it all from scratch, but that would be passing up a great opportunity to learn something new!
SpriteKit has a super-stylish and built-in way of letting you transition between scenes. This means you can have one scene for your menu, one for your options, one for your game, and so on, then transition between them as if they were view controllers in a navigation controller.
To transition from one scene to another, you first create the scene, then create a transition using the list available from SKTransition, then finally use the presentScene() method of our scene's view, passing in the new scene and the transition you created. For example, this will cross-fade in a new scene over 2 seconds:
let newGame = GameScene(size: self.size)
let transition = SKTransition.crossFade(withDuration: 2)
self.view?.presentScene(newGame, transition: transition)
In the destroy(player:) method we're going to execute the scene transition after two seconds so that players have a chance to see who won and, let's face it, laugh at the losing player. But when we create the new game scene we also need to do something very important: we need to update the view controller's currentGame property and set the new scene's viewController property so they can talk to each other once the change has happened.
We also need to call the changePlayer() method when a player is destroyed. We haven't written this method yet, but it transfers control of the game to the other player, then calls the activatePlayer() method on the game view controller so that the game controls are re-shown. Calling this method here ensures that the player who lost gets the first turn in the new game.
First, here's the code for destroy(player:):
func destroy(player: SKSpriteNode) {
    if let explosion = SKEmitterNode(fileNamed: "hitPlayer") {
        explosion.position = player.position
        addChild(explosion)
    }

    player.removeFromParent()
    banana.removeFromParent()

    DispatchQueue.main.asyncAfter(deadline: .now() + 2) {
        let newGame = GameScene(size: self.size)
        newGame.viewController = self.viewController
        self.viewController.currentGame = newGame

        self.changePlayer()
        newGame.currentPlayer = self.currentPlayer

        let transition = SKTransition.doorway(withDuration: 1.5)
        self.view?.presentScene(newGame, transition: transition)
    }
}
Important: after calling changePlayer(), we must set the new game's currentPlayer property to our own currentPlayer property, so that whoever died gets the first shot.
The changePlayer() method is trivial, so here it is:
func changePlayer() {
    if currentPlayer == 1 {
        currentPlayer = 2
    } else {
        currentPlayer = 1
    }

    viewController.activatePlayer(number: currentPlayer)
}
Now it's time for the real work. How do we allow our exploding bananas to create holes in buildings? Surprisingly, it's not that hard. I'm going to split it into two parts: a bananaHit(building:) game scene method that handles creating the explosion, deleting the banana and changing players, and a hit(at:) building node method that handles damaging the building. The first one is easy, so put this into the game scene:
func bananaHit(building: SKNode, atPoint contactPoint: CGPoint) {
    guard let building = building as? BuildingNode else { return }
    let buildingLocation = convert(contactPoint, to: building)
    building.hit(at: buildingLocation)

    if let explosion = SKEmitterNode(fileNamed: "hitBuilding") {
        explosion.position = contactPoint
        addChild(explosion)
    }

    banana.name = ""
    banana.removeFromParent()
    banana = nil

    changePlayer()
}
Note: We haven’t written hit(at:) yet, so don’t worry about Xcode’s error message.
The only new thing in there is the call to convert(), which asks the game scene to convert the collision contact point into the coordinates relative to the building node. That is, if the building node was at X:200 and the collision was at X:250, this would return X:50, because it was 50 points into the building node.
If you're curious why I use banana.name = "", it's to fix a small but annoying bug: if a banana just so happens to hit two buildings at the same time, then it will explode twice and thus call changePlayer() twice – effectively giving the player another throw. By clearing the banana's name here, the second collision won't happen because our didBegin() method won't see the banana as being a banana any more – its name is gone.
And now for the part where we handle destroying chunks of the building. With your current knowledge of Core Graphics, this is something you can do with only one new thing: blend modes. When you draw anything to a Core Graphics context, you can set how it should be drawn. For example, should it be be drawn normally, or should it add to what's there to create a combination?
Core Graphics has quite a few blend modes that might look similar, but we're going to use one called .clear, which means "delete whatever is there already." When combined with the fact that we already have a property called currentImage you might be able to see how our destructible terrain technique will work!
Put simply, when we create the building we save its UIImage to a property of the BuildingNode class. When we want to destroy part of the building, we draw that image into a new context, draw an ellipse using .clear to blast a hole, then save that back to our currentImage property and update our sprite's texture.
Here's a full break down of what the method needs to do:
- Figure out where the building was hit. Remember: SpriteKit's positions things from the center and Core Graphics from the bottom left!
- Create a new Core Graphics context the size of our current sprite.
- Draw our current building image into the context. This will be the full building to begin with, but it will change when hit.
- Create an ellipse at the collision point. The exact co-ordinates will be 32 points up and to the left of the collision, then 64x64 in size - an ellipse centered on the impact point.
- Set the blend mode
.clearthen draw the ellipse, literally cutting an ellipse out of our image. - Convert the contents of the Core Graphics context back to a
UIImage, which is saved in thecurrentImageproperty for next time we’re hit, and used to update our building texture. - Call
configurePhysics()again so that SpriteKit will recalculate the per-pixel physics for our damaged building. Here's that in code – put this method into theBuildingNodeclass:
func hit(at point: CGPoint) {
    let convertedPoint = CGPoint(x: point.x + size.width / 2.0, y: abs(point.y - (size.height / 2.0)))

    let renderer = UIGraphicsImageRenderer(size: size)
    let img = renderer.image { ctx in
        currentImage.draw(at: .zero)

        ctx.cgContext.addEllipse(in: CGRect(x: convertedPoint.x - 32, y: convertedPoint.y - 32, width: 64, height: 64))
        ctx.cgContext.setBlendMode(.clear)
        ctx.cgContext.drawPath(using: .fill)
    }

    texture = SKTexture(image: img)
    currentImage = img

    configurePhysics()
}
We haven’t used the abs() function before, but its job is quite simple: it makes negative number positive. So, if you pass it 1000 it sends back 1000, but if you pass in -1000 it still sends back 1000.
That's it for destructible terrain! There's one curious quirk of SpriteKit's physics implementation: if you slice a building in two with lots of bananas, only one half will respond to physics because it won't put two (now separate) physics bodies into one. Fortunately, the chances of that happening are pretty slim unless you're an appalling shot!
There is just one more thing to do with the game before we're finished: what if the banana misses the other player and misses all the other buildings? If you put in a 45° angle and full velocity, changes are it will shoot right off the screen, at which point the game won't end. We're going to fix this by using the update() method: if the banana is ever way off the screen, remove it and change players:
override func update(_ currentTime: TimeInterval) {
    guard banana != nil else { return }

    if abs(banana.position.y) > 1000 {
        banana.removeFromParent()
        banana = nil
        changePlayer()
    }
}
That's it, your game is finished. Go and play!