Day 88
Day 88 관련

Project 27, part one
So far I’ve been working hard to introduce you to a variety of Apple’s built-in components: UIViewController, UITableView, UISlider, and more – all really important, and all fundamental building blocks that you’ll use when building your own apps.
Now, though, it’s time for you to learn how to do custom drawing: how to render shapes, colors, text, and images of your choosing, so that you can make images dynamically rather than relying solely on those in your asset catalog.
Apple’s framework for this is called Core Graphics, and it gives you a large blank canvas to render into whatever takes hold of your imagination. As Michelangelo once said, “every block of stone has a statue inside it and it is the task of the sculptor to discover it.”
I’m going to teach you the tools you need to create your own artwork, but what you do with those tools is down to you!
Today you have six topics to work through, and you’ll learn about UIGraphicsImageRenderer, drawing fills and strokes, and insetting a CGRect, while also getting more practice with NSAttributedString, and more.
Setting up
Setting up
You're probably tired of me saying this: iOS is full of powerful and easy to use programming frameworks. It's true, and you've already met UIKit, SpriteKit, Core Animation, Core Motion, Core Image, Core Location, Grand Central Dispatch and more. But how would you feel if I said that we've yet to use one of the biggest, most powerful and most important frameworks of all?
Well, it's true. And in this technique project we're going to right that wrong. The framework is called Core Graphics, and it's responsible for device-independent 2D drawing – when you want to draw shapes, paths, shadows, colors or so on, you'll want Core Graphics. Being device-independent means you can draw things to the screen or draw them in a PDF without having to change your code.
Create a new Single View App project, name it Project27, then adjust its project settings so that it’s iPad-only. We're going to create a Core Graphics sandbox that's similar to project 15's Core Animation sandbox – a button you can type will trigger Core Graphics drawing in different ways.
If you haven't already downloaded the files for this project, please do so now from GitHub, then copy the mouse picture into your project.
Creating the sandbox
Creating the sandbox
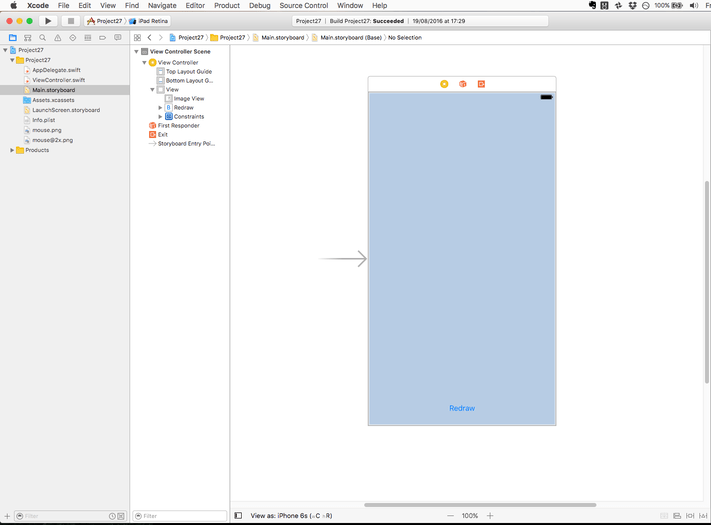
Open Main.storyboard in Interface Builder, then drag out an image view so that it fills the whole space of the view. Set its aspect mode to be Aspect Fit, so that images will be correctly resized according to the device’s aspect ratio. Now place a button near the bottom of the view controller, centered horizontally, then give it the title “Redraw”.
We can make Interface Builder do all the constraints for this one: select the main view in the document outline, then go to [Editor] > [Resolve Auto Layout Issues] > [Reset to Suggested Constraints].
We're going to need to reference the image view in code, so please switch to the assistant editor and create an outlet for it called imageView. While you're there, you should also create an action for the button being tapped, called redrawTapped().
Switch back to the standard editor, and open up ViewController.swift because that's our user interface done; the rest is code!
UIImageView with a UIButton underneath.We're going to use a similar code structure to project 15: a property that we increment through, using a switch/case to call different methods each time. In addition, we need viewDidLoad() to call an initial method so that we start by drawing something. Start by adding this property to your view controller:
var currentDrawType = 0
And now create this empty method – we'll be filling it shortly:
func drawRectangle() {

}
As with project 15, the button we placed needs to add one to the property, wrapping it back to zero when it reaches a certain point. The property is then used to decide what method to call, although right now we're only going to have one useful case: drawRectangle().
Here's the initial code for redrawTapped(); we'll be adding more cases over time:
@IBAction func redrawTapped(_ sender: Any) {
    currentDrawType += 1

    if currentDrawType > 5 {
        currentDrawType = 0
    }

    switch currentDrawType {
    case 0:
        drawRectangle()

    default:
        break
    }
}
The only remaining step to make our sandbox complete is to have viewDidLoad() call the drawRectangle() method so that the screen starts by showing something. Change your viewDidLoad() method to this:
override func viewDidLoad() {
    super.viewDidLoad()

    drawRectangle()
}
Running the app at this point will do very little, because although your user interface works the code effectively does nothing. We're going to fix that by filling in the drawRectangle() method, then proceed to add more cases to the switch/case block.
Drawing into a Core Graphics context with UIGraphicsImageRenderer
Drawing into a Core Graphics context with UIGraphicsImageRenderer
https://www.hackingwithswift.com/read/2
Carl Sagan once said, "if you wish to make an apple pie from scratch, you must first invent the universe." Filling in the drawRectangle() method doesn't require you to invent the universe, but it does require a fair amount of Core Graphics learning before you get to the actual drawing part. I will, of course, try to remove as much of it as I can so that the remaining bits are important.
The most important thing to understand is that, like Core Animation, Core Graphics sits at a lower technical level than UIKit. This means it doesn't understand classes you know like UIColor and UIBezierPath, so you either need to use their counterparts (CGColor and CGPath respectively), or use helper methods from UIKit that convert between the two.
Second you need to understand that Core Graphics differentiates between creating a path and drawing a path. That is, you can add lines, squares and other shapes to a path as much as you want to, but none of it will do anything until you actually draw the path. Think of it like a simple state machine: you configure a set of states you want (colors, transforms, and so on), then perform actions. You can even maintain multiple states at a time by pushing and popping in order to backup and restore specific states.
Finally, you should know that Core Graphics is extremely fast: you can use it for updating drawing in real time, and you'll be very impressed. Core Graphics can work on a background thread – something that UIKit can't do – which means you can do complicated drawing without locking up your user interface.
It's time to start looking at some code, so it’s time to meet the UIGraphicsImageRenderer class. This was introduced in iOS 10 to allow fast and easy graphics rendering, while also quietly adding support for wide color devices like the iPad Pro. It works with closures, which might seem annoying if you’re still not comfortable with them, but has the advantage that you can build complex drawing instructions by composing functions.
Now, wait a minute: that class name starts with "UI", so what makes it anything to do with Core Graphics? Well, it isn’t a Core Graphics class; it’s a UIKit class, but it acts as a gateway to and from Core Graphics for UIKit-based apps like ours. You create a renderer object and start a rendering context, but everything between will be Core Graphics functions or UIKit methods that are designed to work with Core Graphics contexts.
In Core Graphics, a context is a canvas upon which we can draw, but it also stores information about how we want to draw (e.g., what should our line thickness be?) and information about the device we are drawing to. So, it's a combination of canvas and metadata all in one, and it's what you'll be using for all your drawing. This Core Graphics context is exposed to us when we render with UIGraphicsImageRenderer.
When you create a renderer, you get to specify how big it should be, whether it should be opaque or not, and what pixel to point scale you want. To kick off rendering you can either call the image() function to get back a UIImage of the results, or call the pngData() and jpegData() methods to get back a Data object in PNG or JPEG format respectively.
Armed with this knowledge, you can write the first version of drawRectangle():
func drawRectangle() {
    let renderer = UIGraphicsImageRenderer(size: CGSize(width: 512, height: 512))

    let img = renderer.image { ctx in
        // awesome drawing code
    }

    imageView.image = img
}
In that code, we create a UIGraphicsImageRenderer with the size 512x512, leaving it with default values for scale and opacity – that means it will be the same scale as the device (e.g. 2x for retina) and transparent.
Creating the renderer doesn’t actually start any rendering – that’s done in the image() method. This accepts a closure as its only parameter, which is code that should do all the drawing. It gets passed a single parameter that I’ve named ctx, which is a reference to a UIGraphicsImageRendererContext to draw to. This is a thin wrapper around another data type called CGContext, which is where the majority of drawing code lives.
When the rendering has finished it gets placed into the image constant, which in turn gets sent to the image view for display. Our rendering code is empty right now, but it will still result in an empty 512x512 image being created.
Let’s make things more interesting by having the drawRectangle() method actually draw a rectangle. And not just any rectangle – a stroked rectangle, which is a rectangle with a line around it.
There are a number of ways of drawing boxes in Core Graphics, but I've chosen the easiest: we'll define a CGRect structure that holds the bounds of our rectangle, we'll set the context's fill color to be red and its stroke color to be black, we'll set the context's line drawing width to be 10 points, then add a rectangle path to the context and draw it.
The part that might seem strange is the way we're adding a path then drawing it. This is because you can actually add multiple paths to your context before drawing, which means Core Graphics batches them all together. Your path can be as simple or as complicated as you want, you still need to set up your Core Graphics state as you want it then draw the path.
Although the UIGraphicsImageRendererContext does have a handful of methods we can call to do basic drawing, almost all the good stuff lies in its cgContext property that gives us the full power of Core Graphics.
Let's take a look at the five new methods you'll need to use to draw our box:
setFillColor()sets the fill color of our context, which is the color used on the insides of the rectangle we'll draw.setStrokeColor()sets the stroke color of our context, which is the color used on the line around the edge of the rectangle we'll draw.setLineWidth()adjusts the line width that will be used to stroke our rectangle. Note that the line is drawn centered on the edge of the rectangle, so a value of 10 will draw 5 points inside the rectangle and five points outside.addRect()adds aCGRectrectangle to the context's current path to be drawn.drawPath()draws the context's current path using the state you have configured.
All five of those are called on the Core Graphics context that comes from ctx.cgContext, using a parameter that does the actual work. So for setting colors the parameter is the color to set (remember how to convert UIColor values to CGColor values? I hope so!), for setting the line width it's a number in points, for adding a rectangle path it's the CGRect of your rectangle, and for drawing it's a special constant that says whether you want just the fill, just the stroke, or both.
Time for some code: replace // awesome drawing code with this:
let rectangle = CGRect(x: 0, y: 0, width: 512, height: 512)

ctx.cgContext.setFillColor(UIColor.red.cgColor)
ctx.cgContext.setStrokeColor(UIColor.black.cgColor)
ctx.cgContext.setLineWidth(10)

ctx.cgContext.addRect(rectangle)
ctx.cgContext.drawPath(using: .fillStroke)
At long last, this project does something useful: when you run it, you'll see a red box with a black line around it. You can’t really see it just yet, but the black line will be just five points across in its original image because it's centered on the edge of its path and therefore is cropped. You'll see this more clearly in a moment.
Ellipses and checkerboards
Ellipses and checkerboards
Add a case to your redrawTapped() method to call a new method: drawCircle(). This will… wait for it… draw a circle. So, your switch/case should look like this:
switch currentDrawType {
case 0:
    drawRectangle()

case 1:
    drawCircle()

default:
    break
}
There are several ways of drawing rectangles using Core Graphics, but the method we used in drawRectangle() is particularly useful because in order to draw a circle we need to change just one line of code. This is because drawing circles (or indeed any elliptical shape) in Core Graphics is done by specifying its rectangular bounds.
So, where before you had:
ctx.cgContext.addRect(rectangle)
…you can now use this:
ctx.cgContext.addEllipse(in: rectangle)
It even has the same parameters! So, the full drawCircle() method is this:
func drawCircle() {
    let renderer = UIGraphicsImageRenderer(size: CGSize(width: 512, height: 512))

    let img = renderer.image { ctx in
        let rectangle = CGRect(x: 0, y: 0, width: 512, height: 512)

        ctx.cgContext.setFillColor(UIColor.red.cgColor)
        ctx.cgContext.setStrokeColor(UIColor.black.cgColor)
        ctx.cgContext.setLineWidth(10)

        ctx.cgContext.addEllipse(in: rectangle)
        ctx.cgContext.drawPath(using: .fillStroke)
    }

    imageView.image = img
}
Run the app now and click the button once to make it draw a circle. Notice how the stroke around the edge appears to be clipped at the top, right, bottom and left edges? This is a direct result of what I was saying about stroke positioning: the stroke is centered on the edge of the path, meaning that a 10 point stroke is 5 points inside the path and 5 points outside.

The rectangle being used to define our circle is the same size as the whole context, meaning that it goes edge to edge – and thus the stroke gets clipped. To fix the problem, change the rectangle to this:
let rectangle = CGRect(x: 5, y: 5, width: 502, height: 502)`
That indents the circle by 5 points on all sides, so the stroke will now look uniform around the entire shape.
While that works fine, there is a better option: CGRect has an insetBy() method that lets us push each edge in by a certain amount. So instead of the above, a much cleaner piece of code is this:
let rectangle = CGRect(x: 0, y: 0, width: 512, height: 512).insetBy(dx: 5, dy: 5)
That adds 5 points of inset on each edge, which has the same result.
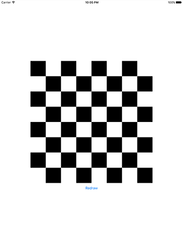
A different way of drawing rectangles is just to fill them directly with your target color. Add a "case 2" to your switch/case that calls a method named drawCheckerboard(), and give it this code:
func drawCheckerboard() {
    let renderer = UIGraphicsImageRenderer(size: CGSize(width: 512, height: 512))

    let img = renderer.image { ctx in
        ctx.cgContext.setFillColor(UIColor.black.cgColor)

        for row in 0 ..< 8 {
            for col in 0 ..< 8 {
                if (row + col) % 2 == 0 {
                    ctx.cgContext.fill(CGRect(x: col * 64, y: row * 64, width: 64, height: 64))
                }
            }
        }
    }

    imageView.image = img
}
The only piece of code in there that you won't recognize is fill(), which skips the add path / draw path work and just fills the rectangle given as its parameter using whatever the current fill color is. You already know about ranges and modulo, so you should be able to see that this method makes every other square black, alternating between rows.
There are two things to be aware of with that code. First, we're filling every other square in black, but leaving the other squares alone. As we haven’t specified that our renderer is opaque, this means those places where we haven't filled anything will be transparent. So, if the view behind was green, you'd get a black and green checkerboard. Second, you can actually make checkerboards using a Core Image filter – check out CICheckerboardGenerator to see how!
Transforms and lines
Transforms and lines
Add another case to your switch/case block, and make this one call another new method named drawRotatedSquares(). This is going to demonstrate how we can apply transforms to our context before drawing, and how you can stroke a path without filling it.
To make this happen, you need to know three new Core Graphics methods:
translateBy()translates (moves) the current transformation matrix.rotate(by:)rotates the current transformation matrix.strokePath()strokes the path with your specified line width, which is 1 if you don't set it explicitly.
The current transformation matrix is very similar to those CGAffineTransform modifications we used in project 15, except its application is a little different in Core Graphics. In UIKit, you rotate drawing around the center of your view, as if a pin was stuck right through the middle. In Core Graphics, you rotate around the top-left corner, so to avoid that we're going to move the transformation matrix half way into our image first so that we've effectively moved the rotation point.
This also means we need to draw our rotated squares so they are centered on our center: for example, setting their top and left coordinates to be -128 and their width and height to be 256.
Here's the code for the method:
func drawRotatedSquares() {
    let renderer = UIGraphicsImageRenderer(size: CGSize(width: 512, height: 512))

    let img = renderer.image { ctx in
        ctx.cgContext.translateBy(x: 256, y: 256)

        let rotations = 16
        let amount = Double.pi / Double(rotations)

        for _ in 0 ..< rotations {
            ctx.cgContext.rotate(by: CGFloat(amount))
            ctx.cgContext.addRect(CGRect(x: -128, y: -128, width: 256, height: 256))
        }

        ctx.cgContext.setStrokeColor(UIColor.black.cgColor)
        ctx.cgContext.strokePath()
    }

    imageView.image = img
}
Run the app and look at the output: beautiful, rotated, stroked squares, with no extra calculations required. I mean, just stop for a moment and consider the math it would take to calculate the four corners of each of those rectangles. If sine and cosine are distant memories for you, be glad to have the current transformation matrix!
One thing that I should make clear: modifying the CTM is cumulative, which is what makes the above code work. That is, when you rotate the CTM, that transformation is applied on top of what was there already, rather than to a clean slate. So the code works by rotating the CTM a small amount more every time the loop goes around.
The last shape drawing I want to show you is how to draw lines, and you're going to need two new functions: move(to:) and addLine(to:). These are the Core Graphics equivalents to the UIBezierPath paths we made in project 20 to move the fireworks.
Add another case to your switch/case block, this time calling drawLines(). I'm going to make this translate and rotate the CTM again, although this time the rotation will always be 90 degrees. This method is going to draw boxes inside boxes, always getting smaller, like a square spiral. It's going to do this by adding a line to more or less the same point inside a loop, but each time the loop rotates the CTM so the actual point the line ends has moved too. It will also slowly decrease the line length, causing the space between boxes to shrink like a spiral. Here's the code:
func drawLines() {
    let renderer = UIGraphicsImageRenderer(size: CGSize(width: 512, height: 512))

    let img = renderer.image { ctx in
        ctx.cgContext.translateBy(x: 256, y: 256)

        var first = true
        var length: CGFloat = 256

        for _ in 0 ..< 256 {
            ctx.cgContext.rotate(by: .pi / 2)

            if first {
                ctx.cgContext.move(to: CGPoint(x: length, y: 50))
                first = false
            } else {
                ctx.cgContext.addLine(to: CGPoint(x: length, y: 50))
            }

            length *= 0.99
        }

        ctx.cgContext.setStrokeColor(UIColor.black.cgColor)
        ctx.cgContext.strokePath()
    }

    imageView.image = img
}
The end result looks like one of the hand-crafted effects from the Twilight Zone, but it shows a little of the power that transforms and lines can bring to your drawing.
Images and text
Images and text
Add one final case to your switch/case statement calling a method drawImagesAndText(), because no discussion of Core Graphics would be useful without telling you how to draw images and text to your context.
If you have an attributed string in Swift, how can you place it into a graphic? The answer is simpler than you think: attributed strings have a built-in method called draw(with:) that draws the string in a rectangle you specify. Even better, your attributed string styles are used to customize the font and size, the formatting, the line wrapping and more all with that one method.
Remarkably, the same is true of UIImage: any image can be drawn straight to a context, and it will even take into account the coordinate reversal of Core Graphics.
To help make the code clearer, here's a bulleted list of all the things the method needs to do:
- Create a renderer at the correct size.
- Define a paragraph style that aligns text to the center.
- Create an attributes dictionary containing that paragraph style, and also a font.
- Wrap that attributes dictionary and a string into an instance of
NSAttributedString. - Load an image from the project and draw it to the context.
- Update the image view with the finished result.
Below is that the same process, now coded in Swift. As per usual, the number comments match the list above:
func drawImagesAndText() {
    // 1
    let renderer = UIGraphicsImageRenderer(size: CGSize(width: 512, height: 512))

    let img = renderer.image { ctx in
        // 2
        let paragraphStyle = NSMutableParagraphStyle()
        paragraphStyle.alignment = .center

        // 3
        let attrs: [NSAttributedString.Key: Any] = [
            .font: UIFont.systemFont(ofSize: 36),
            .paragraphStyle: paragraphStyle
        ]

        // 4
        let string = "The best-laid schemes o'\nmice an' men gang aft agley"
        let attributedString = NSAttributedString(string: string, attributes: attrs)

        // 5
        attributedString.draw(with: CGRect(x: 32, y: 32, width: 448, height: 448), options: .usesLineFragmentOrigin, context: nil)

        // 5
        let mouse = UIImage(named: "mouse")
        mouse?.draw(at: CGPoint(x: 300, y: 150))
    }

    // 6
    imageView.image = img
}
That completes our project – good job!

Strings and UIImages have built-in methods that let you draw them to a Core Graphics context.