How to Launch an EC2 Instance and Set Up a Web Server Using HTTPD
How to Launch an EC2 Instance and Set Up a Web Server Using HTTPD 관련

Hey there! Have you ever thought about creating your own web server on the cloud? Well, you’re in for a treat because in this article, we’re going to explore how you can launch an EC2 instance and use HTTPD to host a simple web server.
Don’t worry - it’s simpler than it sounds, and I promise to walk you through it step-by-step with a bit of fun along the way.
By the end of this guide, you’ll feel like a cloud wizard, casting spells that make servers appear out of thin air (well, out of Amazon’s data centers, but you get the point).
Ready? Let’s dive in!
What Is EC2?
Think of EC2 (Elastic Compute Cloud) as a hotel room in the cloud. Instead of booking a physical server to store your website, you’re renting one from Amazon’s magical cloud infrastructure. This room (or instance) comes with all the amenities you need to host a website. Today, we’ll install HTTPD (a web server software) in our “room” to make our website live. 🏨✨
What is HTTPD?
- At its core, HTTPD stands for Hypertext Transfer Protocol Daemon. Let’s break that down:
- Hypertext Transfer Protocol (HTTP): This is the standard protocol used on the web. When you type a URL into your browser or click a link, you’re using HTTP to tell the server, “Hey, send me this web page!”
- Daemon (D): A daemon is just a fancy term for a background process that runs continuously on a server. In this case, the daemon is responsible for responding to requests from web browsers (like Chrome or Firefox) and sending back the appropriate content.
- So, HTTPD is a program that listens for incoming HTTP requests (like when you visit a webpage) and serves back the data (HTML, CSS, images, and so on) needed to display that page.
HTTPD vs. Apache2: Different Names, Same Game
Depending on your Linux distribution, you may encounter different names for the same basic software:
- On RPM-based distributions (like Red Hat, CentOS, or Fedora), it’s called httpd.
- On Debian-based distributions (like Ubuntu or Debian itself), it’s referred to as apache2.
Let’s look at the steps you can use to launch your EC2 instance, and how to set up a web server using HTTPD.
Step 1: How to Launch Your EC2 Instance
First things first, let’s launch our EC2 instance. You’ll need an AWS account—signing up is free, and AWS offers a free tier, so this won’t cost you a dime for small-scale experiments.
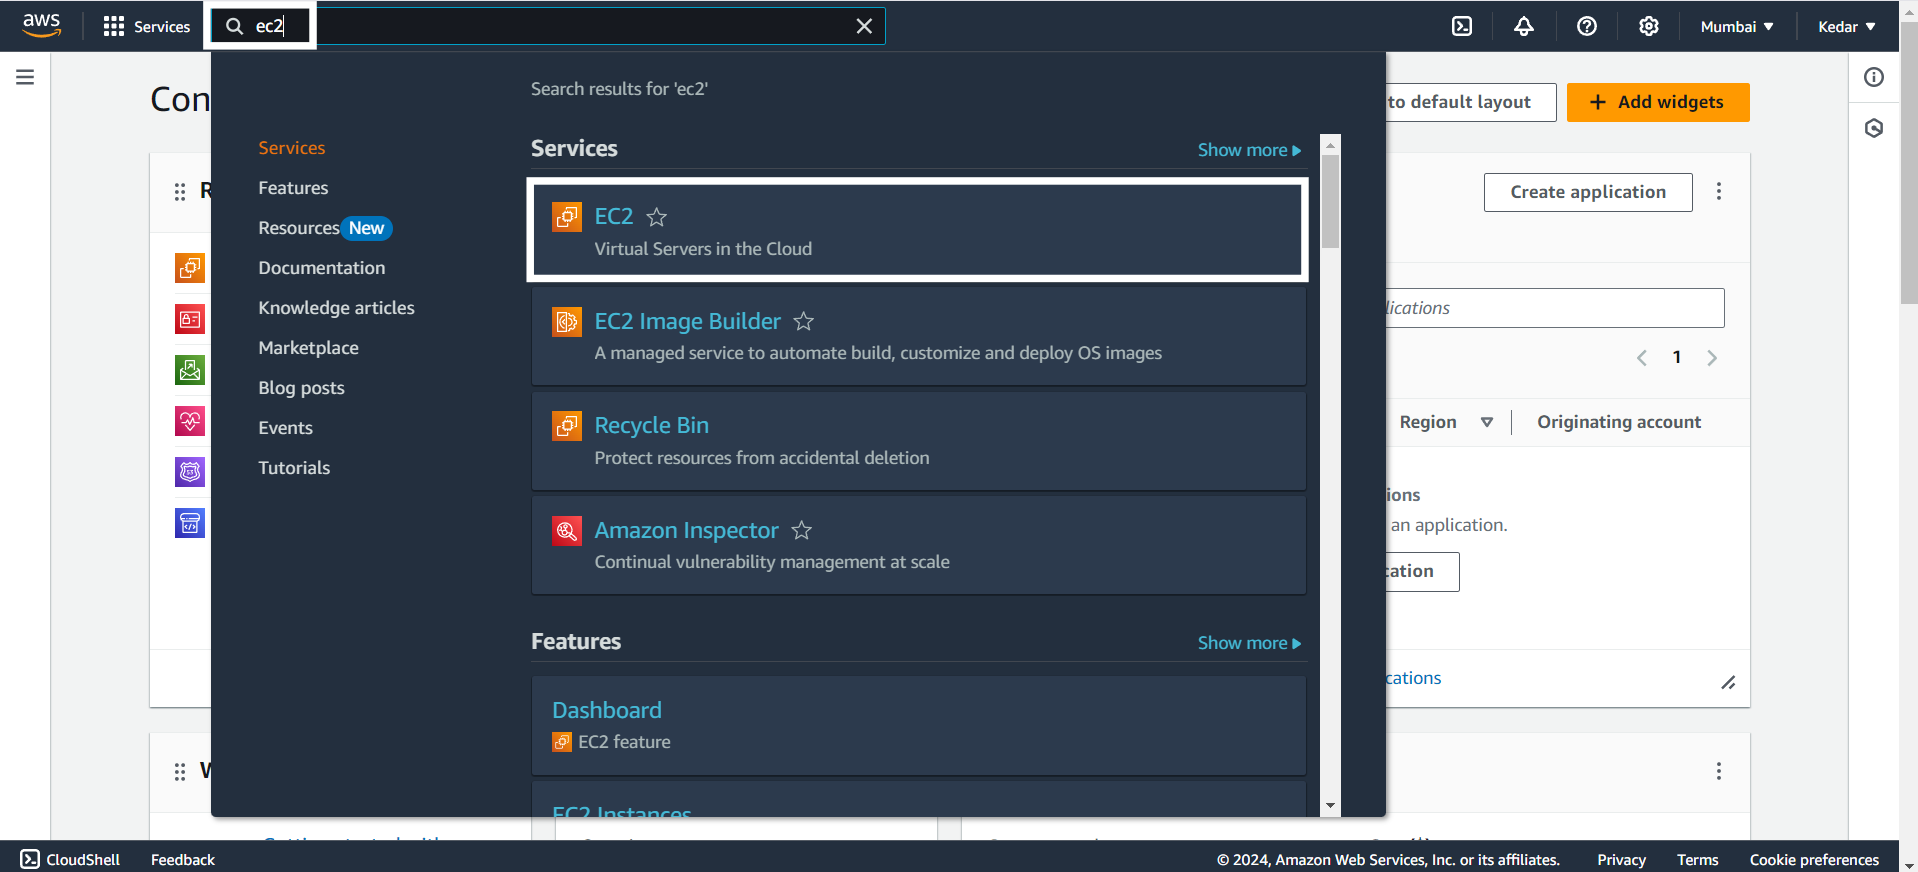
Head over to the AWS Management Console and log in. From the search bar, type “EC2” and click on EC2 Dashboard.
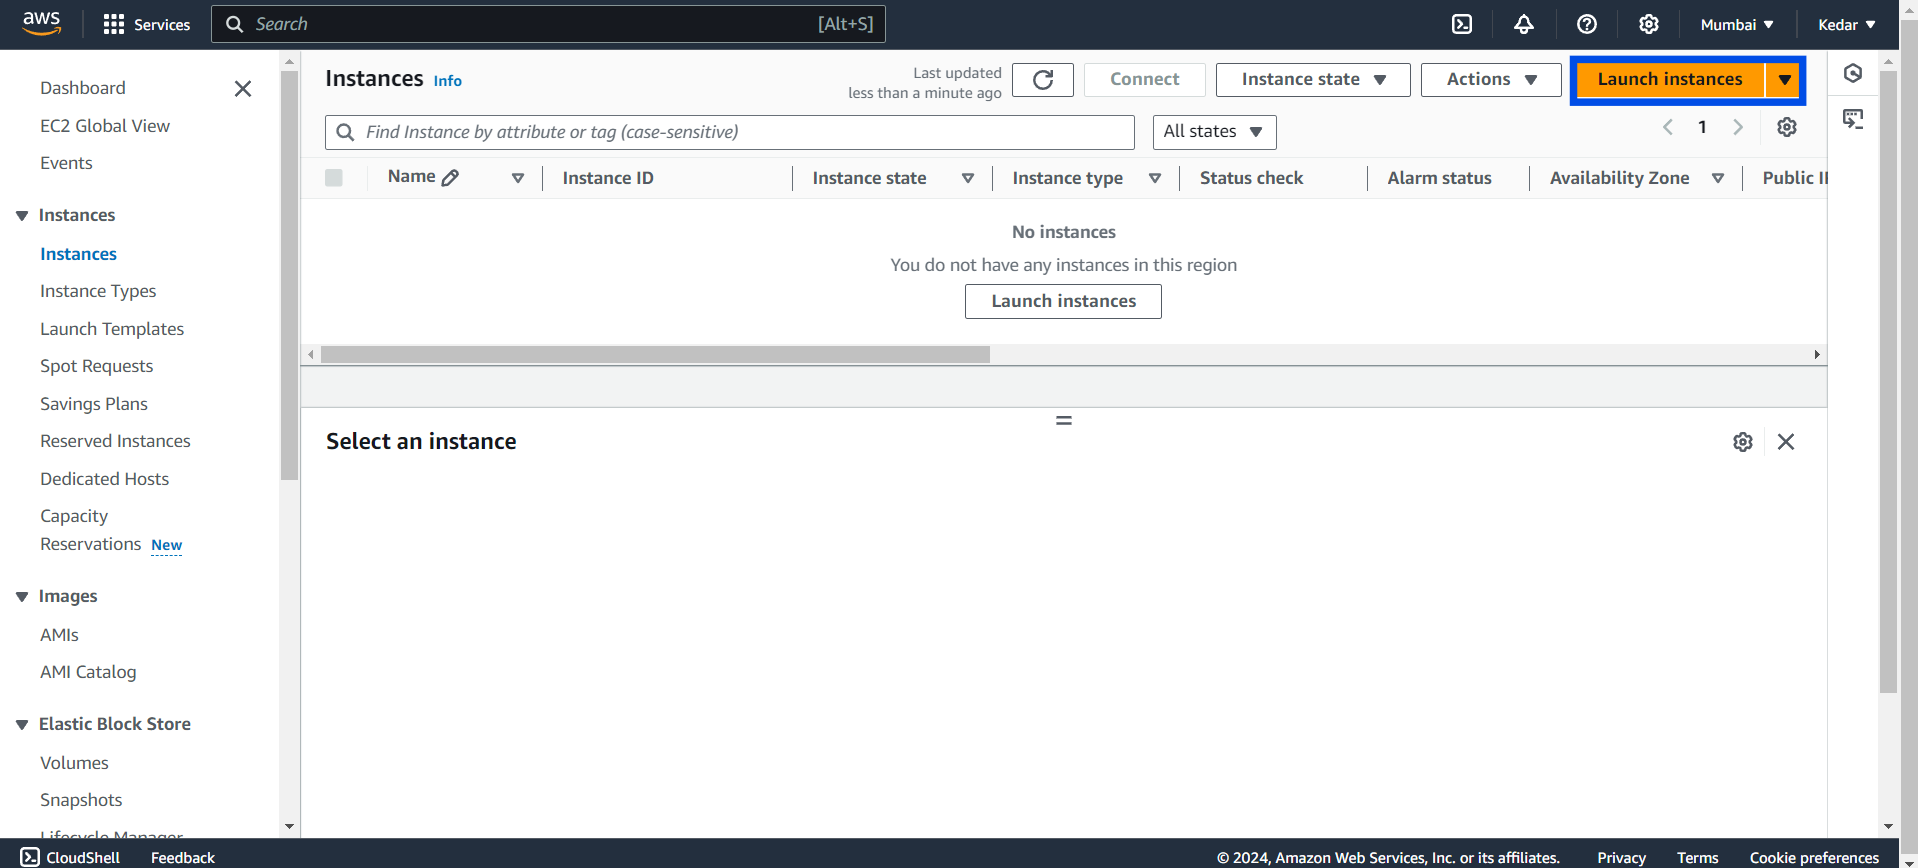
Create a new instance by clicking on the orange Launch Instance button.
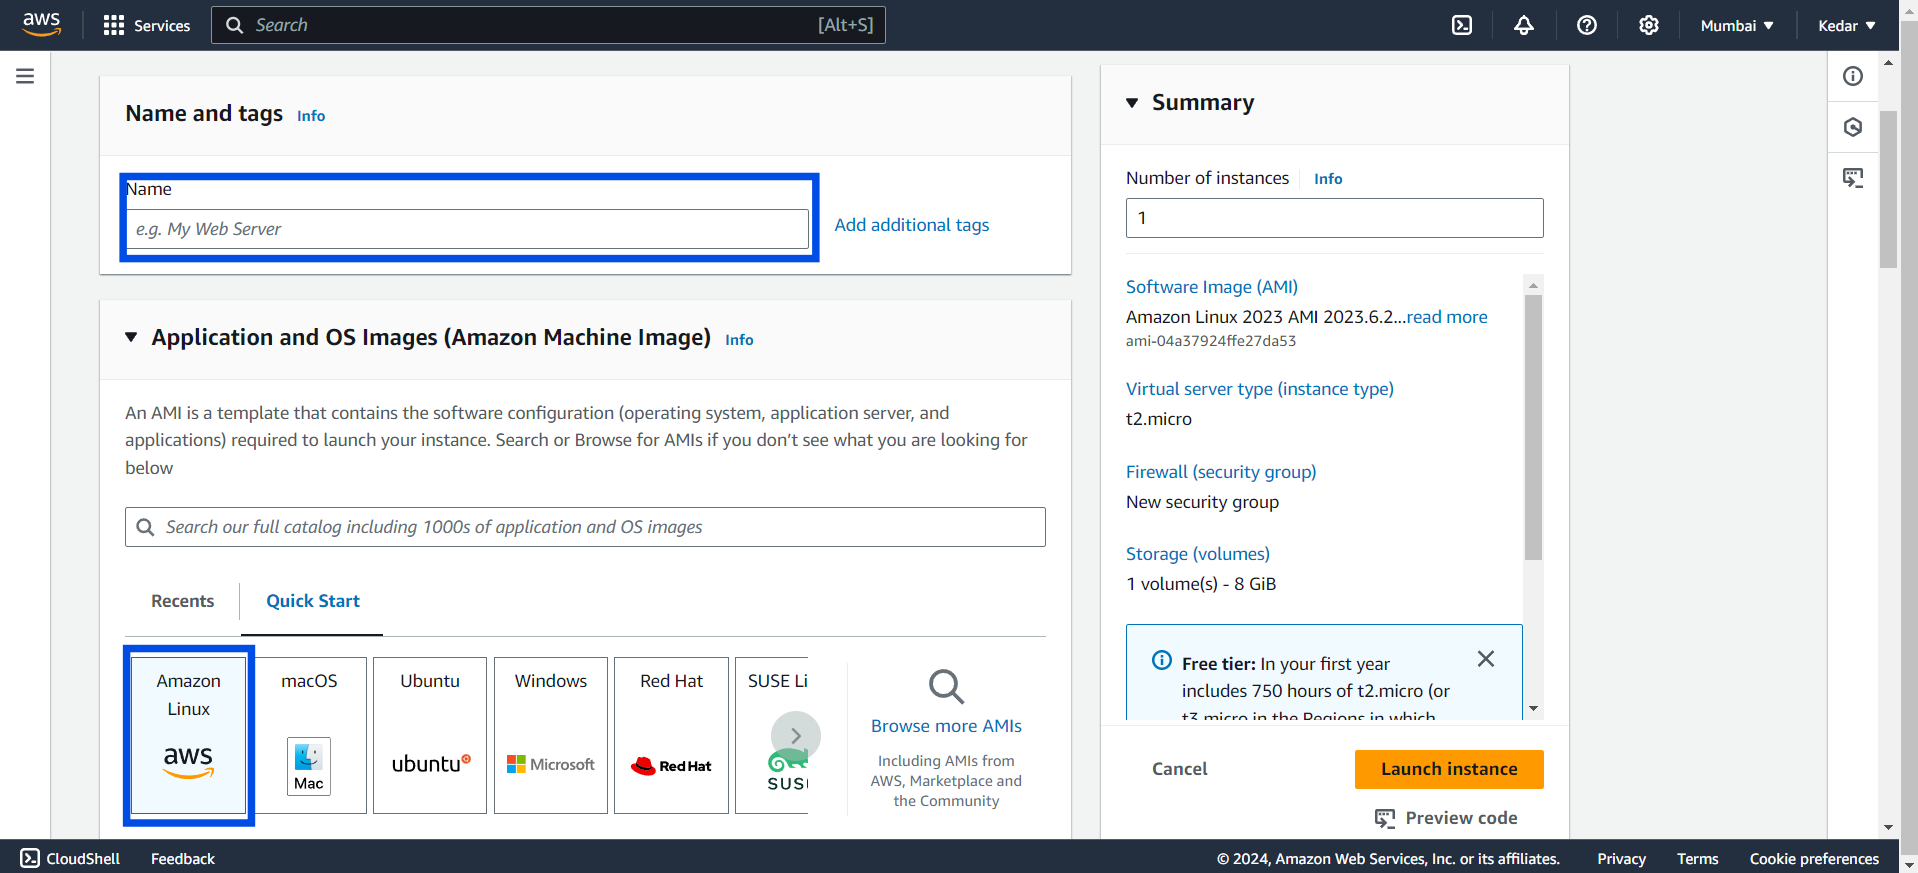
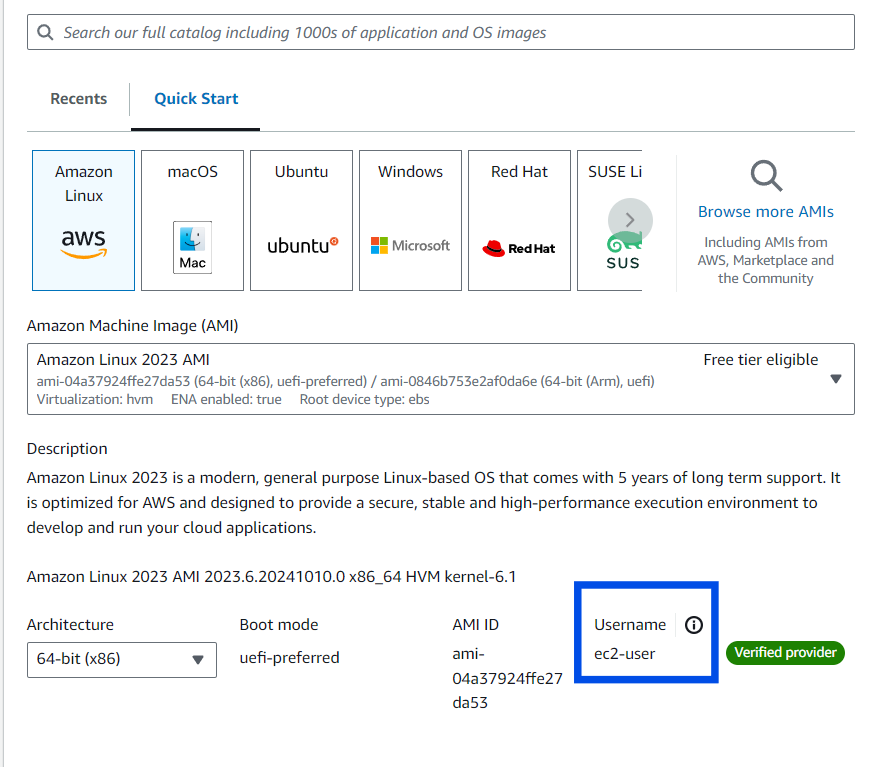
Next, choose the Amazon Machine Image (AMI) by selecting the Amazon Linux AMI, which is free-tier eligible and super reliable. Don’t forget to give your instance a unique name!
Adding a "Name" tag with a value like "MyFirstInstance" or "ProductionServer" helps you keep track of multiple instances while adding a personal touch to your cloud workspace.
Also, remember to check the default username for the AMI you select. Since you’ve chosen Amazon Linux, the default username is ec2-user. Keep this in mind for connecting to your instance later!
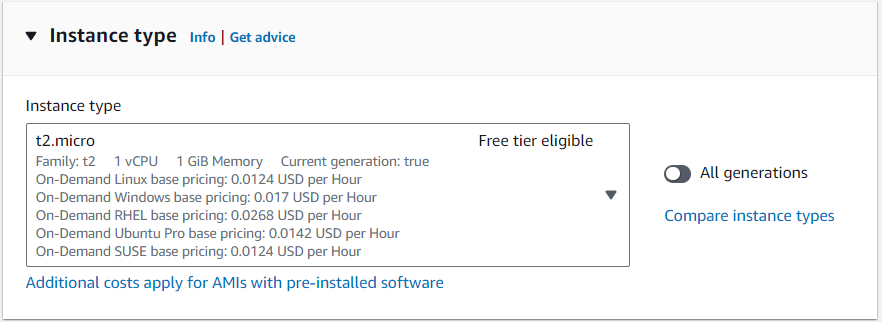
Select an Instance Type: The t2.micro is your best buddy here again, free-tier eligible and perfect for our needs.
Key Pair for SSH Access: Here’s where it gets important to have a .pem file to securely connect to your instance. This file, also known as a key pair, acts like the secret key to your cloud “hotel room,” allowing you to log in via SSH.
If you already have a .pem file for a previously created key pair, go ahead and choose that from the dropdown menu.
If you don’t have a .pem file, no worries! Create a new key pair by clicking Create New Key Pair, and download the .pem file to your computer. Make sure to store this file safely—you’ll need it to log in, and if you lose it, you won’t be able to access your EC2 instance!
Why is this file important? The .pem file is your private key, and AWS uses it to verify that you are the rightful owner trying to connect to the instance. You won’t get access without it, just like how you can’t get into a hotel room without the key.

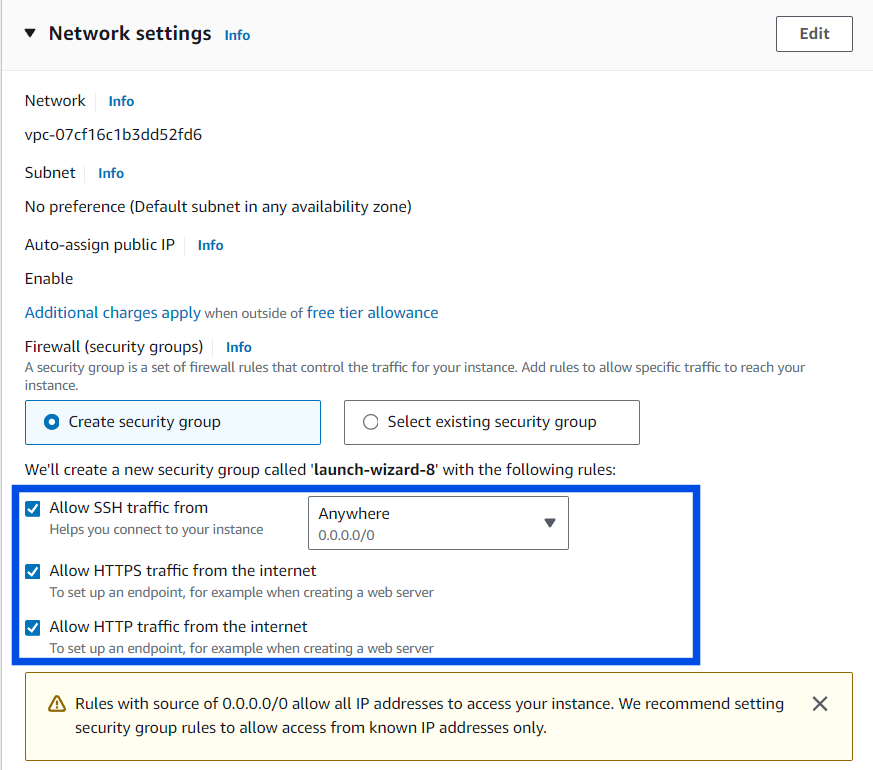
Configure Security Group: AWS EC2 security groups are like virtual firewalls that control traffic in and out of your instance, ensuring only specific types of access. To allow web visitors, set up an HTTP rule on port 80, and for secure server logins, enable SSH on port 22 with restricted IPs.
You can reuse security groups across instances, making configuration easier and more consistent. Regularly review these settings to keep your instance secure and organized.
Launch the instance: Boom! You’ve just launched your very own server in the cloud.
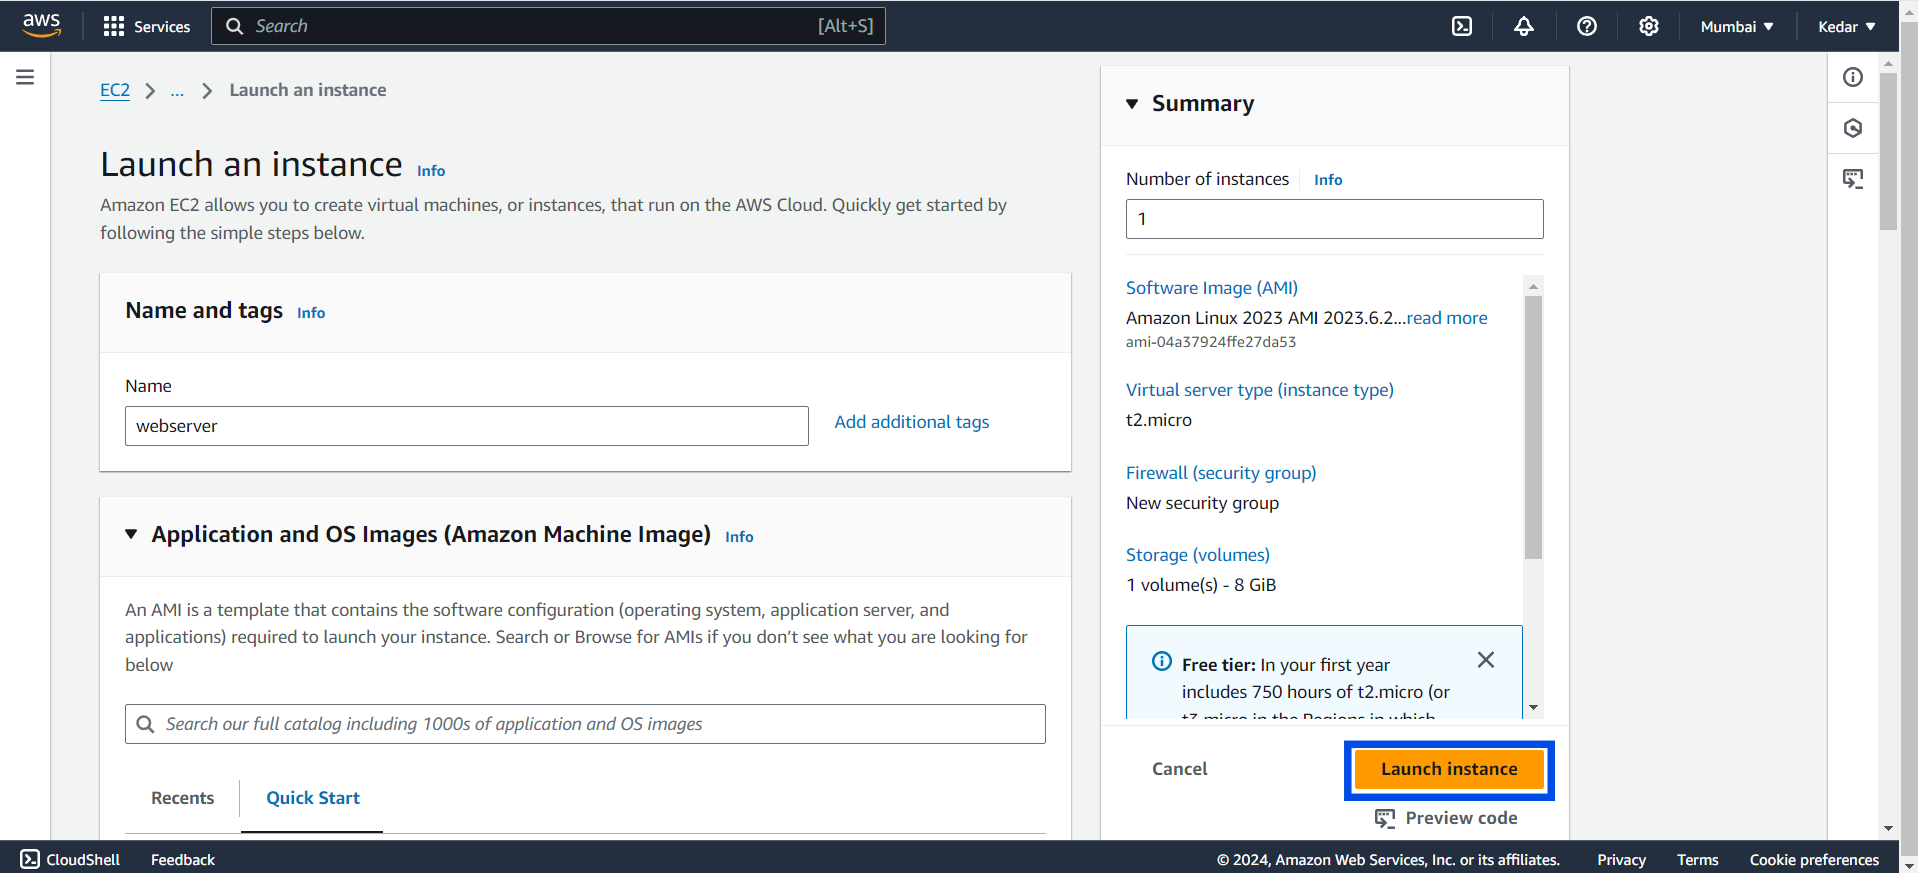
Wait a minute or two for your instance to come online. Now that we have our EC2 instance running, let’s move to the next step of setting up our web server.
Step 2: How to Connect to Your EC2 Instance
To connect, we’ll use the .pem file (key pair) we created earlier. If you’re on a Mac or Linux machine, this is super simple with SSH. For Windows folks, I recommend using MobaXterm—it’s a user-friendly terminal with SSH built-in.
If you’re new to connecting EC2 instances using MobaXterm, I’ve written a detailed guide in my previous blog post. You can check it out here, where I show how to set up and connect to an EC2 instance using MobaXterm.
For now, here’s a quick overview of the connection process using SSH:
ssh -i "your-key.pem" ec2-user@your-ec2-public-ip
Replace your-key.pem with the name of your key pair and your-ec2-public-ip with the public IP of your instance (you can find this in the EC2 dashboard).
If you’ve connected successfully, congratulations! 🎉 You’re inside your cloud server.
Step 3: How to Install and Start HTTPD (Apache Web Server)
Alright, time to install our web server software (HTTPD)! We’ll be using Apache, one of the most popular web servers around. Don’t worry, you don’t need a degree in IT to get this working.
After you successfully connect to your EC2 instance from MobaXterm, you should be all set to start the installation. You’re just a few commands away from having your web server up and running!
It’s always good practice to make sure your server is up to date. To update your server, run:
sudo dnf update -y
Next, we’ll install HTTPD (Apache):
sudo dnf install httpd -y
Then start the HTTPD service. Run this command to get the server running.
sudo systemctl start httpd
Next, enable it to start on boot so that every time your EC2 instance reboots, your web server comes back to life automatically.
sudo systemctl enable httpd
Time to test it out! Open your browser and type in your instance’s public IP. If you see the Apache test page, give yourself a high-five. 🖐️ You’ve just launched a web server!
Step 4: How to Host Your Custom Web Page
Now, let’s get creative! Instead of the default web server message, let’s host your very own custom web page in just one step. This will allow you to display a unique message on your site in no time.
Run the following command in your EC2 instance to create and display a simple, personalized web page:
echo "Welcome to the Cloud! You’re now hosting your own custom web server using AWS EC2 and Apache!" > /var/www/html/index.html
What does this command do?
- The
echocommand outputs the text:"Welcome to the Cloud! You’re now hosting your own custom web server using AWS EC2 and Apache!". - The
>symbol redirects this output to a file. /var/www/html/index.htmlis the path to the file where the message is saved. This file is the homepage of your web server.
By running this command, you're replacing the default Apache test page with your custom message.
Now, select your EC2 instance, and you’ll find its public IP address. Open your browser, enter that IP, refresh the page, and boom! Your custom message is live on the site. 🎉
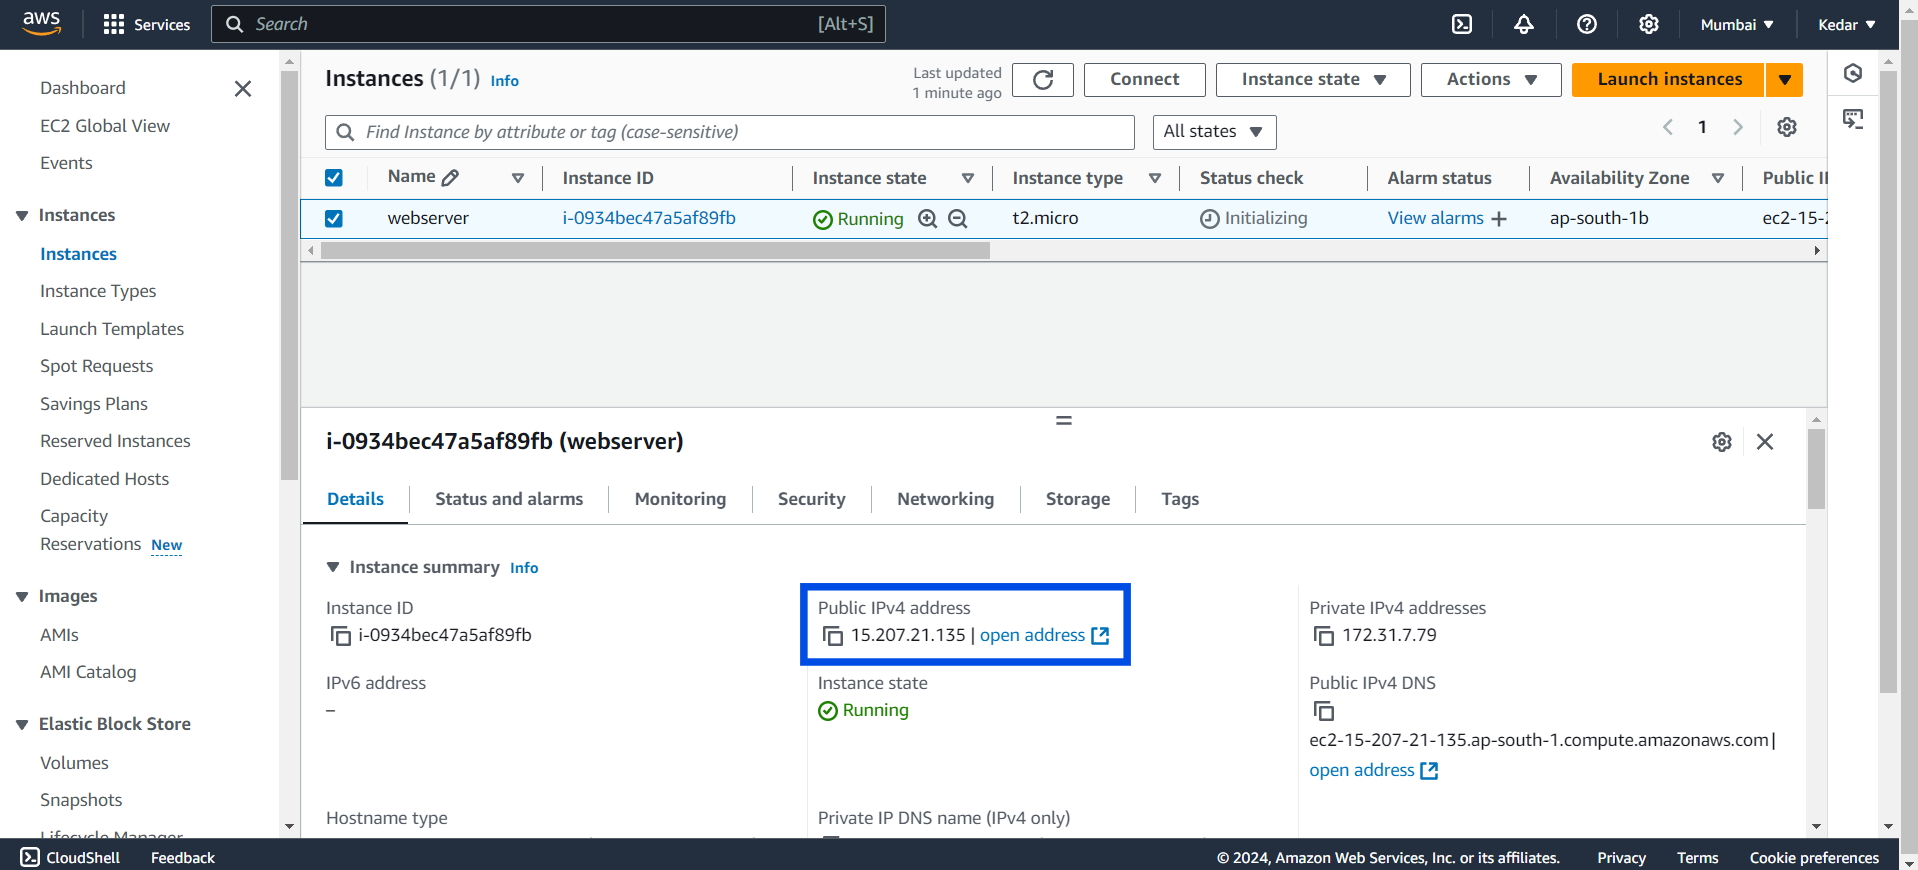
Feel free to modify the text to make it uniquely yours!
Wrapping Up
And there you have it - you’ve just launched an EC2 instance and set up a simple web server using HTTPD! With these steps, you’ve not only spun up a server in the cloud but also configured it to be accessible to the world. By following along, you’ve learned the essentials of creating instances, setting up security groups, connecting via SSH, and installing Apache to serve up web content.
Keep exploring EC2’s features, and don’t hesitate to test new configurations and ideas. Each step adds to your cloud skills, bringing you one step closer to mastering AWS. So keep building, experimenting, and, most importantly, enjoying the journey. Happy cloud computing!
You can follow me on