How to Integrate WordPress as a Headless CMS with Next.js - With Code Examples
How to Integrate WordPress as a Headless CMS with Next.js - With Code Examples 관련


When building a dynamic blog website, it's common to fetch data from a content source, such as a CMS (Content Management System) like WordPress.
Recently, I faced the challenge of integrating WordPress into my existing Next.js project. I had a blog hosted on WordPress and wanted to migrate it to my Next.js app.
I needed a solution that would allow me to use WordPress as a headless CMS. The goal was simple: leverage the power of WordPress for managing content while utilizing a modern frontend framework for displaying it.
In this article, we’ll walk through how to integrate WordPress to a Next JS app.
Why Use a Headless CMS?
A headless CMS separates the content management (back-end) from the presentation layer (front-end). This gives developers more flexibility over how content is delivered and displayed, without being restricted by traditional themes or layouts.
It's great for performance, and scalability, offering more control over how content is rendered on the frontend. In this case, you’ll use WordPress as your content management system but display the content in a more modern and performant way using Next.js.
What is Next.js?
If you are yet to come across Next.js, it's a powerful React-based framework that makes building optimized, server-side rendered (SSR) applications much easier.
It offers a bunch of features out of the box like file-based routing, API routes, static site generation (SSG), and incremental static regeneration (ISR). All these make it a great choice for creating fast, SEO-friendly websites.
How to Connect WordPress and Next.js
When using WordPress as a headless CMS, there are two primary ways to connect your Next.js application to your WordPress backend:
- WP REST API: WordPress comes with a built-in REST API, which allows you to retrieve content from WordPress in JSON format.
- WPGraphQL: WordPress supports headless content management through the use of GraphQL (with plugins such as WPGraphQL), making it easy to query and retrieve specific content, like blog posts, for use in a front-end framework like React.
While the REST API is popular, we’ll to go with WPGraphQL because it allows for more precise queries and flexibility. With GraphQL, you can ask for exactly the data you need, which can reduce the amount of data transferred and improve performance.
Steps to Connect WordPress and Next.js Using WPGraphQL

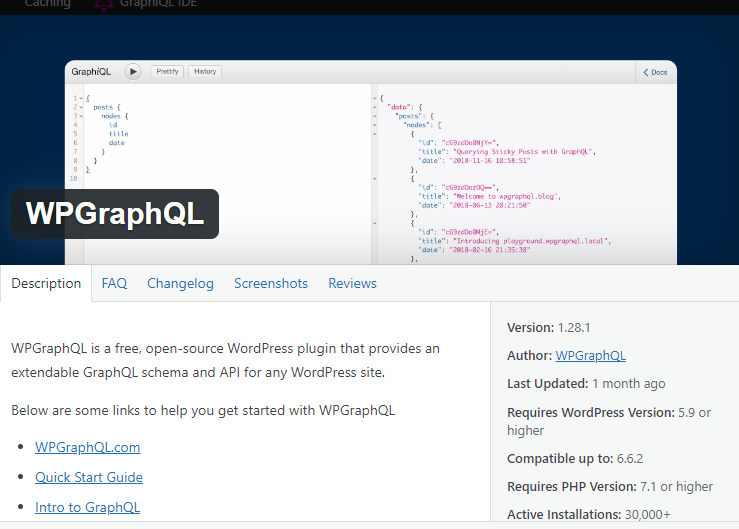
The first thing you need to do is to install the WPGraphQL plugin on your WordPress site. This plugin enables GraphQL API functionality within WordPress. You can install the plugin like any other by navigating to the WordPress admin dashboard.
First, go to Plugins and select Add New. Then, search for WPGraphQL, and once you find it, simply install and activate the plugin.
After installing and activating the plugin, the GraphQL IDE will appear on the WordPress dashboard. Here, you can test various queries you may need for your frontend development.
Let's move on to the frontend.
How to Fetch Data from WPGraphQL in Next.js
In your Next.js project, you'll need to fetch data from the GraphQL API. Here’s a simple example using graphql-request:
Install graphql-request to make it easy to query the GraphQL API:
npm install graphql-request
In your Next.js component, create a GraphQL query to fetch the blog posts:
import BlogHeader from '@/components/blog/BlogHeader';
import BlogNewsletter from '@/components/blog/BlogNewsletter';
import BlogPosts from '@/components/blog/BlogPosts';
import Link from 'next/link';
import React from 'react';

import { request, gql } from "graphql-request";

const query = gql`
{
  posts(first: 10) {
    edges {
      node {
        id
        title
        excerpt
        content
        date
        author {
          node {
            id
            name
          }
        }
        date
        slug
        featuredImage {
          node {
            sourceUrl
          }
        }
        categories {
          edges {
            node {
              name
            }
          }
        }
      }
    }
  }
}
`

export async function getStaticProps() {
  try {
    const posts: any = await request('https://blog.intercity.ng/graphql', query);

    return {
      props: { posts }
    }
  } catch (error) {
    console.error('Error fetching posts:', error);
    return {
      props: {
        posts: []
      }
    };
  }
}

const Index = ({ posts }: { posts: any }) => {

  return (
    <main className="relative pb-10 pt-10 lg:pt-0 lg:mt-[-3%]">
      <div className='t40-container w-full'>
        <BlogHeader />
        <BlogPosts posts={posts} />
        <BlogNewsletter />
      </div>
    </main>
  )
}

export default Index
In the code above, your Next.js app fetches blog posts from your WordPress backend using GraphQL and displays them on the frontend. The GraphQL query is created to retrieve post details like the title, author, content, and featured image.
Using Next.js getStaticProps, the data is fetched at build time and passed as props to the component. The blog posts are rendered through custom components like BlogHeader, BlogPosts, and BlogNewsletter, making the page dynamic and efficient.
This demonstrates how WordPress can be used as a headless CMS for a Next.js application. Now that you have successfully integrated WordPress as a headless CMS in your Next.js application, you can continue fetching more data from the GraphQL API to enhance the functionality of your app.
Conclusion
By using WordPress as a headless CMS and Next.js for the frontend, we can build a fast, SEO-friendly blog while taking advantage of WordPress’s powerful content management features.
Using WPGraphQL allowed us to efficiently fetch only the data we needed, giving us more control and improving the site's performance.
I hope this was useful. Happy coding!