First Project - Reading a Joke
First Project - Reading a Joke 관련
In this project, you're going to interact with and deploy your smart contract on Vara Network, and receive a reply message back.
This is just a simple project, and nothing too complex. I chose this example project because it aligns with the analogy I gave earlier.
Currently, this project should be fine when running it on your Windows system. In case you get an error, scroll to the part of this article with a guide for setting up a Windows Subsystem for Linux (WSL), since it would allow you to run a Linux environment, including command-line tools and applications, directly on Windows, without the overhead of a traditional virtual machine or dual boot setup.
To get started, create a directory named freecodecamp-gear-protocol. Since you'll be building about fours projects, and I think it is important on how you can setup your projects for Gear Protocol.
So in your freecodecamp-gear-protocol directory, create a Cargo.toml file with the following code:
[workspace]
resolver = "2"
members = []

[workspace.package]
name = "freecodecamp-gear-protocol"
version = "0.1.0"
edition = "2021"
authors = ["Rocky Essel"]
license = "MIT"
publish = false

[workspace.dependencies]
# Internal Crates
# External Crates
For someone new to Rust or used to creating single projects, I'll guide you through understanding and setting up a workspace in Rust, making it easy to grasp.
Understanding Your Workspace
A workspace in Rust is a set of packages (crates) that are managed together. Let's break down the key sections: [workspace], members, [workspace.package], and [workspace.dependencies]. So think of this like a cabin for your shoes, where each pair of shoes is a crate (package) that you want to keep organized.
[workspace] Section
The [workspace] section defines the overall workspace. It typically contains multiple members.
resolver = "2": Specifies the version of Cargo's feature resolver to use, improving how dependencies are managed across the workspace.members: Lists the crates that are part of the workspace. When you add a project withcargo new --lib sneakersorboots, thememberssection of theCargo.tomlis populated with the name of the project you created.
If not added automatically, you can add them yourself.
For example:
members = ["sneakers", "boots"]
[workspace.package] Section
This section provides metadata for the entire workspace as if it were a single package.
name: The name of the workspace package.version: The version of the workspace package.edition: The Rust edition being used (e.g., "2021").authors: List of authors.license: The license for the workspace package.publish: Indicates whether the workspace package should be published to crates.io.
Example:
[workspace.package]
name = "my-shoe-collection"
version = "0.1.0"
edition = "2021"
authors = ["Your Name"]
license = "MIT"
publish = false
[workspace.dependencies] Section
Lists dependencies that apply to the entire workspace. Meaning that every crate whether external or internal added to the [workspace.dependencies] is accessible to every project you create under project workspace. So below is how both external and internal crate are made accessible to other project.
Note
For internal crate, you need to add them yourself.
Add internal crates like this:
sneakers = { path = "sneakers" }
boots = { path = "boots" }
Add external crates like this:
polish = "1.0"
Example Cargo.toml
Here's an example combining these sections:
[workspace]
resolver = "2"
members = ["sneakers", "boots"]

[workspace.package]
name = "my-shoe-collection"
version = "0.1.0"
edition = "2021"
authors = ["Your Name"]
license = "MIT"
publish = false

[workspace.dependencies]
# Internal crate
sneakers = { path = "sneakers" }
boots = { path = "boots" }

# External crate
polish = "1.0"
So, here's how you set up a workspace for your project to manage multiple crates (sub-projects) and share dependencies and configuration settings across them. I spent quite some time understanding this, so I thought I'd share it with you all to make it easier.
To build your first smart contract, run the command below in your parent directory (freecodecamp-gear-protocol) on your terminal.
cargo new --lib receive-joke
#
# .freecodecamp-gear-protocol
# ├── Cargo.toml
# └── receive-joke
#     ├── Cargo.toml
#     └── src
#         └── lib.rs
#
# 2 directories, 3 files
Head over to your freecodecamp-gear-protocol/receive-joke/Cargo.toml, and this is how you access crates, and configuration from the workspace directory(main) using .workspace=true, like below;
[package]
name ="receive-joke"
version.workspace = true
edition.workspace = true
authors.workspace = true
license.workspace = true
publish.workspace = true

# See more keys and their definitions at https://doc.rust-lang.org/cargo/reference/manifest.html

[dependencies]
Next, create a build file in your receive-joke directory with path like receive-joke/build.rs, and paste the code below. Now, the build.rs helps you to build your project into .wasm file, that is used to deploy your smart contract.
fn main() {
    gear_wasm_builder::build();
}
Currently, you have't install the nesscessary crate to help create your smart contract. Therefore, add the following crate to your workspace dependency.
[workspace]
resolver = "2"
members = ["receive-joke"]


[workspace.package]
name = "freecodecamp-gear-protocol"
version = "0.1.0"
edition = "2021"
authors = ["Rocky Essel"]
license = "MIT"
publish = false

[workspace.dependencies]
# Internal Crates

# External Crates
gstd = "1.4.1"
gmeta = "1.4.1"
gtest  = "1.4.1"
gear-wasm-builder = "1.4.1"
parity-scale-codec = { version = "3.6.12", default-features = false }
scale-info = { version = "2.11.3", default-features = false }
For your first project, only gstd would be used, so like add that external crate to your receive-joke's Cargo.toml. Like below:
[dependencies]
gstd.workspace = true


[build-dependencies]
gear-wasm-builder.workspace = true
If you reached here without any errors, well done my friend. Next, is to clear any code in freecodecamp-gear-protocol/receive-joke/src/lib.rs. Let's move on to the next step.
In Gear Protocol, there are entry points. An entry point serves as a gateway or door to your code. Gear has a few entry points, namely:
state(),
handle(),
handle_reply(),
init(),
handle_signal(),
Each entry point plays a significant role. For example, init() is called when the smart contract(.wasm) is deployed, allowing you to set certain conditions or variables or even other functions that need to be executed for smooth sailing of your smart contract or program.
However, it's optional, meaning that you can choose to include or exclude it depending on your project, but it still gets executed, and it is the first message you'll see once you deploy your smart contract.
The handle() method is crucial as it contains most of the business logic. It's mandatory to include your program. More light will be shared on the entry points as you move forward.
Now, paste the following code into your receive-joke/src/lib.rs:
#![no_std]

use gstd::msg;

#[no_mangle]
extern "C" fn handle() {
    // Send a reply(in HTTP GET Request, you'd use "response").
    msg::reply_bytes(
        "What did the dirt say to the rain? If you keep this up, my name will be mud!",
        0,
    )
    .expect("Unable to reply");
}
The code above defines a function handle that, when called, sends a message you've defined as a response using the gstd::msg functionality. This gstd is a crate provided by Gear Protocol**,** to send and receive messages, and this is crucial for programs running on Vara Network to communicate with each other and external systems. And the reply_bytes send a new message as a reply to the message that is currently being processed.
Time to deploy and send your first message and recieve your joke reply. In your terminal, run the following command to build your program into .wasm.
Usually, I use cargo check for check for errors first, before using the build command below, either way is fine.
cargo build --release
#
# .freecodecamp-gear-protocol
# ├── Cargo.lock
# ├── Cargo.toml
# ├── receive-joke
# │   └── ...
# └── target
#     ├── ...
#     └── wasm32-unknown-unknown
#         ├── ...
#         └── release
#             ├── receive_joke.opt.wasm <--- Optimized for deployment.
#             └── receive_joke.wasm
After the build is completed, follow the structure below to locate your .wasm file in the path below:
How to Deploy Your Smart Contract
Just like in other blockchain tools, that help you deploy your smart contract from the terminal, IDEA is where you deploy your smart contract and interact with it. We'll be exploring the interface in a bit. So finally, head over to IDEA so start familiarizing yourself with your deployment environment.
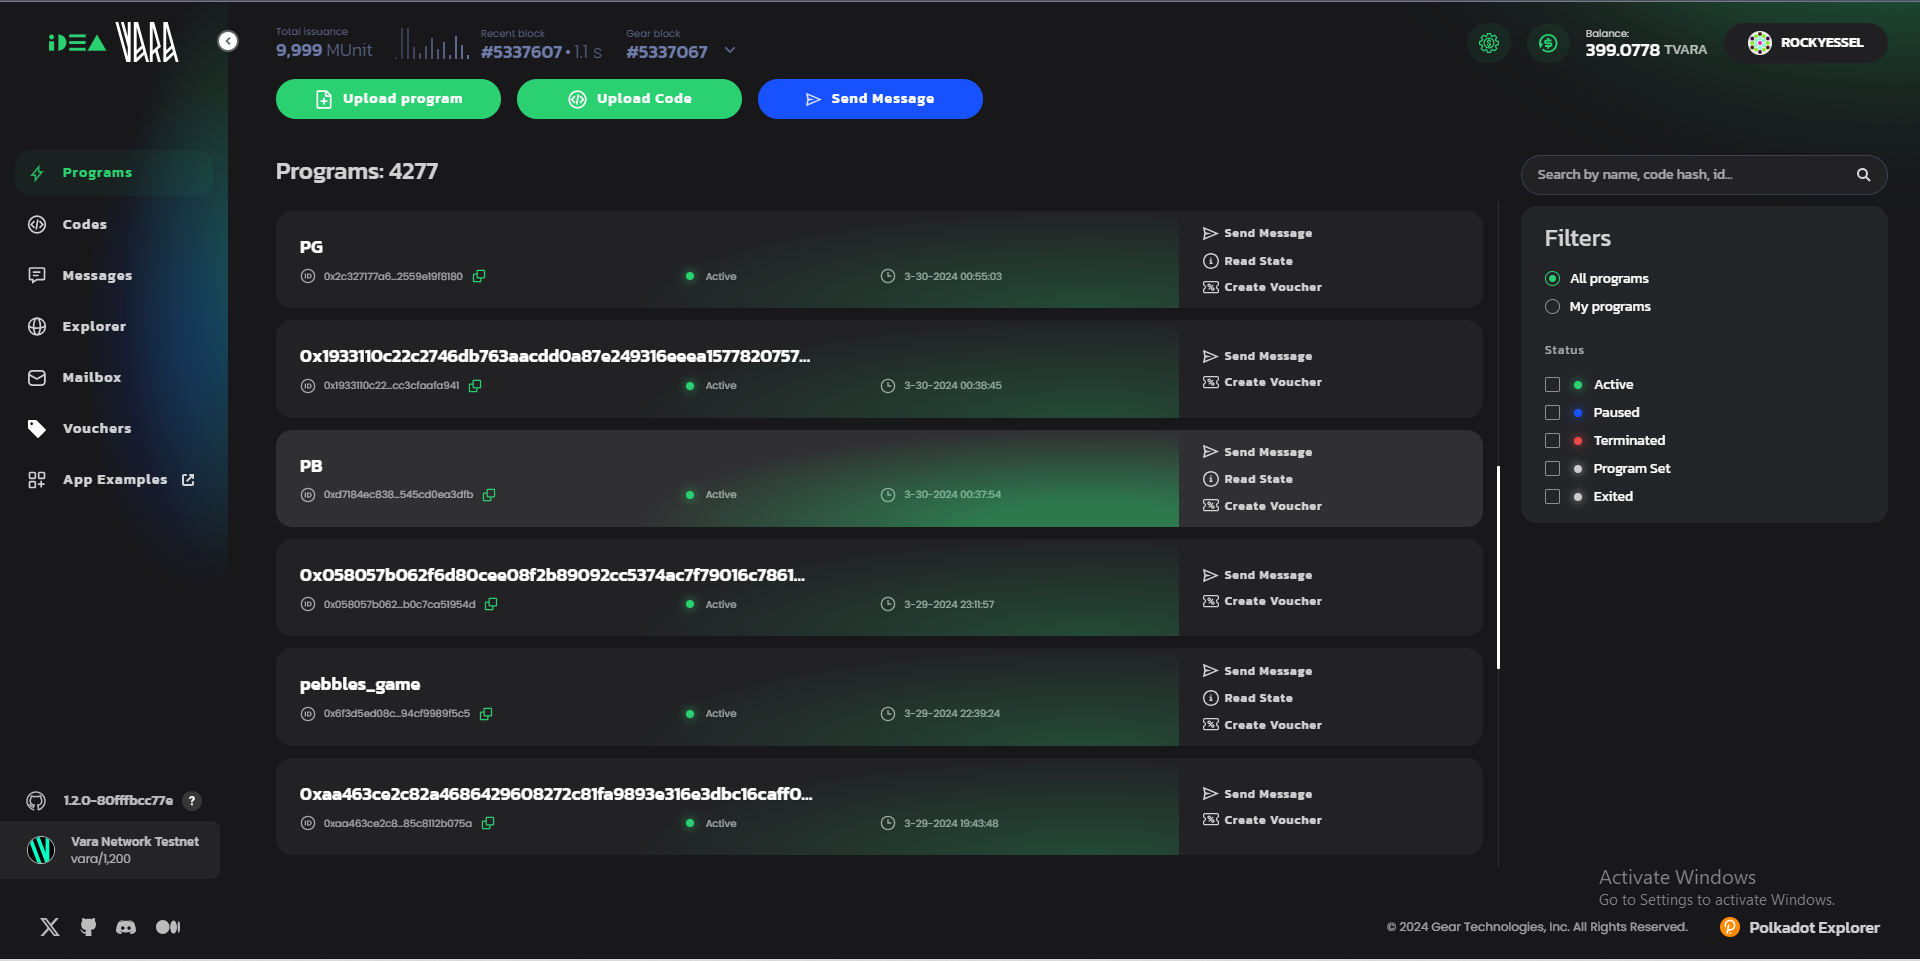
Step one, click on Upload program, then select or drag your .opt.wasm inside the modal. This takes you to the upload page, where you can change names, enter values for the payload, or change the payload type. For now, let's leave everything as it is, and click on the Calculate, which will enter a 0.00015 gas fee value for uploading your program.
::: Note
You can either set the gas limit yourself, or click on Calculate to allow the program to generate one for you.
:::
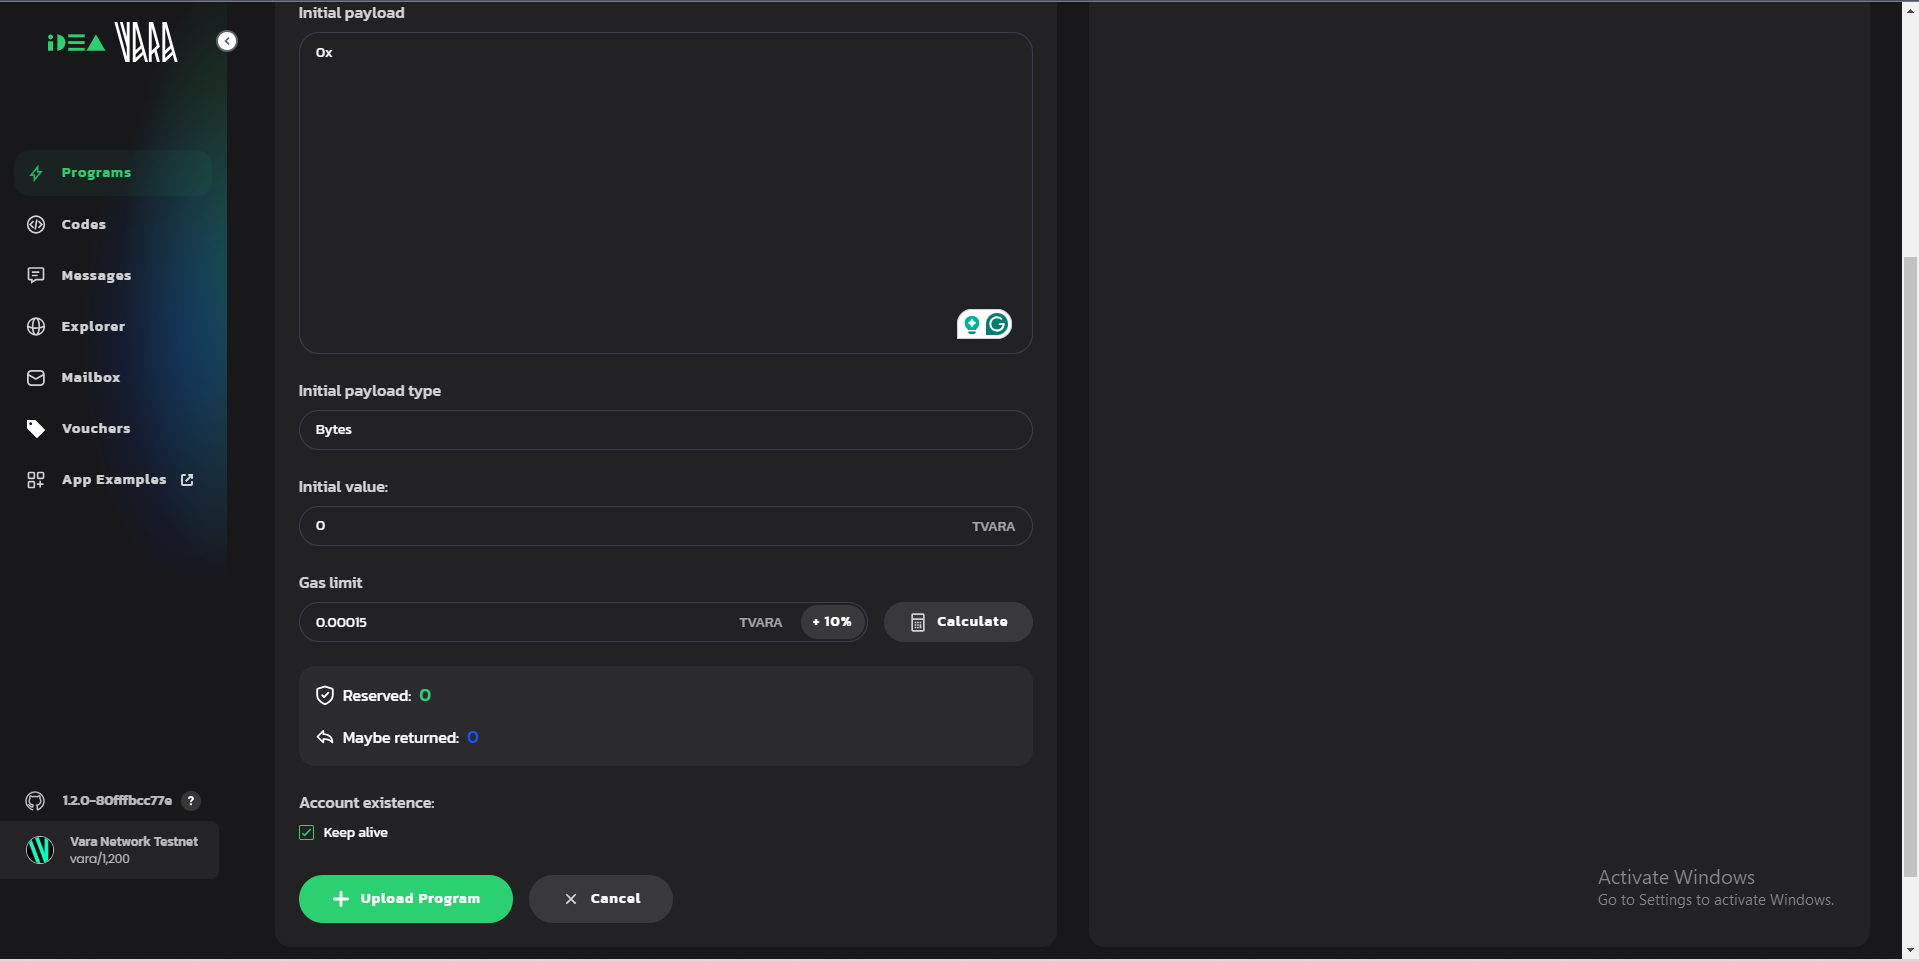
At this point, click on the Upload Program, and click on the Submit button.
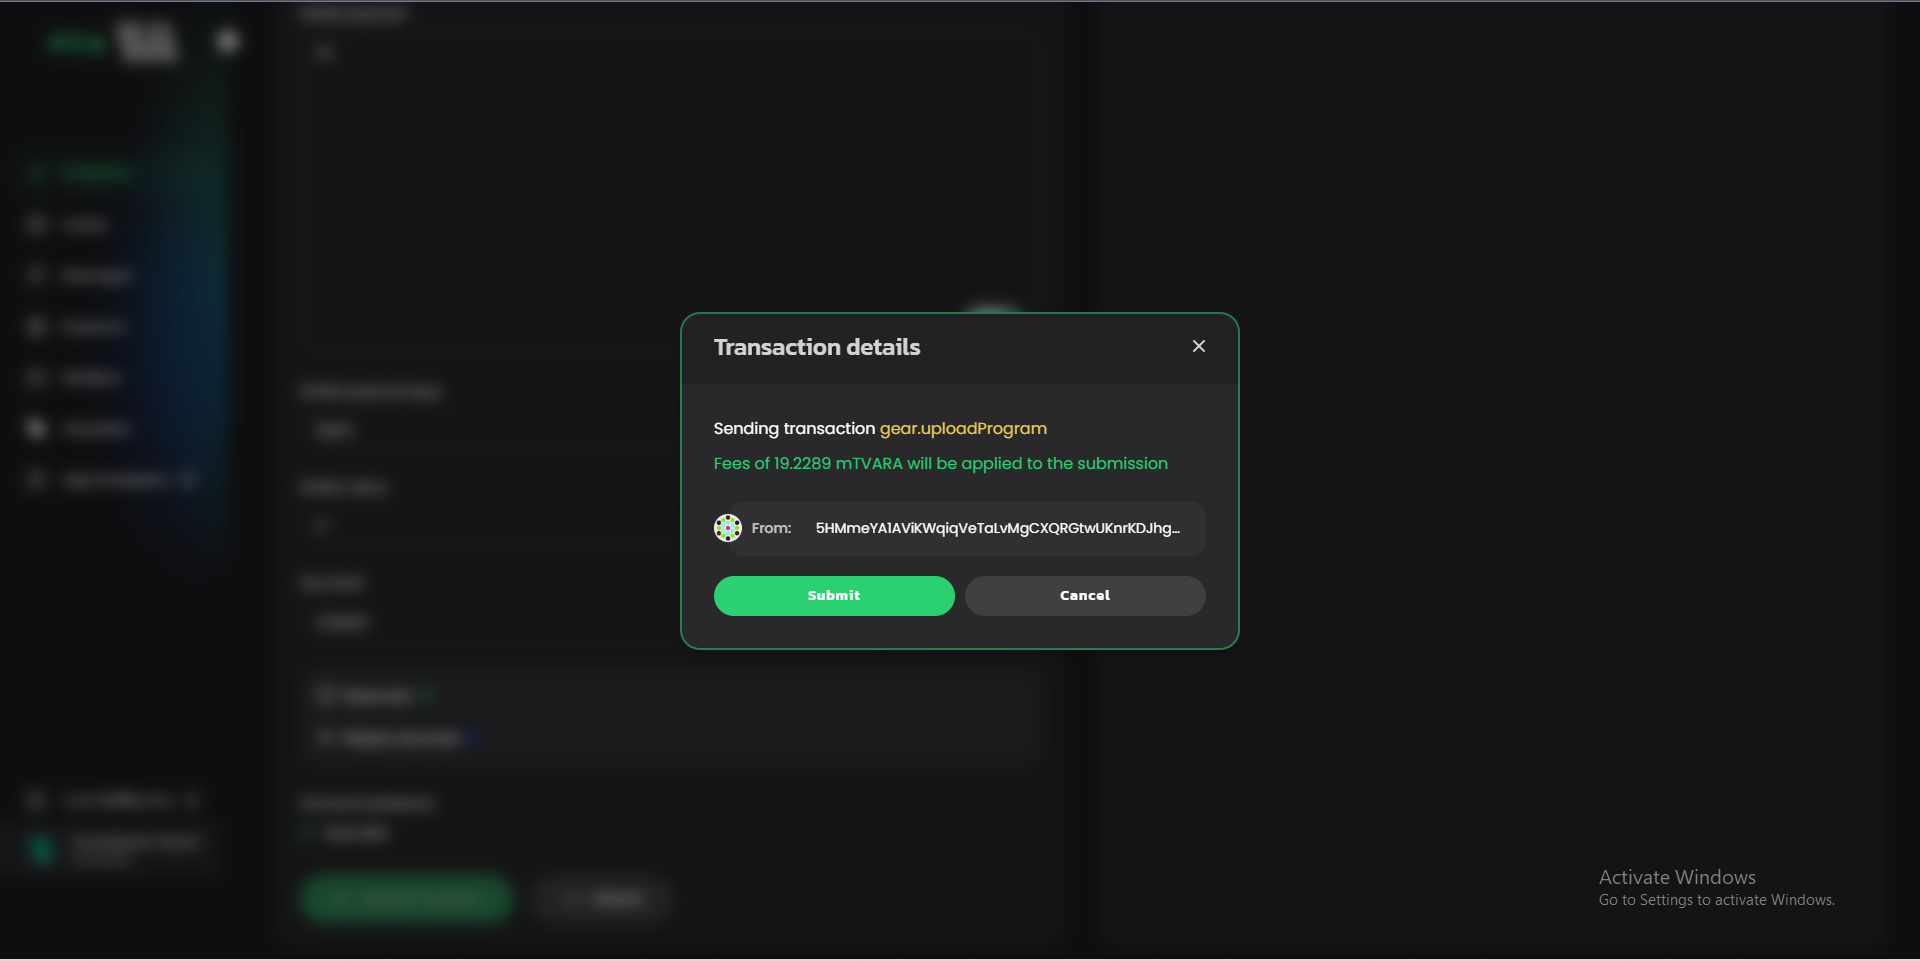
When you submit, you'll be prompted you sign into a your wallet, and approve.

After the approval, a toast message should be displayed at the right-hand corner your computer/laptop screen for you to see the status of your program, whether it failed or succeeded.
Assuming it's a success, click on the Programs on the sidebar, then BOOM!, there's your program. Click on it, and let's explore.
Upon deploying, the first thing you see is the program ID, but after a few seconds, the name of your program would be shown.
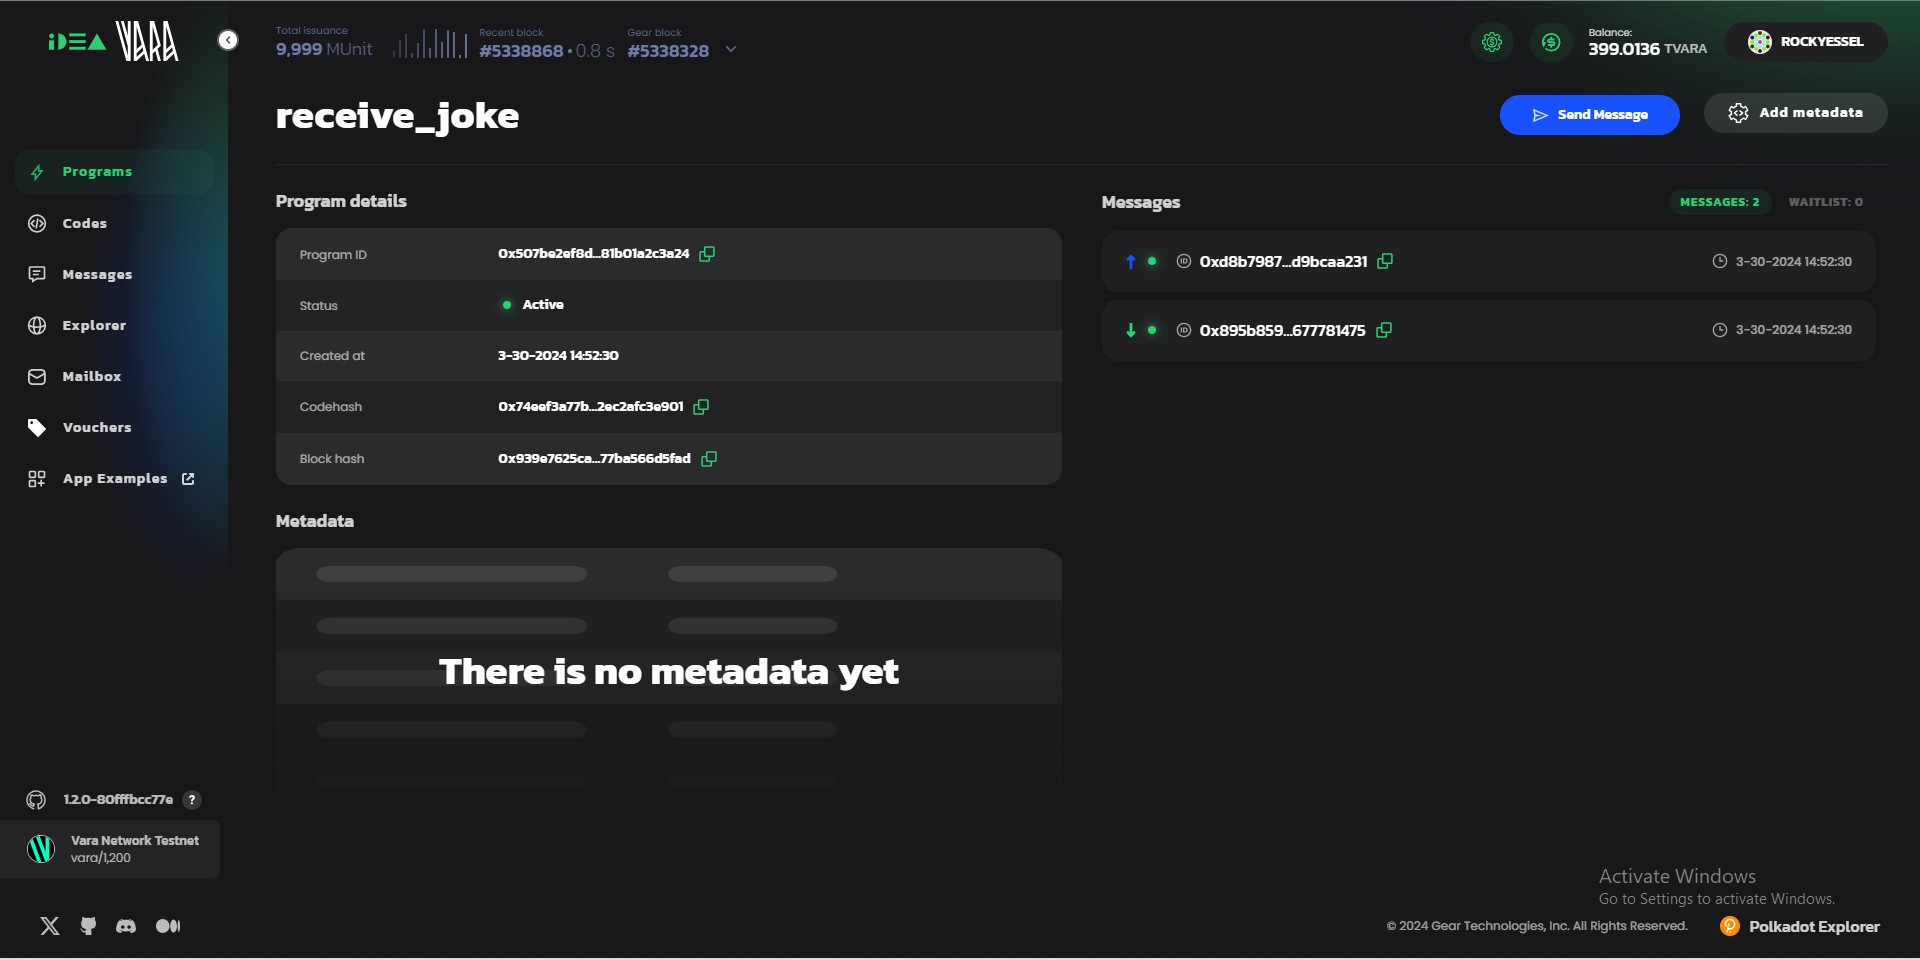
Earlier, I said that when you deploy a program, the init() function is executed regardless of whether you defined it in your project or not, and that's what you see in the Messages section. Below is a simple illustration for you to familiarize and understand the information about your program.

Now, it's time to send a message to your program and receive a reply back, which is our joke. Remember, you're not inputting any values, you're just performing a simple action to receive a reply from the program. So click on Calculate and press the Send Message (that's the action or interaction) button.
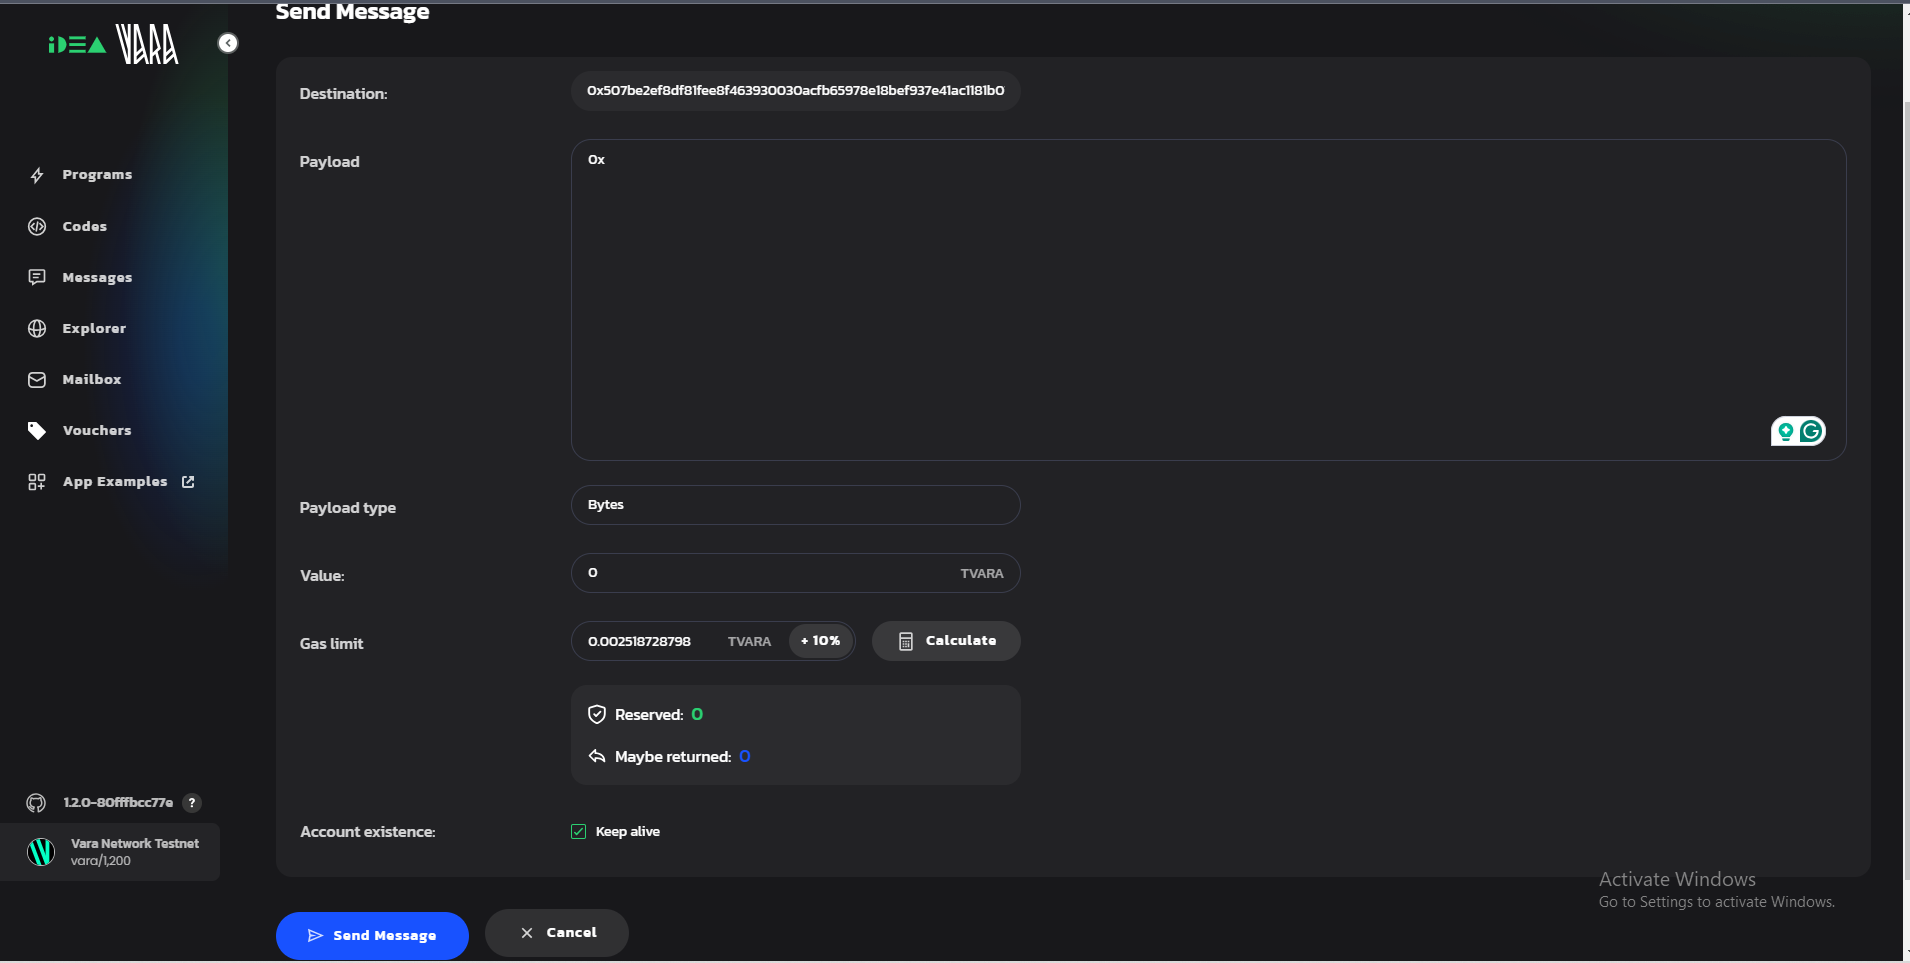
After the message has been sent, a success toast will popup. Then head back to your program by clicking on the Cancel button, and you'll see two additional messages.
Remember, the blue color with the arrow represent the message you sent, and the green represents the reply you've received. So click on the replied message to see the joke, which says: What did the dirt say to the rain? If you keep this up, my name will be mud!.

Now, you're finally done with this project. In the next project, you'll be sending data or information to your program, and having it return a reply with your entered value attached to it. Here is the program deployed on the Vara Network.
Important Information
Though I've provided some context to the picture above, I want to expand on it. Both the Source and Destination takes an address that can be either a user (actor) and a program (actor), or even a message object.