How to Create a Minimal API
How to Create a Minimal API 관련
Creating a minimal API is straightforward when using the dotnet CLI, as the default template is already a minimal API. But if you use Visual Studio, you'll need to remove the boilerplate code that comes with the project template.
Let's start by using the dotnet CLI to create a minimal API project.
dotnet new webapi -n BookStoreApi
The dotnet new webapi command creates a new minimal API project named BookStoreApi. This project contains the necessary files and folders to get you started.

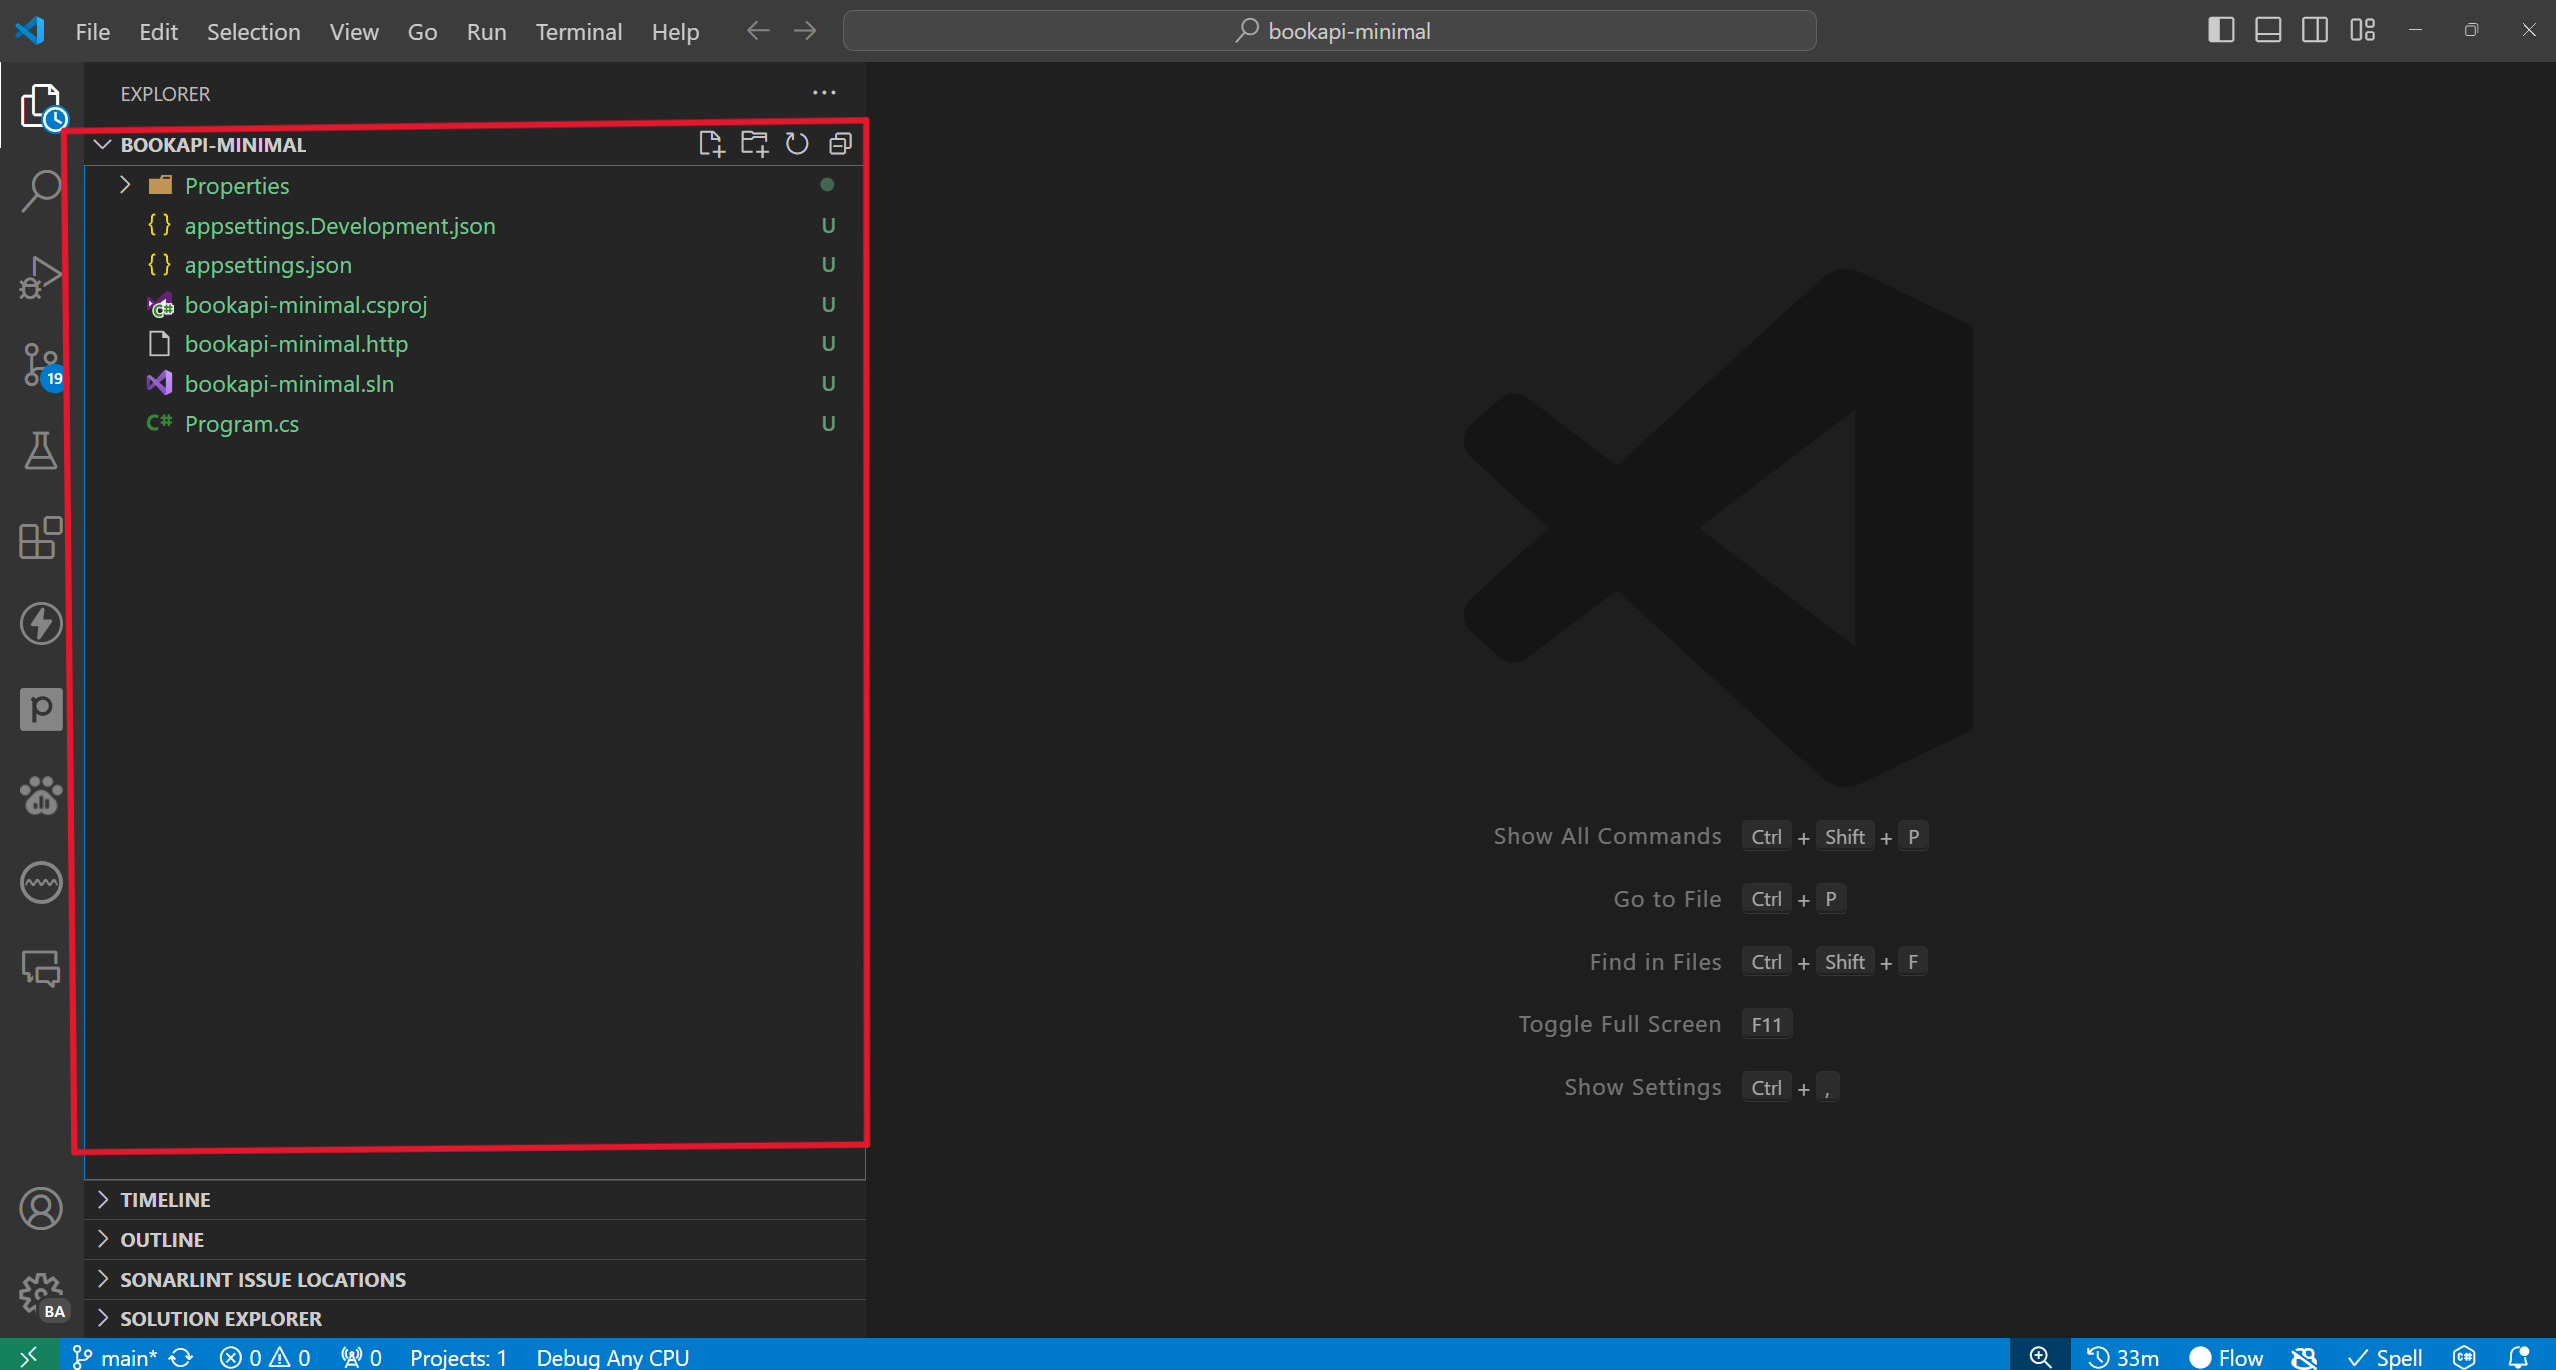
Let's explore the project structure:
Program.cs: The entry point of the application, where the host is configured.bookapi-minimal.sln: The solution file that contains the project.bookapi-minimal.http: A file that contains sample HTTP requests to test the API.bookapi-minimal.csproj: The project file that contains the project configuration.appsettings.json: The configuration file that stores application settings.appsettings.Development.json: The configuration file for the development environment.
When you open the program.cs file, you'll notice that the code is minimal. The Program.cs file contains the following code:
var builder = WebApplication.CreateBuilder(args);

// Add services to the container.
// Learn more about configuring Swagger/OpenAPI at https://aka.ms/aspnetcore/swashbuckle
builder.Services.AddEndpointsApiExplorer();
builder.Services.AddSwaggerGen();

var app = builder.Build();

// Configure the HTTP request pipeline.
if (app.Environment.IsDevelopment())
{
    app.UseSwagger();
    app.UseSwaggerUI();
}

app.UseHttpsRedirection();

var summaries = new[]
{
    "Freezing", "Bracing", "Chilly", "Cool", "Mild", "Warm", "Balmy", "Hot", "Sweltering", "Scorching"
};

app.MapGet("/weatherforecast", () =>
{
    var forecast =  Enumerable.Range(1, 5).Select(index =>
        new WeatherForecast
        (
            DateOnly.FromDateTime(DateTime.Now.AddDays(index)),
            Random.Shared.Next(-20, 55),
            summaries[Random.Shared.Next(summaries.Length)]
        ))
        .ToArray();
    return forecast;
})
.WithName("GetWeatherForecast")
.WithOpenApi();

app.Run();

record WeatherForecast(DateOnly Date, int TemperatureC, string? Summary)
{
    public int TemperatureF => 32 + (int)(TemperatureC / 0.5556);
}
If you don't fully understand the code yet, don't worry—we'll cover it in detail in the upcoming sections. The key takeaway is that minimal APIs require very little code, which is one of their main advantages.
The default code sets up a simple weather forecast API that you can use to test your setup. It generates a list of weather forecasts and returns them when you make a GET request to the /weatherforecast endpoint. Also, the code includes Swagger UI to help you test the API.
Pay special attention to the app.MapGet method, which maps a route to a handler function. In this case, it maps the /weatherforecast route to a function that returns a list of weather forecasts. We'll use similar methods to create our own endpoints in the next sections.
Before we start creating our project folder structure, let's understand the HTTP methods in both Controller-based and Minimal APIs.